In the previous blog post, we demonstrated how to install, test, and run the Node.js code locally.
In this blog post, we will discuss how to:
- Configure your SignalWire phone number
- Configure Voice settings
- Configure Messaging settings
- Create and receive voice calls to and from the PSTN
- Create and receive voice calls to and from different browsers
- Create and receive video calls to and from different browsers
Requirements:
- A SignalWire account (signup for free here).
- A Node.js host (You can host this yourself for development purposes but you will likely want something more robust than ngrok when you push to production)
You can read part 1, where we discuss the benefits of advanced communications systems, here.
You can read part 2, where we demonstrate installation, here.
System Configuration
Now that we have established the code, we have to link the application we have created to one of our SignalWire phone numbers.
Let’s return to the dashboard under the Phone Numbers menu and select which phone number to configure this application to:

Connecting Voice
Once you have both of the sessions running, ./ngrok http 3000 and node index.js, as discussed in the previous article, edit the settings to configure your SignalWire phone number to work with your application.
Using the same Forwarding URL we generated in the previous article, edit the Voice and Fax Settings section of the selected SignalWire phone number to look like this:

Now, when you make a call to the SignalWire phone number you selected, you will hear the menu options we discussed earlier:
“Hello and welcome to SignalWire. If you’re a customer in need of some assistance, press 1, or say help. If you have been invited to a conference, press 2, or say conference. If you know your party’s extension, you may dial it at anytime.”
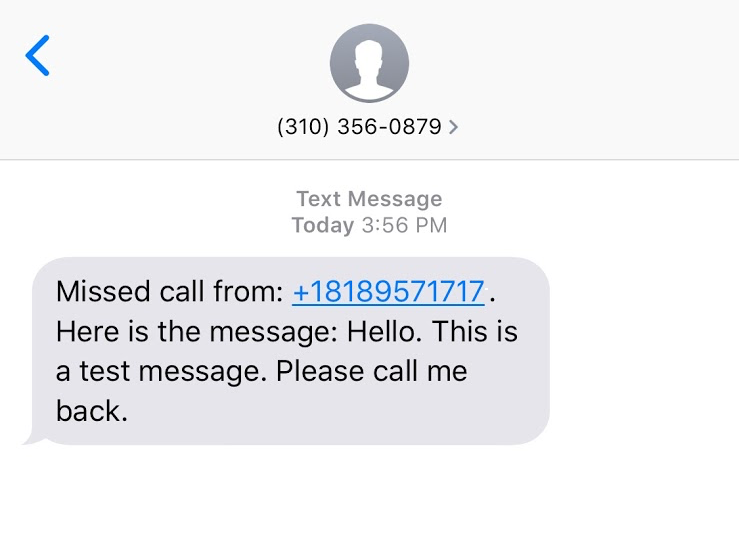
If the call leads to voicemail, you can leave a message. When the message has been processed and a transcription has been created, an SMS message from your SignalWire phone number will be sent as follows:
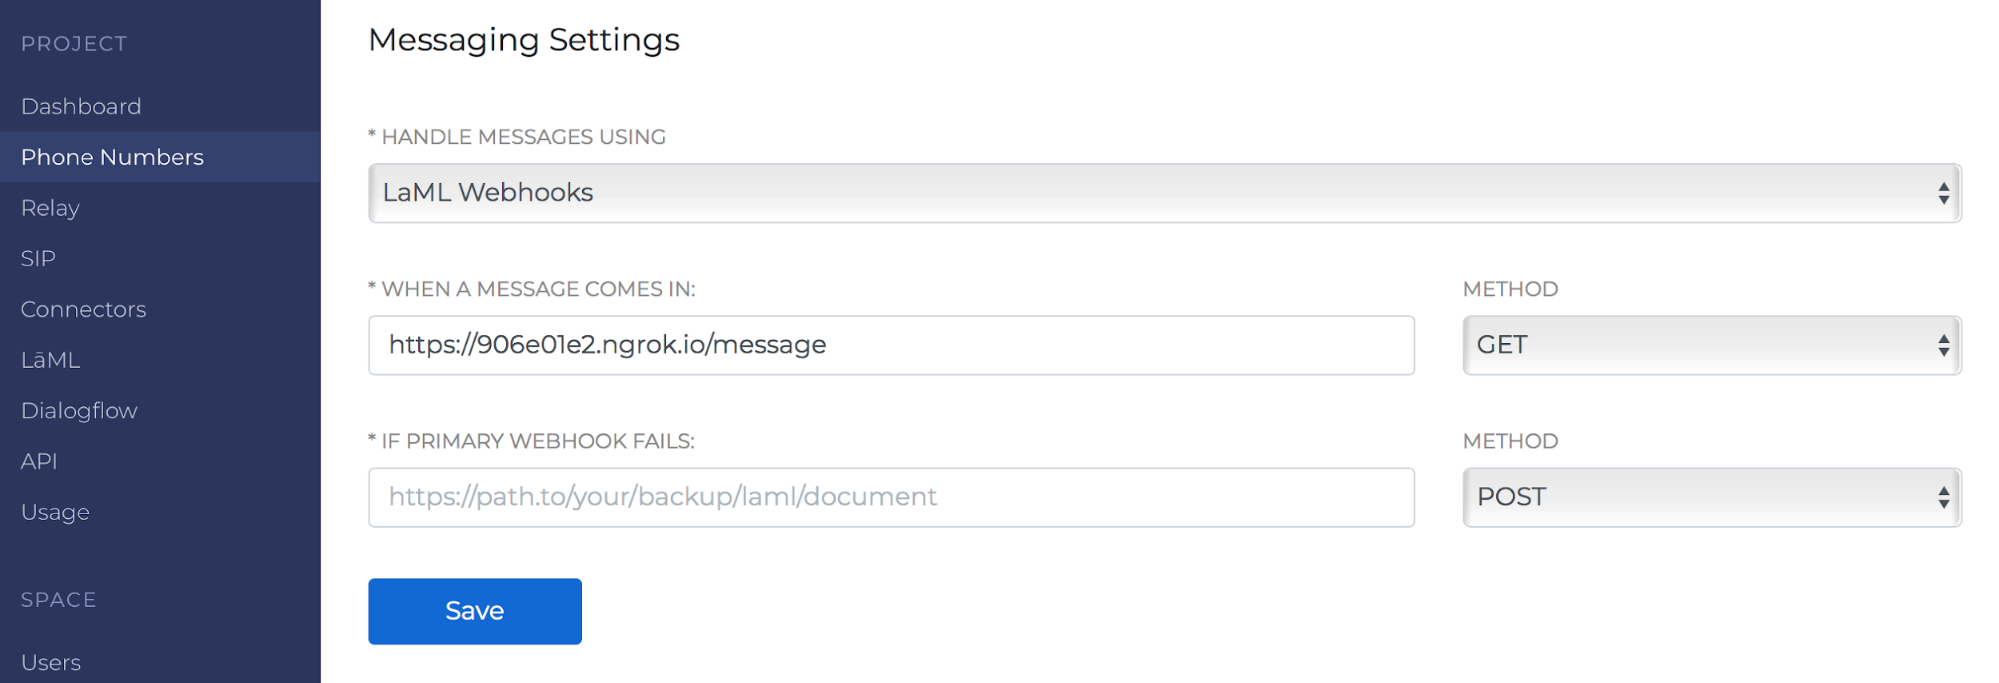
Connecting Messaging
Using the same Forwarding URL from above, edit the Messaging Settings section of your SignalWire phone number to look like this, and click Save:
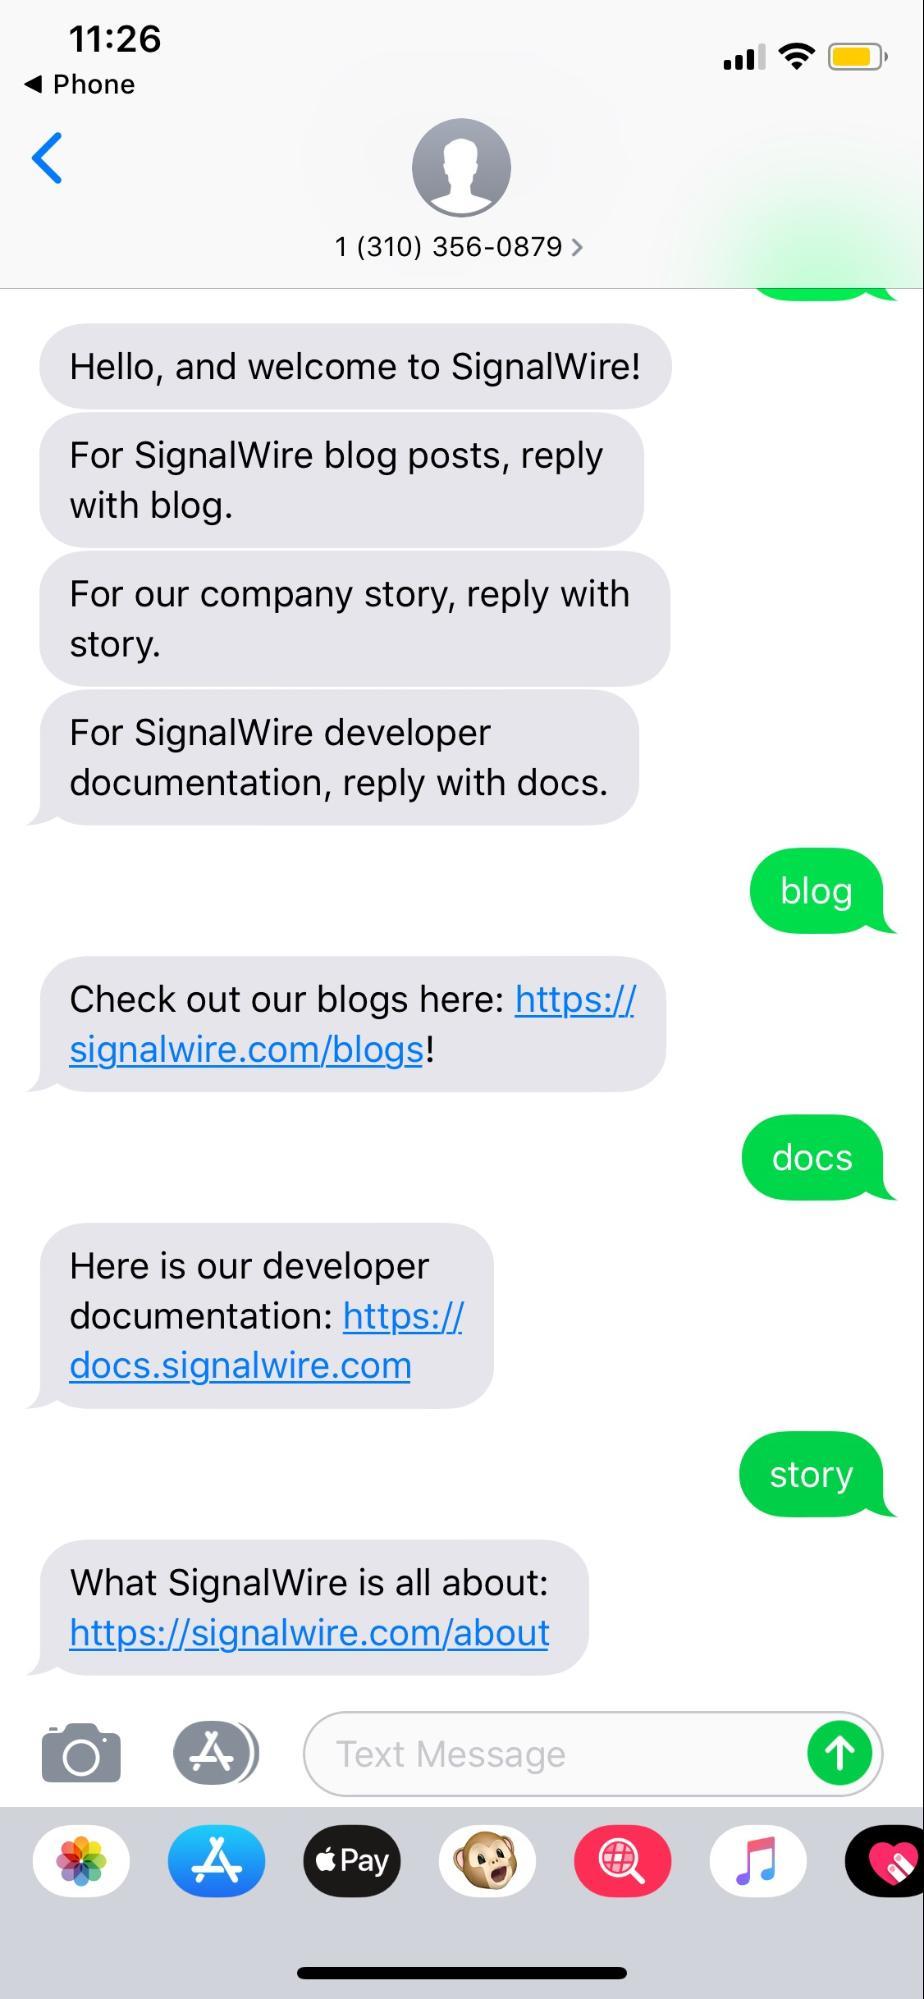
Now, when you send a message to the selected SignalWire phone number, it will result in a response similar to this:
Creating and Receiving Voice and Video Calls From a Web Browser
Our new RELAY for Web Browser library enables voice and video calls between endpoints on the SignalWire network and the PSTN (Public Switched Telephone Network). To test this out, we can use our in-built demo application.
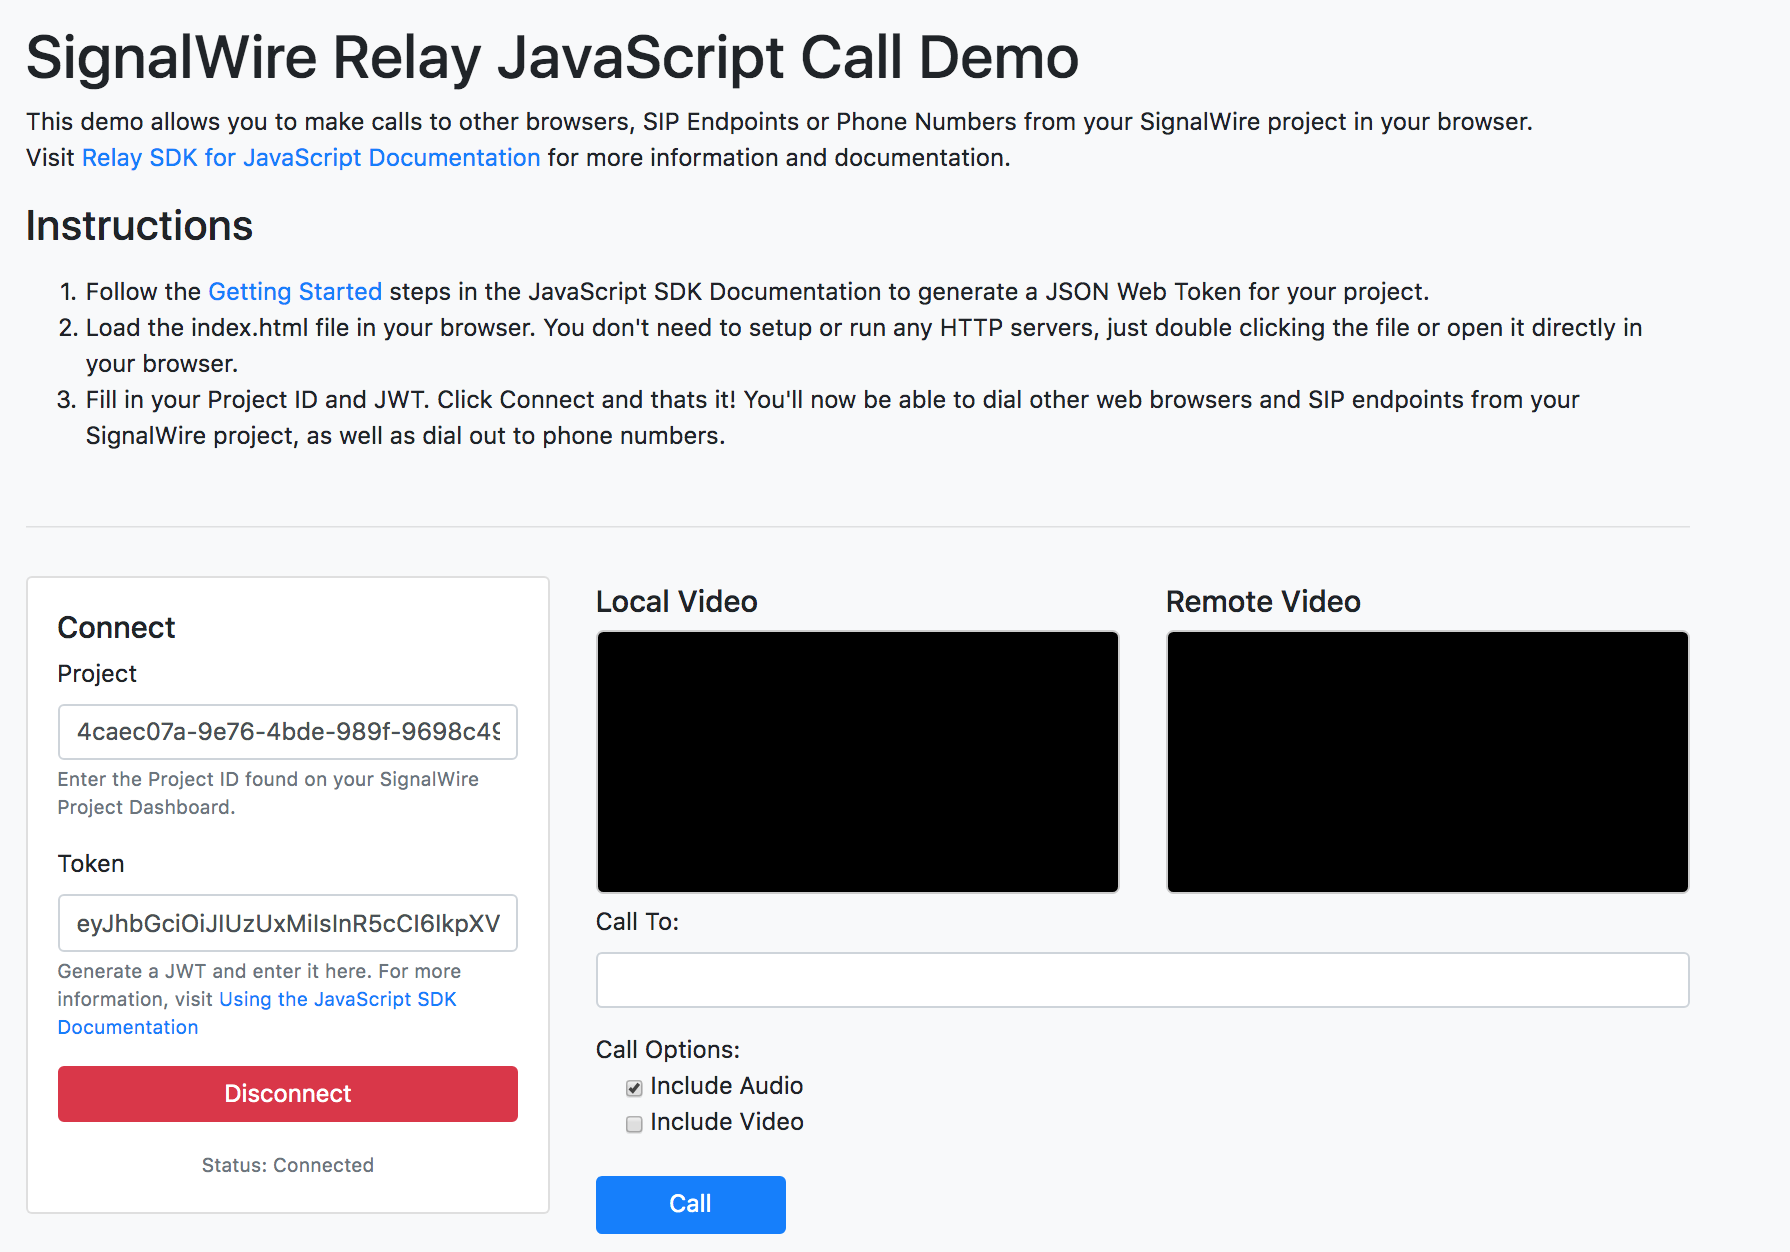
Our SignalWire Call Demonstration can be found here.
To get started, we need a JSON Web Token (JWT). To learn more about generating and using JWT and what options are available to you, see our Authentication for JavaScript SDK Documentation.
Once you have generated a JWT, copy and paste it into the demo application under Token. Then, navigate to your SignalWire Dashboard, grab your unique Project ID, and paste it in the demo under Project. After you have entered both values, connect the client by clicking Connect.
Outbound Voice Calls to PSTN
To create a call to the PSTN, change the Call Options to include audio, enter the number to call under Call To, and click Call:
You should receive a phone call on that device!
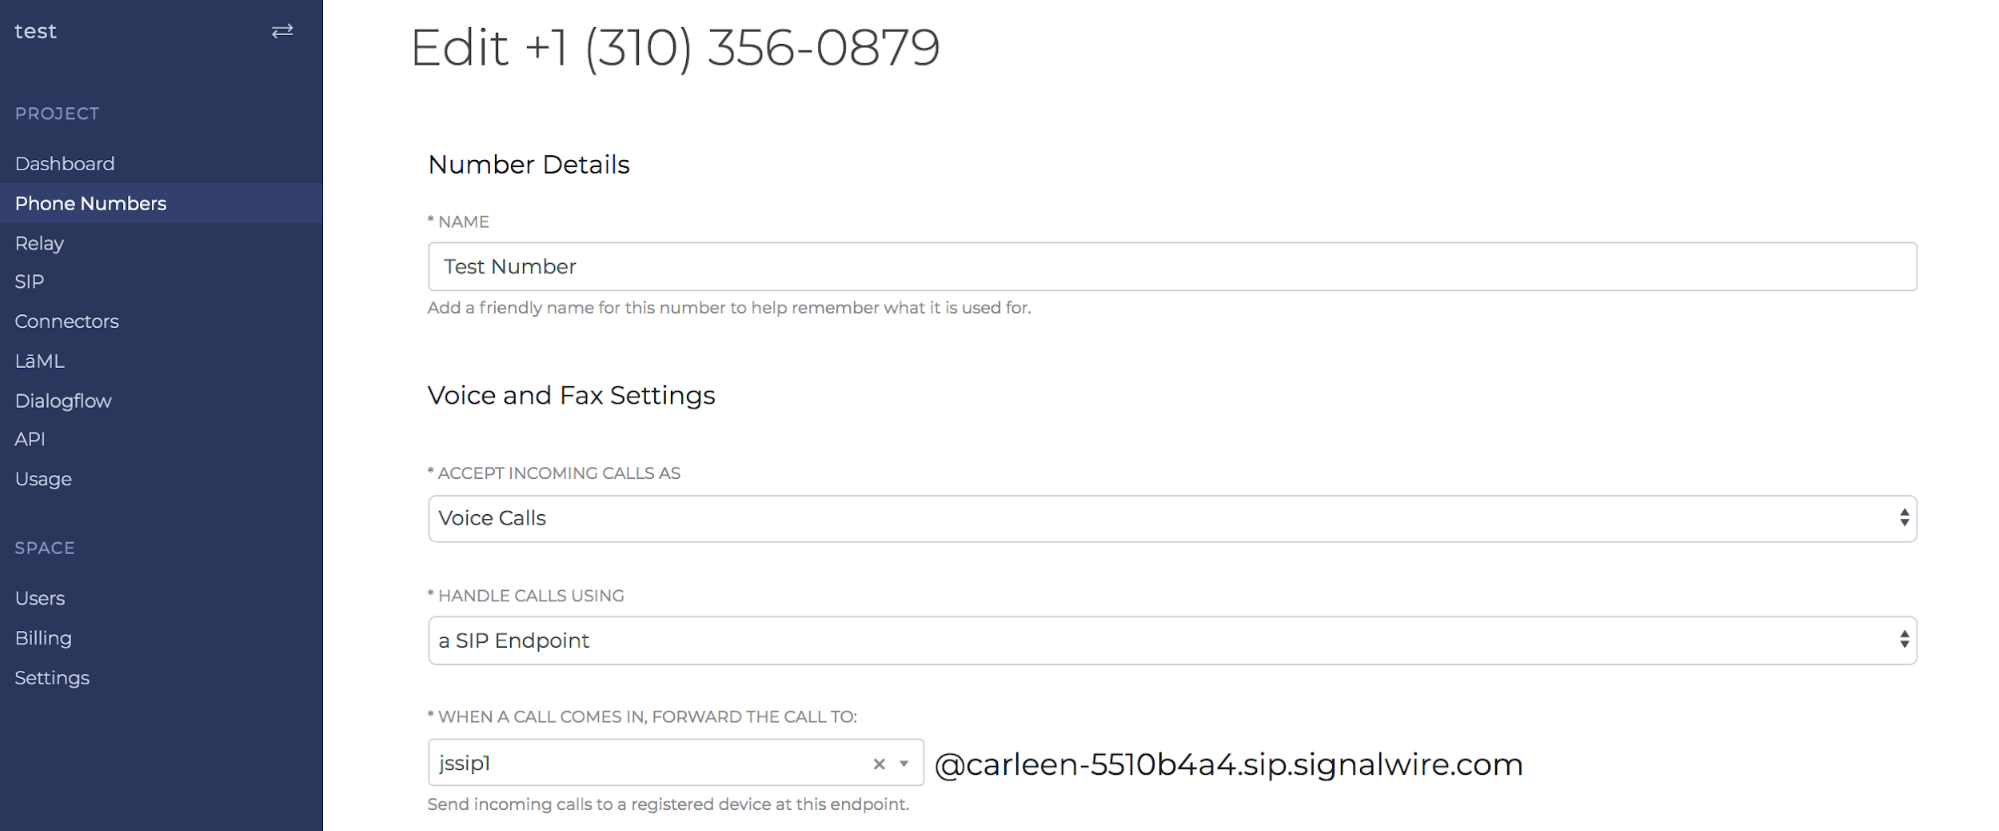
Inbound Voice Calls from PSTN
We can now handle any incoming voice calls using a WebRTC / Verto endpoint. Simply navigate to your SignalWire dashboard and edit the settings of your SignalWire phone number to look something like this:
Now, when a call comes in to that number, you should see a notification to pick up the call:
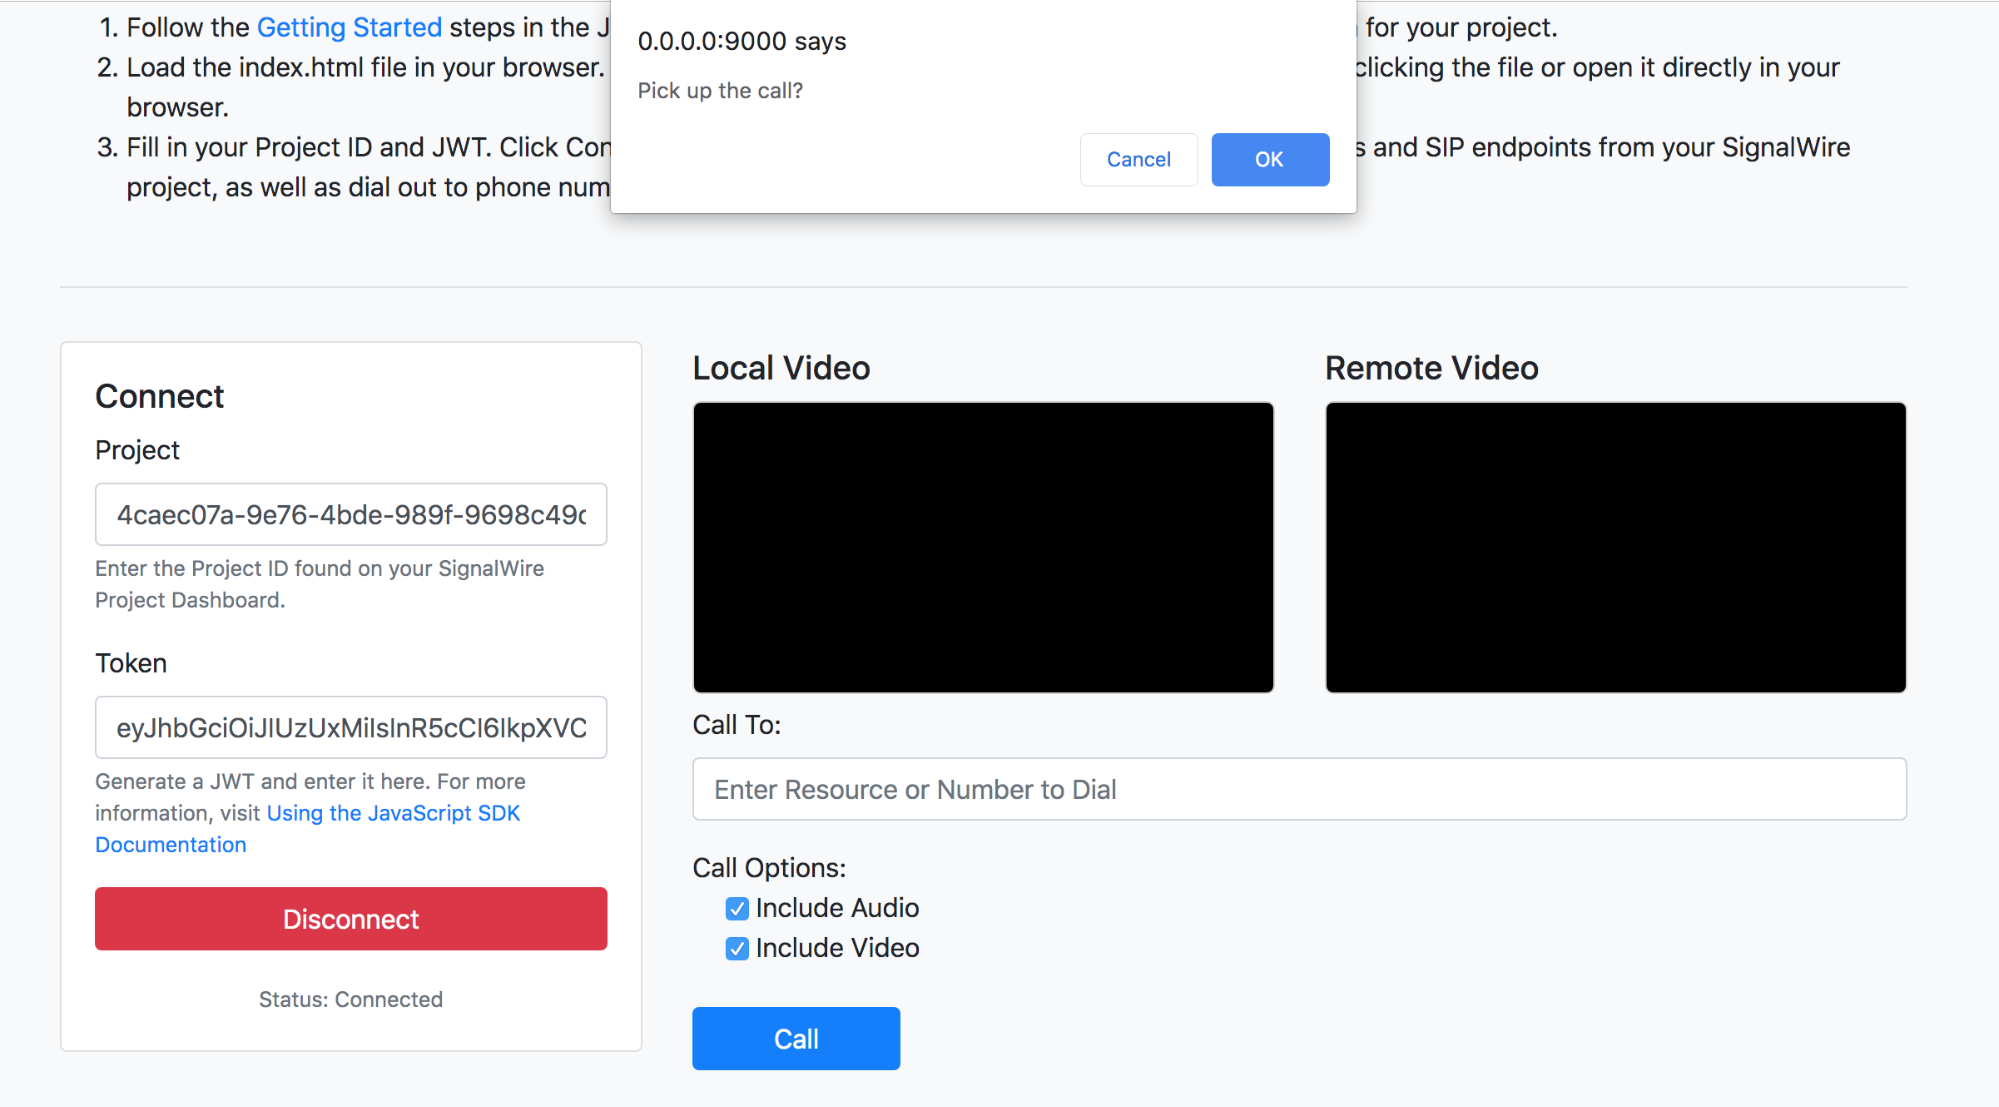
After you click OK the voice call will begin.
Voice Calls Between Browsers
Another option is to make a call to another browser. To test, simply open the demo application in another browser and enter in the connection details. Now, in the original window, enter the client to call. In that second browser window, a notification to pick up the call will appear. Once the call has been accepted, the voice call between browsers will begin.
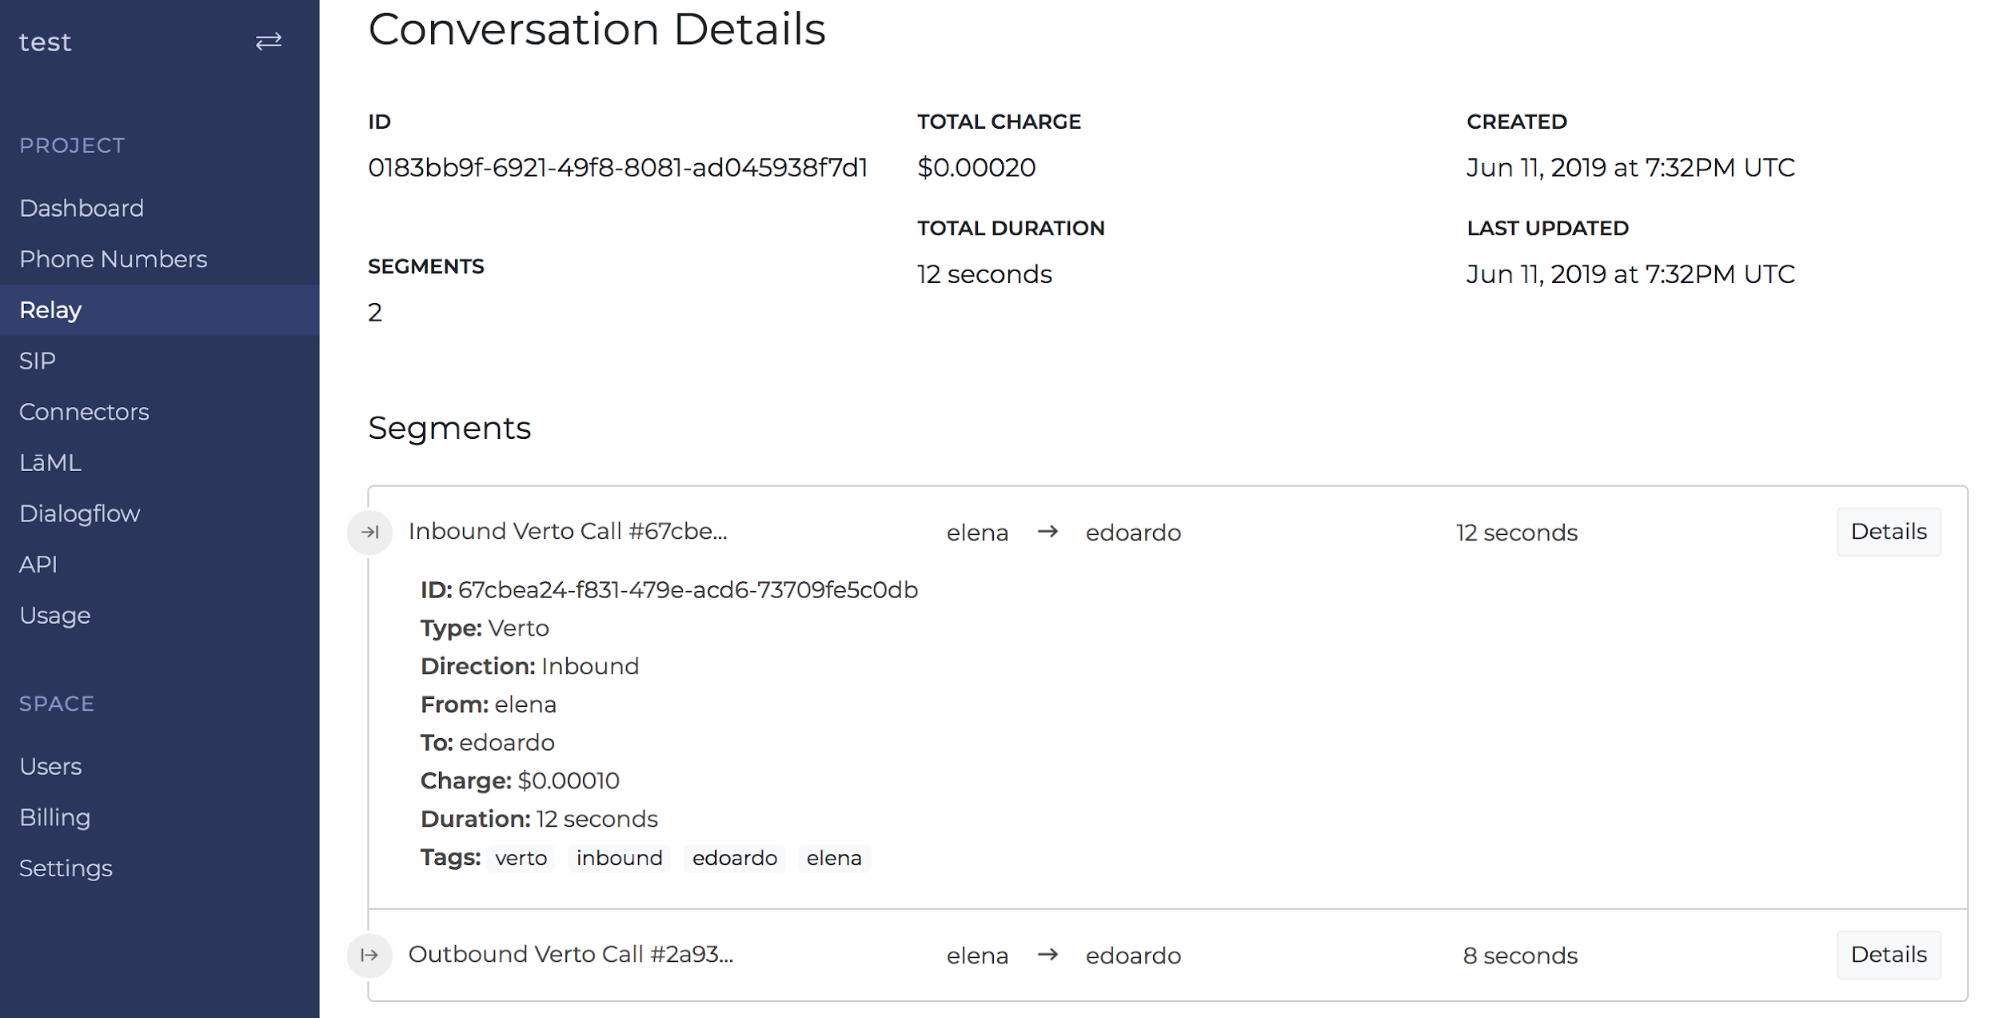
For more information on these calls, navigate to your SignalWire dashboard, go to the Relay menu, and select a conversation. Now you can see details on call segments:
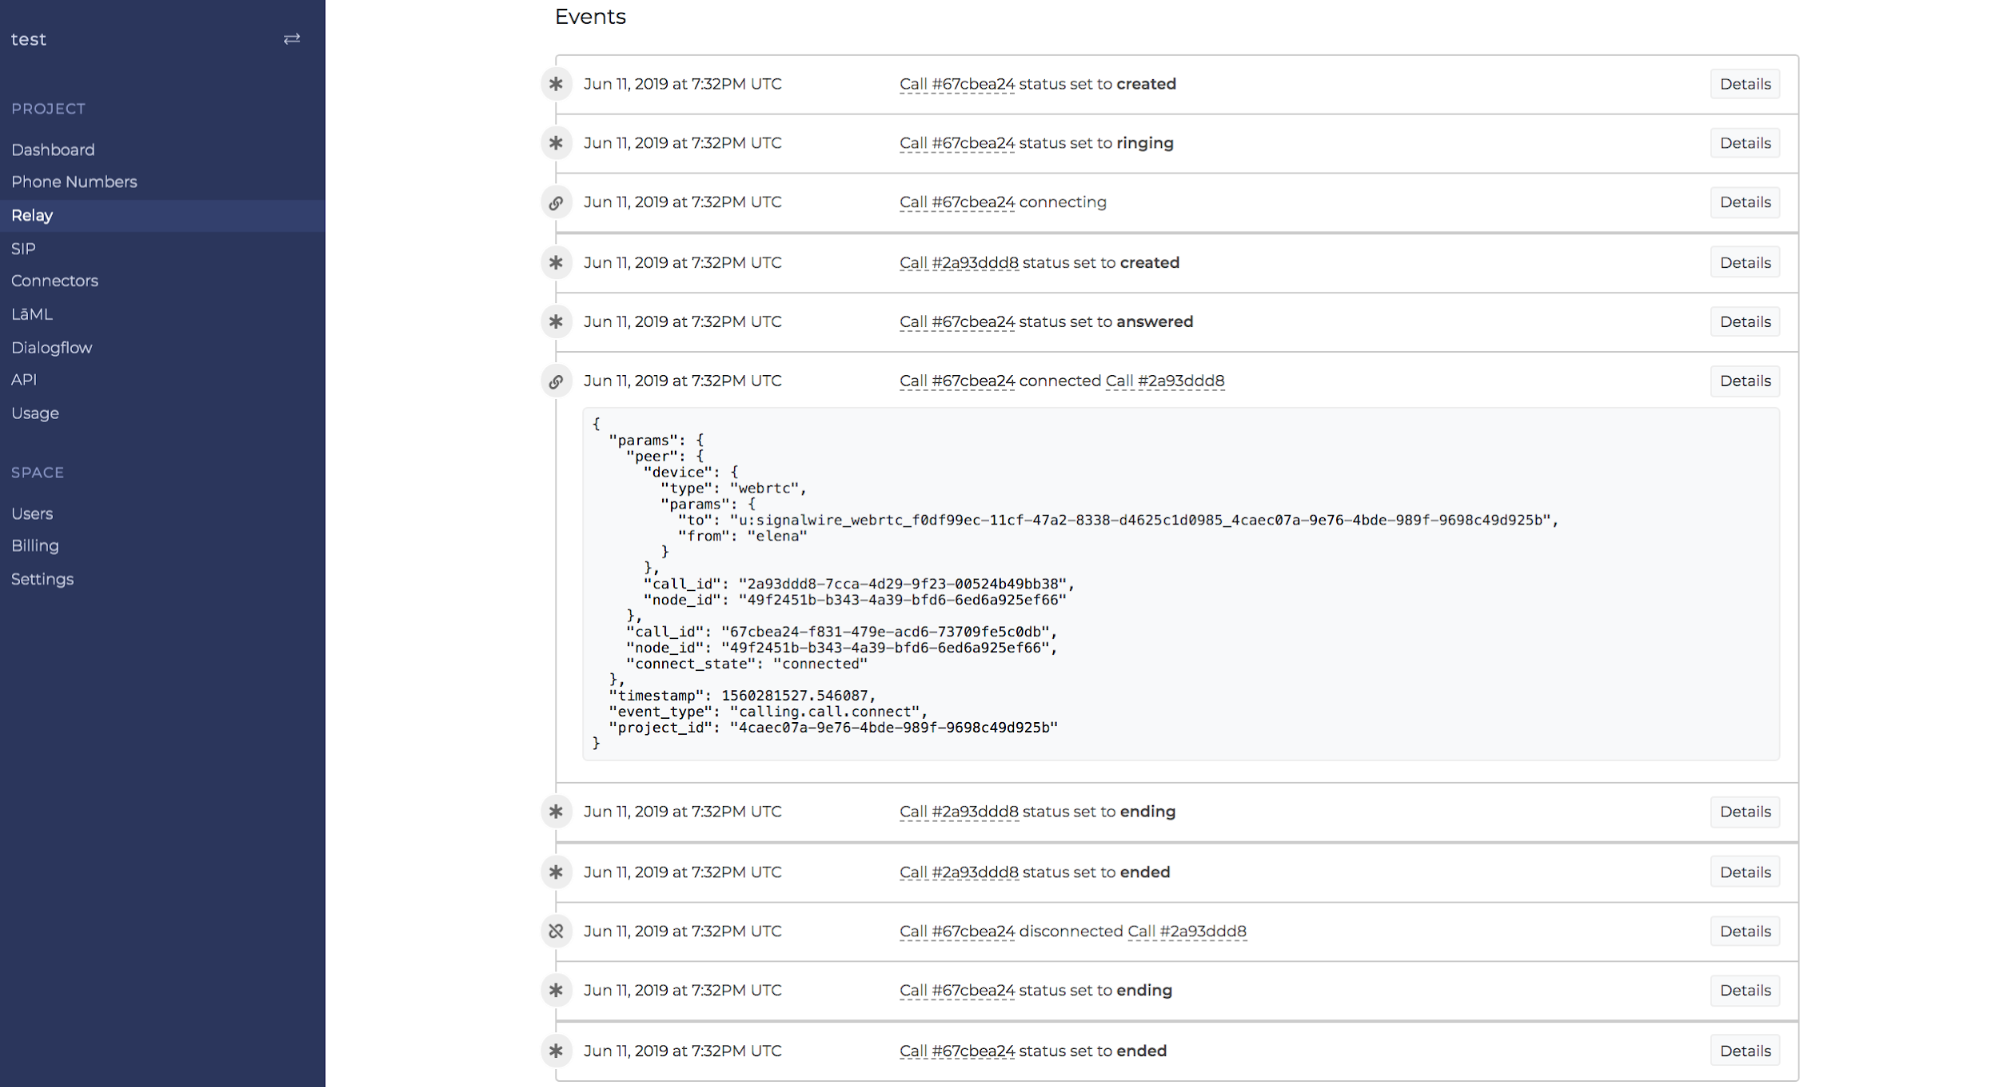
and the various call events:
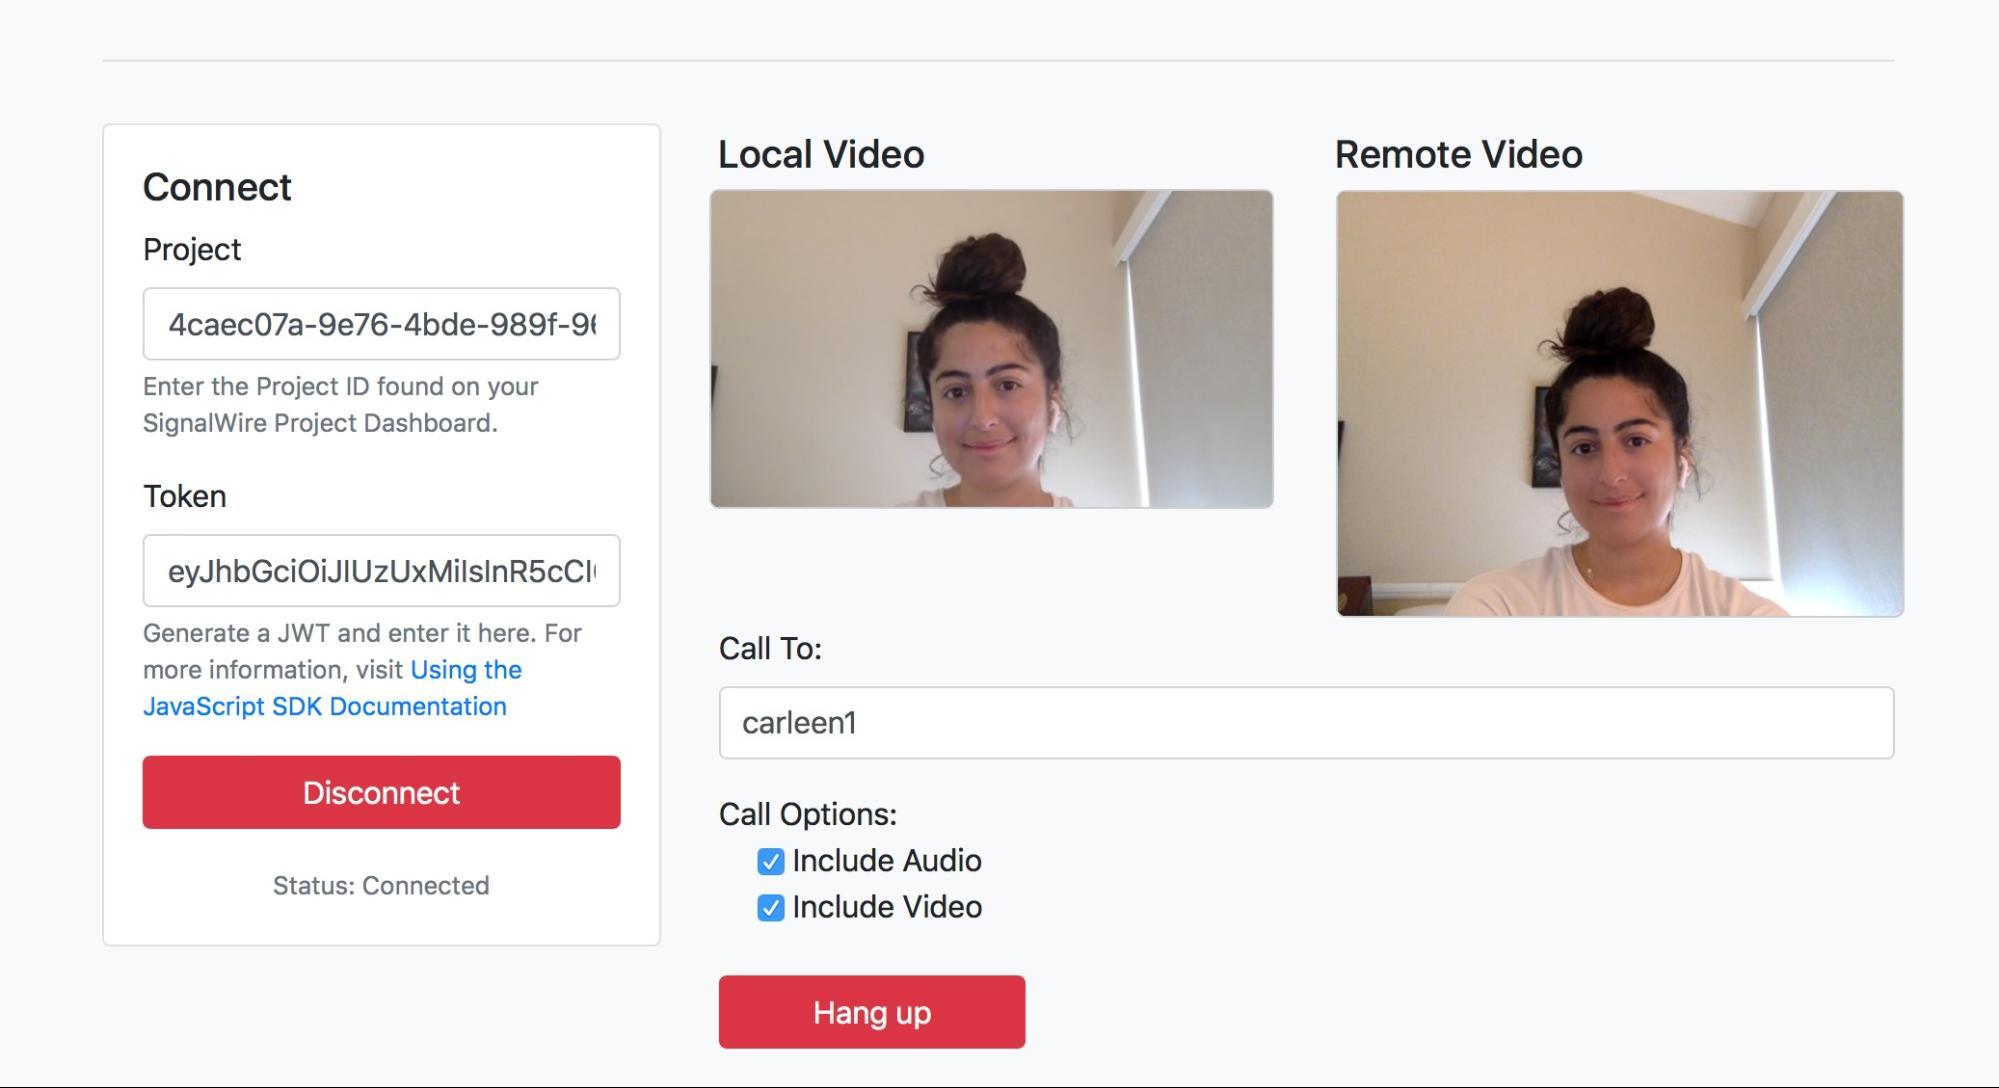
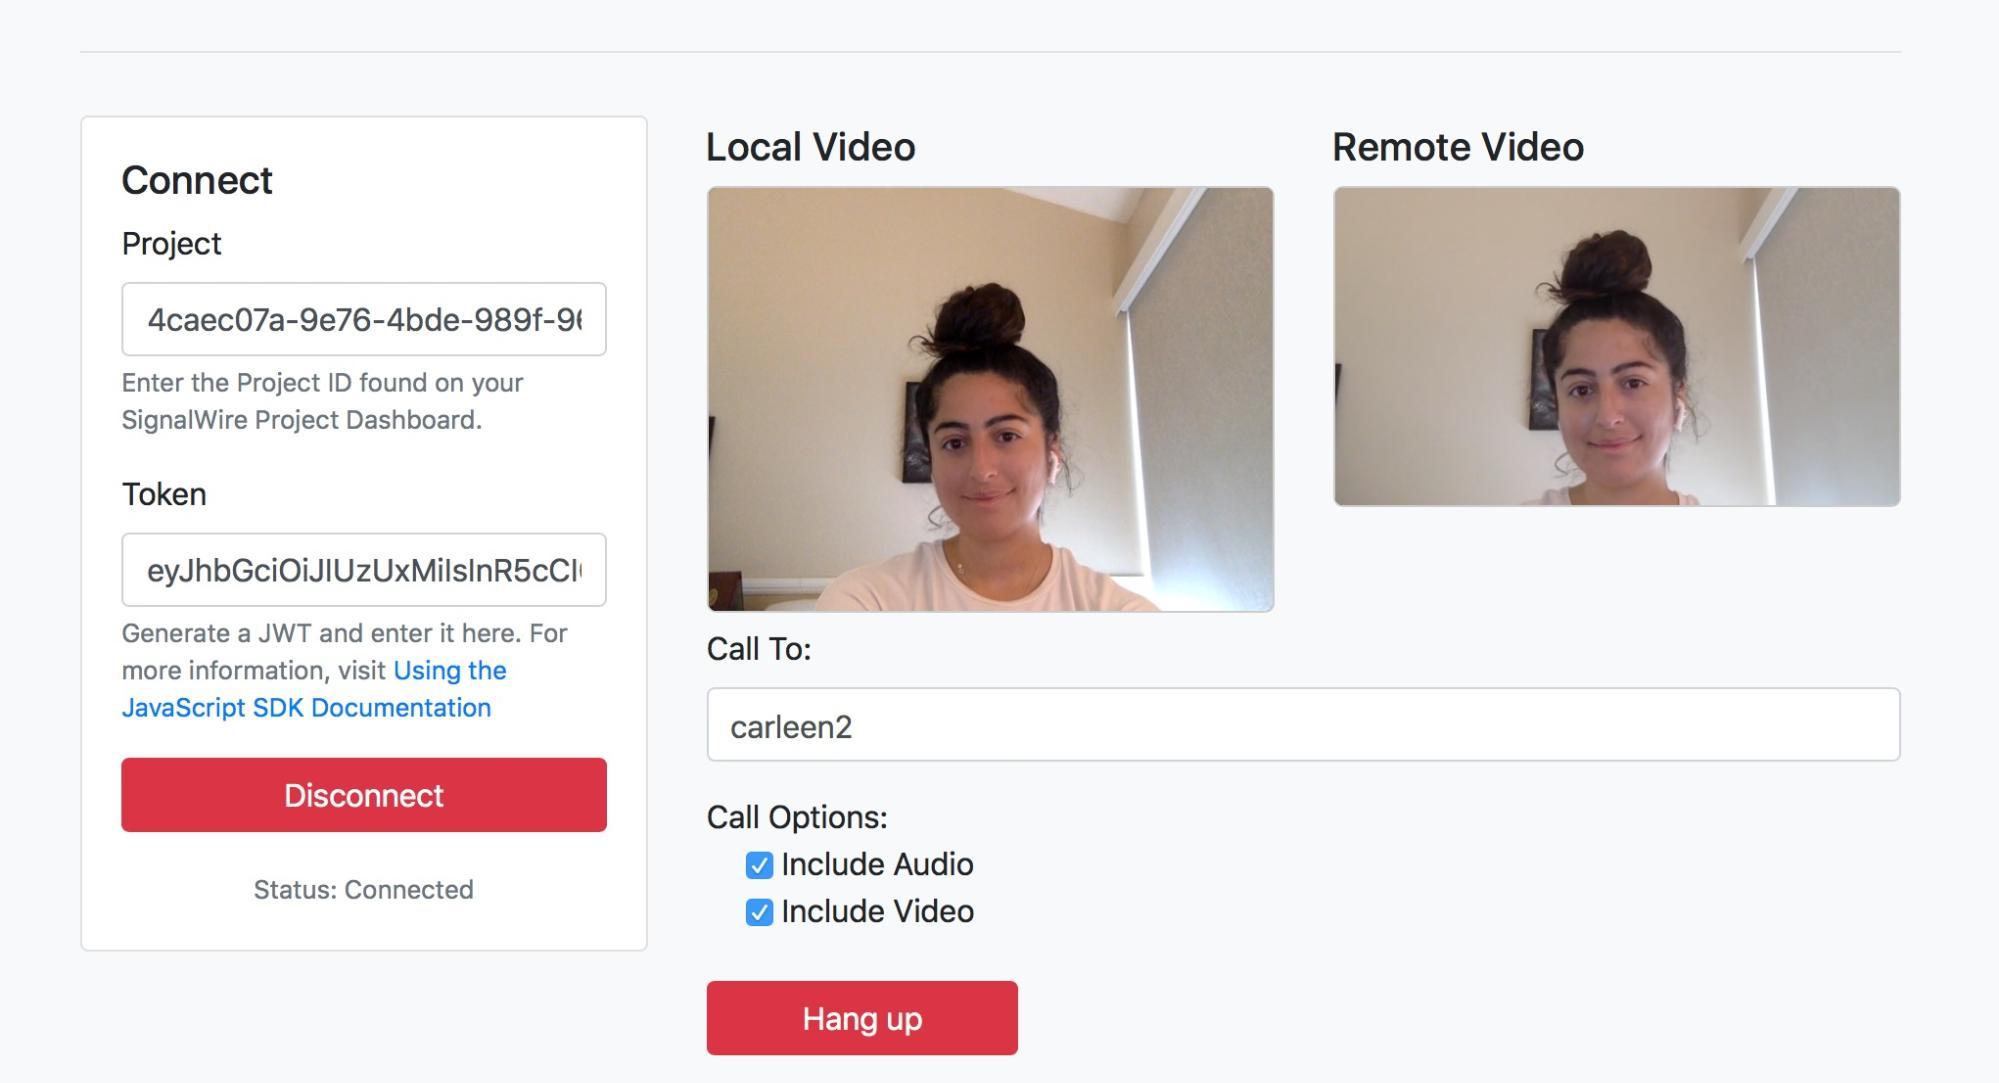
Video Calls Between Browsers
Video calls between browsers are also supported. Enter the connection details in two separate browsers, change the Call Options to include audio and video, and start the call!
You should see something similar to this:
Disruptive Pricing
Our fee structure is simple: we meter per minute / per call leg. We don’t charge for setting up calls programmatically and we don't charge for securing your calls. At SignalWire, we see communication as a necessity and don't agree with egregious markups that get in the way of innovation. We believe in empowering developers and our pricing allows us to maintain this goal.
US Calling Rates:
US Inbound $0.00255
US Outbound $0.0065
SIP / WebRTC (1:1) In/Out $0.0007
For all our disruptive pricing check here.
Come and build something great on SignalWire!
Developer documentation for SIP:
https://docs.signalwire.com/topics/relay-rest/#resources-sip-endpoints
Main developer documentation site:
https://docs.signalwire.com/
Friendly support can be found in our online community.
P.S. We always announce features to our community before bringing it to the general public, so sign up for your free SignalWire account today and join our Community!