"SignalWire was one of the original Dialogflow technology developers. As a launch partner in our latest Dialogflow Contact Center AI initiative, SignalWire offers an unprecedented ease to delivering conversational AI interfaces over the telephone."
— Shantanu Misra, Product Manager, Google Dialogflow
Introducing Dialogflow One-Click Telephony Integration
SignalWire was an original technology partner for Dialogflow, enabling telephony integration into the Google Dialogflow environment for conversational AI. With Google's new One-Click Telephony Integration, Dialogflow users can add telephony to their agents right within the Dialogflow interface.
This integration enables callers to dial a telephone number and experience their conversational AI agents using built-in automatic speech recognition (ASR) and text-to-speech (TTS). In addition, these conversational AI agents can be used as an auto-attendant to route callers to other telephone numbers.
How does the integration work?
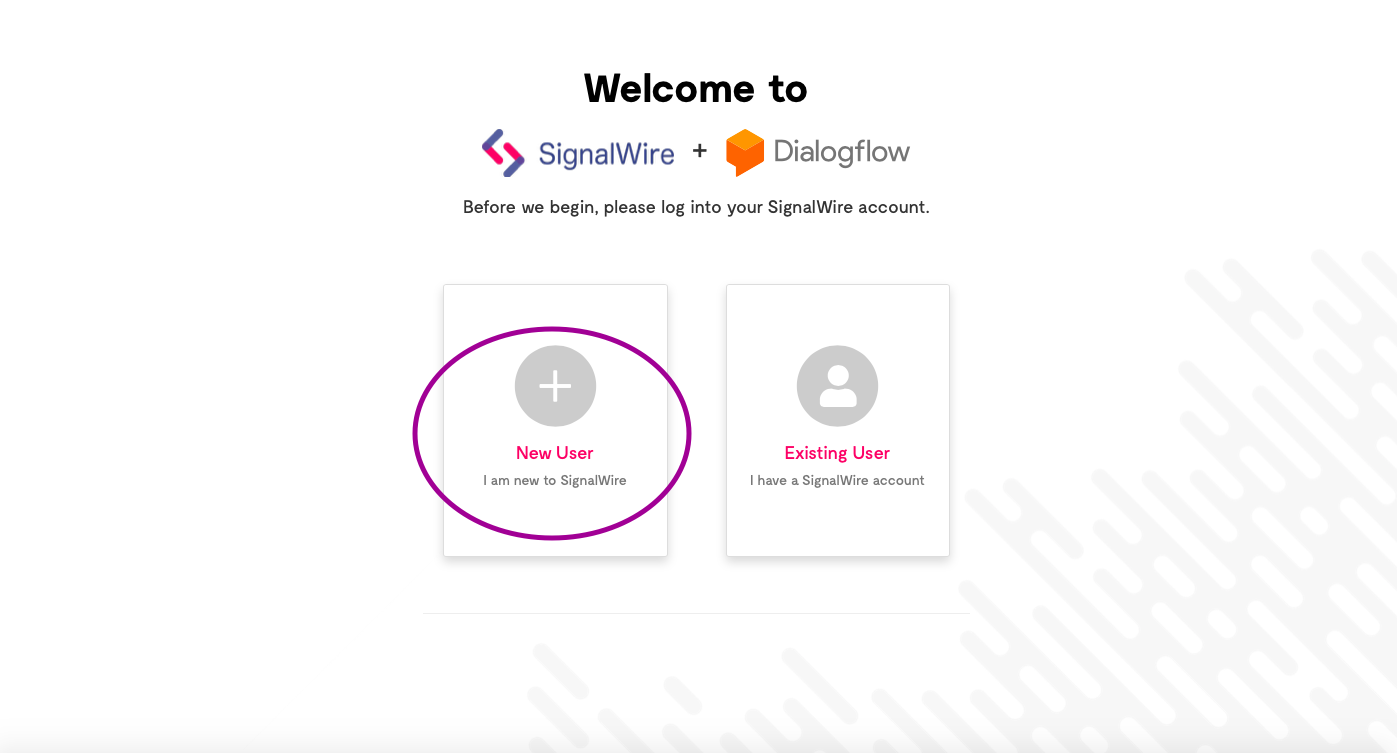
Within the native Dialogflow user interface, you can just select the Integrations Menu from any Dialogflow agent. Selecting the SignalWire button enables you to create a SignalWire space (if necessary) and assign a telephone number to the Dialogflow agent.
The default flow of this integration wizard was specifically designed to make getting started quick and easy.
Streamlining the Creation of New SignalWire Spaces
When creating new SignalWire spaces, the integration wizard streamlines the setup process. You should be aware of the following:
- Default browser. When possible, start the Dialogflow One-Click telephony integration from your default Web browser. The SignalWire space signup process requires an email validation requiring you to click a link from your email client into the same browser from which you invoked the Dialogflow One-Click process. If required, it is recommended that you cut and paste the link from your email into the Dialogflow browser window.
- Default project. New spaces created during Dialogflow One-Click Telephony integration are provisioned with a default project called "Dialogflow Project" to streamline setup. You can move the integration and any numbers to other projects later.
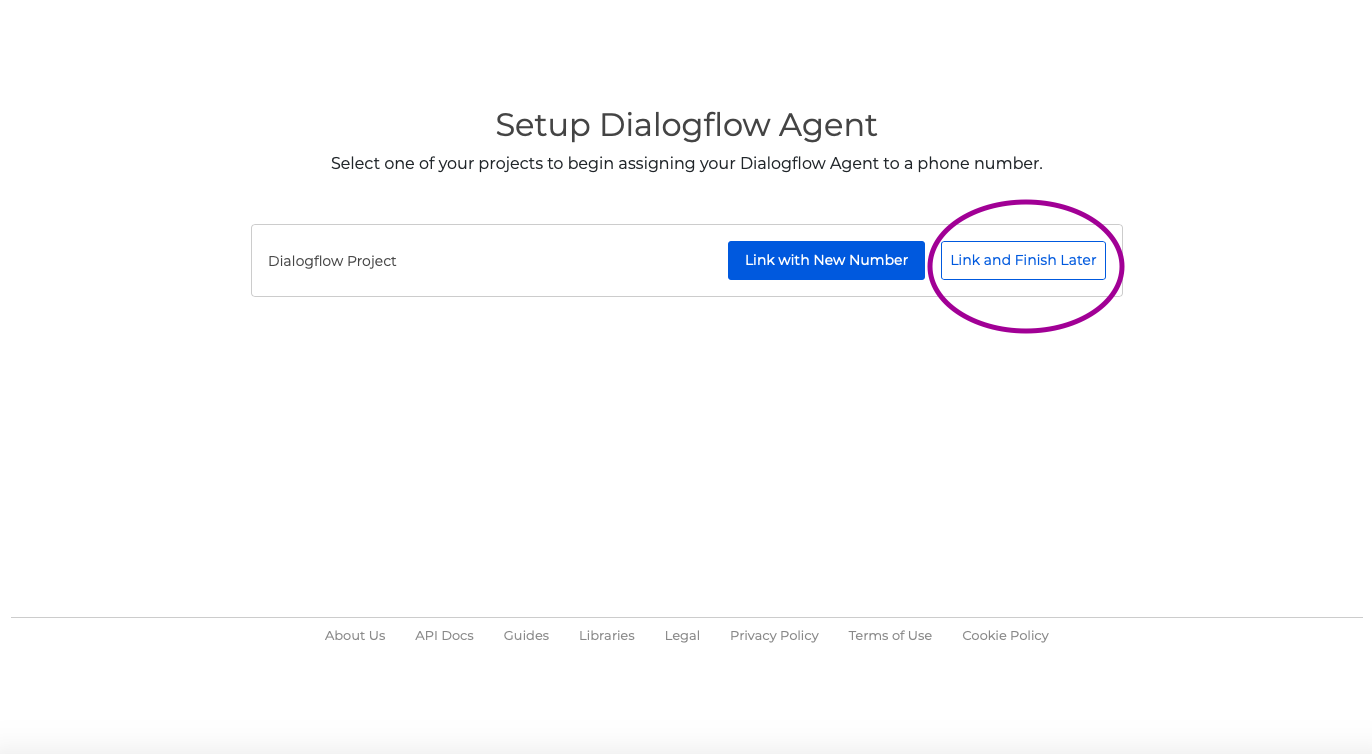
- Default toll telephone numbers. The first Dialogflow agent provisioned with a telephone number will have a DID toll number automatically generated for immediate testing. It is also possible to choose your own telephone numbers (toll or toll-free) instead of using an automatically generated telephone number by "managing" an existing integration or by using the "Link and Finish Later" option with new integrations once you have a SignalWire space.
Managing Your Integration
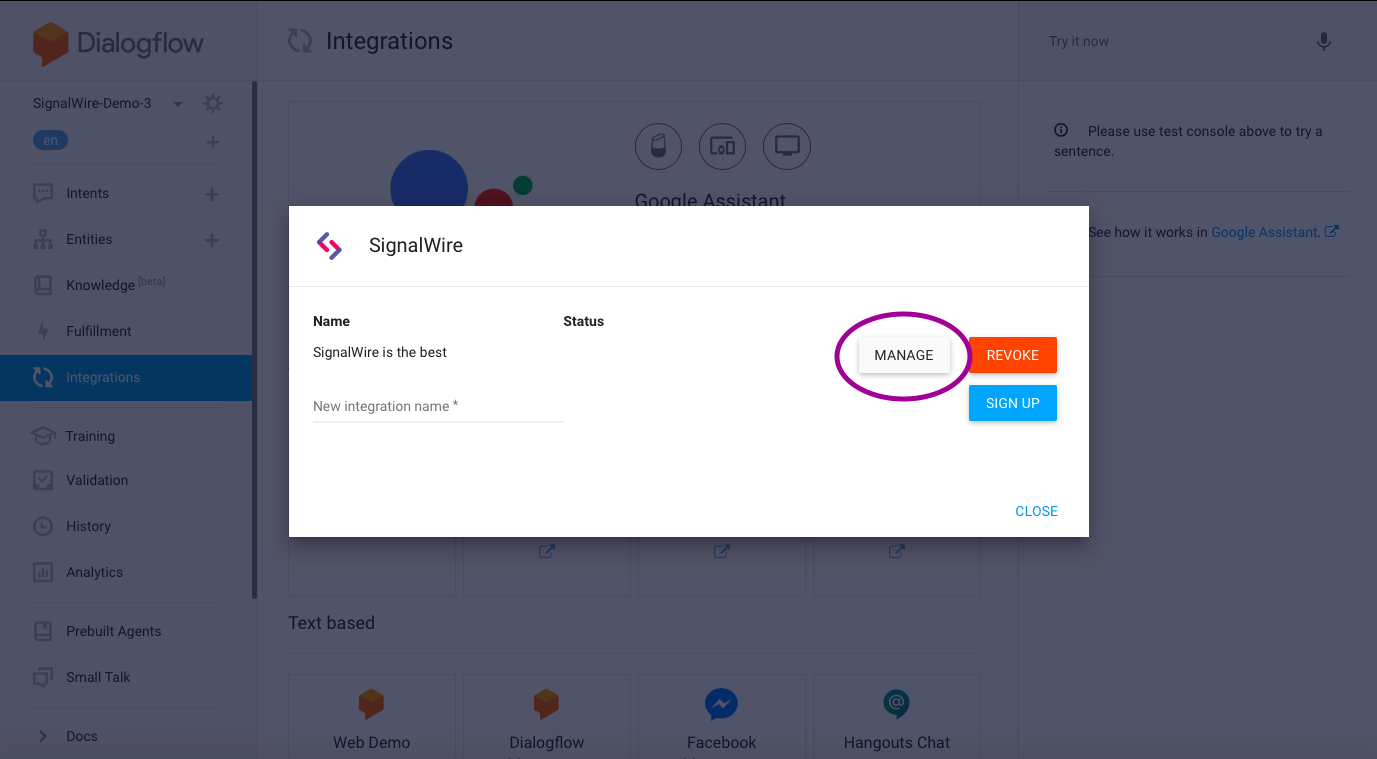
Occasionally, you may want to change the telephone number or utilize more advanced SignalWire features. To manage the integration, within Dialogflow, choose the Integrations menu and click the SignalWire icon.
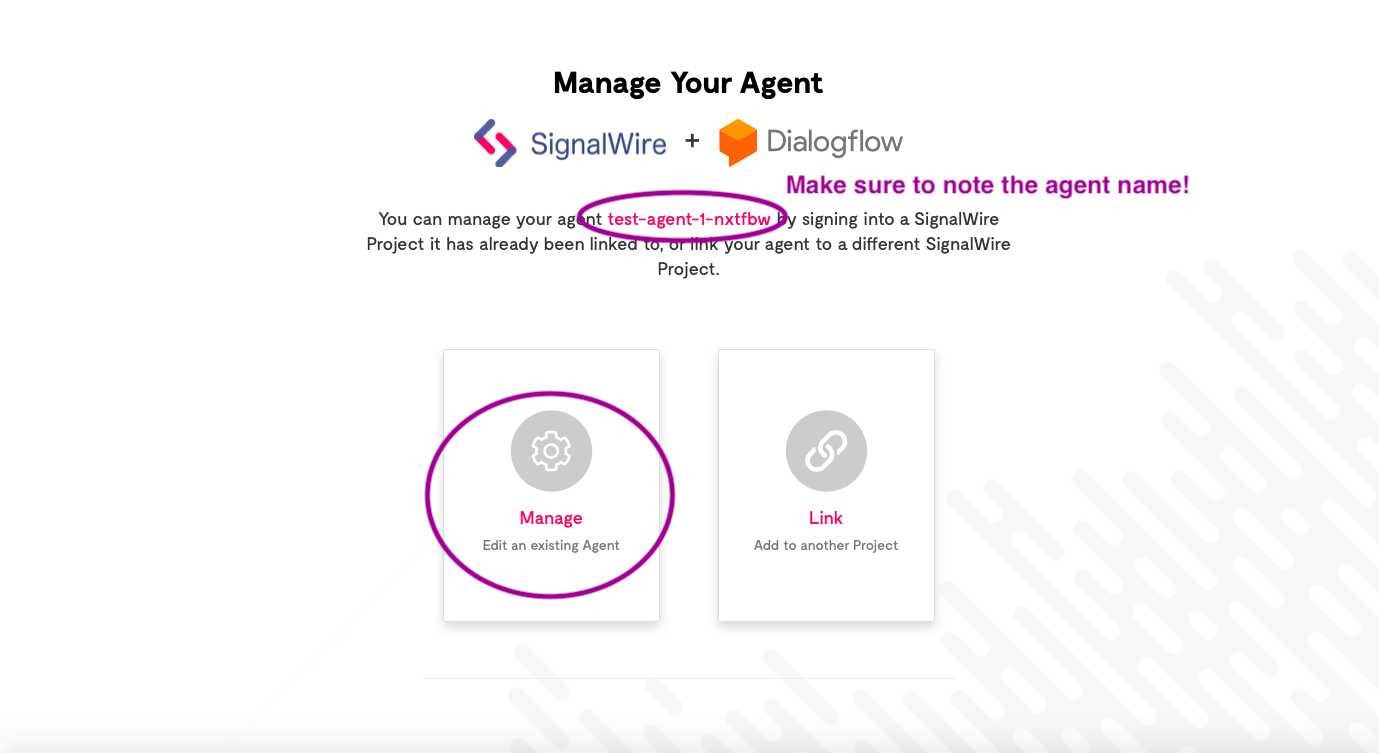
From there you, either manage (edit) the integration or revoke it.
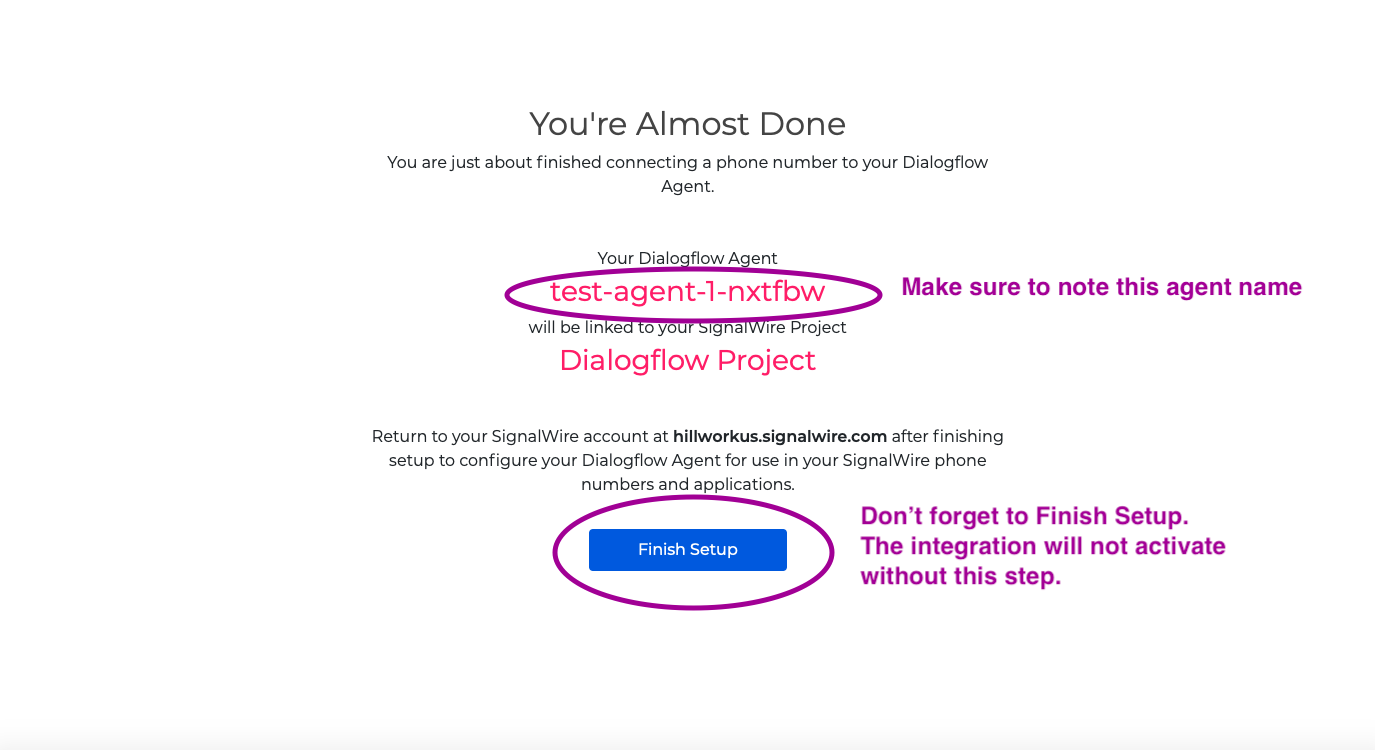
Remember that when you manage an integration, you should note the specific identifier for the Dialogflow agent for use in the SignalWire space user interface.
Link and Finish Later
Once you have a SignalWire space, you can also create new Dialogflow One-Click Telephony integrations on the same Dialogflow agent (perhaps for connecting with other spaces or projects), or you can connect other Dialogflow agents.
While you can assign automatically generated telephone numbers directly from the Dialogflow One-Click Telephony Integration wizard, there are cases, such as when you want to select your own toll or toll-free number, where you might want to "Link and Finish Later."
Note that when you use "Link and Finish Later," you should be sure to note the specific identifier for the Dialogflow agent for use in the SignalWire space user interface.
Make sure to click "Finish Setup." The Dialogflow One-Click Telephony Integration will not activate until this button is clicked.
Choosing Your Telephone Numbers
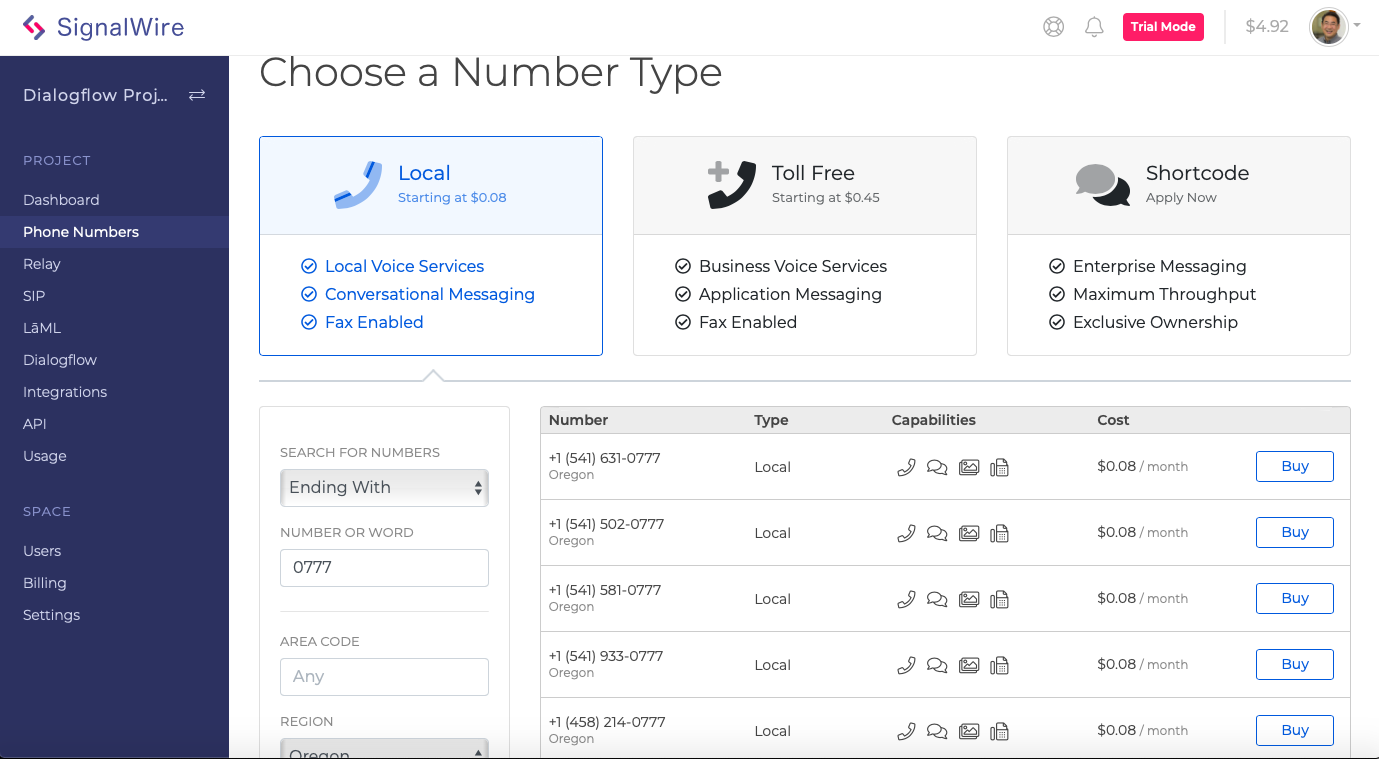
Once you have either chosen to "manage" your integration or "Link and Finish Later," you are free to choose a custom toll or toll-free telephone number to assign to your Dialogflow agents right from within your SignalWire space.
To choose a number, click the Phone Numbers menu on the left side, and the "+ New Number" button in the upper right. You will then be presented with the "Choose a Number type" screen.
In this case, toll numbers featuring the sequence "0777" in the State of Oregon were selected.
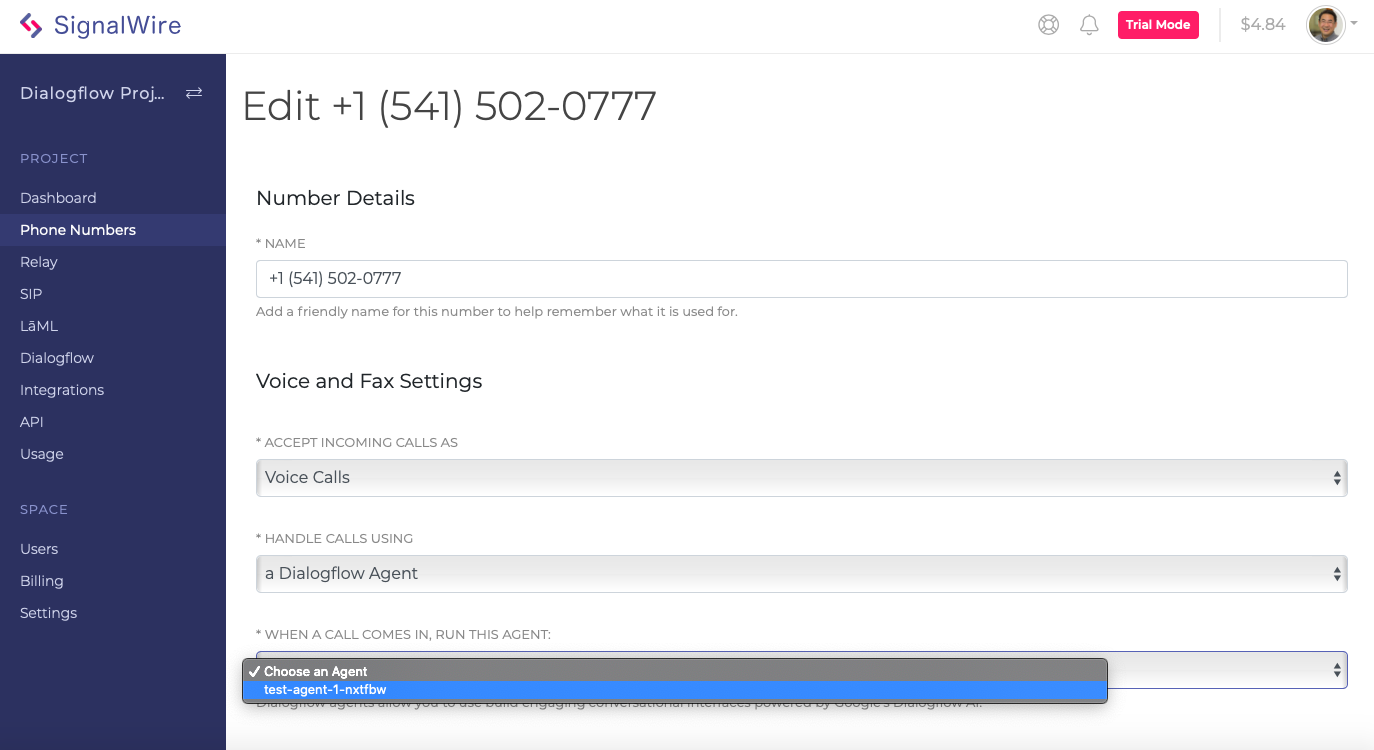
Once a new or existing number is selected, the Dialogflow agent can be assigned to that number on the "Edit Phone Number" screen. Select the correct Dialogflow agent as reported by the Dialogflow One-Click Telephony Integration wizard.
In conjunction with SignalWire, the Dialogflow One-Click Telephony Integration can be used to rapidly provision your Dialogflow agent with an automatically assigned SignalWire telephone number, or you can use it with new or previously purchased telephone numbers.
You can learn more about the SignalWire integration with Dialogflow here.
