SignalWire RELAY is a real-time communications protocol that uses persistent, asynchronous connections so applications can control calls and receive events in real time, without relying on stateless Representational State Transfer (REST) requests and webhooks. This post explains why REST-style APIs are a poor fit for real-time call control, then shows how to use the RELAY JavaScript library in Node.js to place outbound calls, answer inbound calls, and run actions like text-to-speech while monitoring call and system events from the SignalWire network.
Why RELAY is Better Than REST for Real-time Communications
REST (Representational State Transfer) has been prolific, with more than 70% of all public APIs being REST. The popularity comes from the fact that REST builds upon existing systems and features of HTTP, making it familiar to web developers everywhere. REST was chosen over alternatives like SOAP, for its close coupling with JSON and web-friendly format, which web developers preferred when rapidly iterating web applications. That said, there are limitations to REST.
REST-based applications by nature are stateless. The state is managed by the client. Similarly, since HTTP doesn't have a mechanism to push notifications from the server to the client, it is difficult to implement any type of service where the server updates the client in real-time. At least not without the use of polling, web sockets, or another type of webhook.
At SignalWire, we felt like we needed something a bit more modern - something where web microservices are intrinsic in the design from the start.
SignalWire RELAY
RELAY is the next evolution in real-time communication APIs. It's a real-time web service protocol that provides for persistent, asynchronous connections to the SignalWire network.
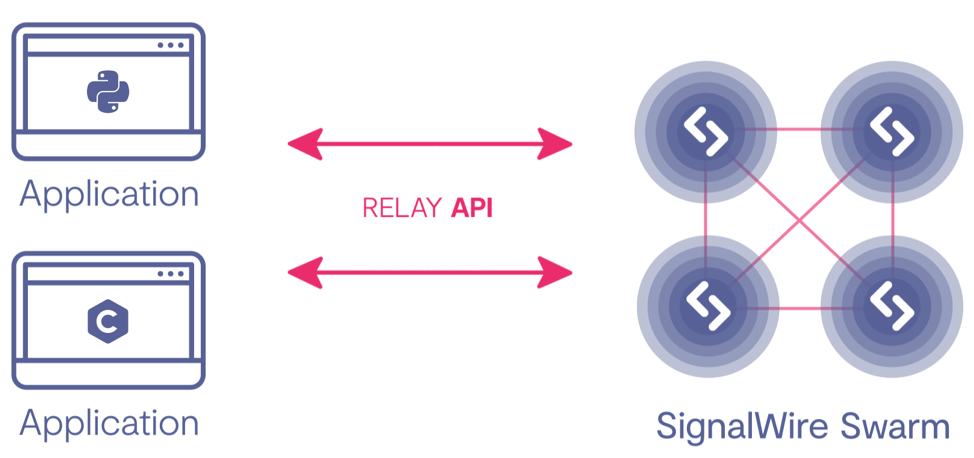
RELAY brings advanced real-time capabilities like real-time event monitoring functionality to the developer, without the need for markup language interpretation or latent REST responses. This is a game-changer for developers.
System and billing events can be monitored and acted upon in real time. In the past, doing something simple like intercepting call events for a voice call that shows the destination endpoint as offline, and then re-routing those calls automagically, was clunky and didn’t produce elegant results. Many times the call would fail or the delays in call setup would drive the user to hang up themselves.
Enabling RELAY Call Control via NodeJS
The first set of RELAY functions that can be consumed via our Relay JavaScript library is Call Control. This will allow developers to programmatically manage voice calls in real-time using NodeJS. It’s the first step towards completing SignalWire’s real-time web services API and libraries. Check our developer website for a current list of supported programming languages and our developer documentation for RELAY Voice Clients.
Before getting started, be sure you have created your SignalWire account.
Create an outbound call using RELAY and NodeJS
1. Install the package using NPM:
npm install @signalwire/realtime-api
2. In order to use the NodeJS client, you must get your project and API token from your SignalWire dashboard:
const project = "XXXXXXXX-XXXX-XXXX-XXXX-XXXXXXXXXXXX"
const token = "PTXXXXXXXXXXXXXXXXXXXXXXXXXXXXXXXXXXXXXXXXXXXXXXXX"
3. Use the SignalWire project, token, and a context of your choice to set up a Voice Client:
import { Voice } from '@signalwire/realtime-api";
const client = new Voice.Client({
 project: "<project-id>",
 token: "<api-token>",
 contexts: ["office"],
});
4. You can then use the client to place a call and play a message:
const call = await client.dialPhone({
 from: "+YYYYYYYYYY",
 to: "+XXXXXXXXXX",
});

await call.playTTS({ text: "Welcome to SignalWire!" });
5. Now, let's process an inbound call:
// Attach a listener to listen for incoming calls.
client.on("call.received", async (call) => {
 console.log("Got call", call.from, call.to);

 try {
 await call.answer();
 console.log("Inbound call answered");

 await call.playTTS({ text: "Thank you for calling SignalWire!" });
 } catch (error) {
 console.error("Error answering inbound call", error);
 }
});
Using the SignalWire Dashboard
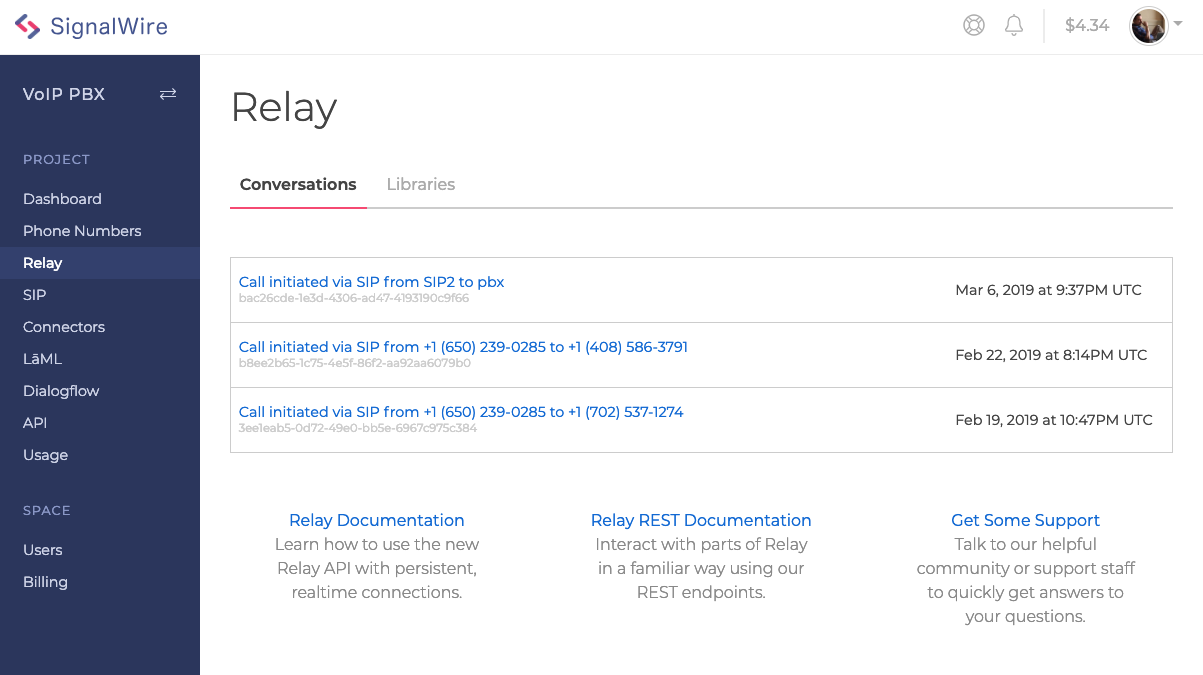
In the SignalWire dashboard, you will have the opportunity to see your RELAY activity. Here we can see a few SIP calls and some that also touch the PSTN:
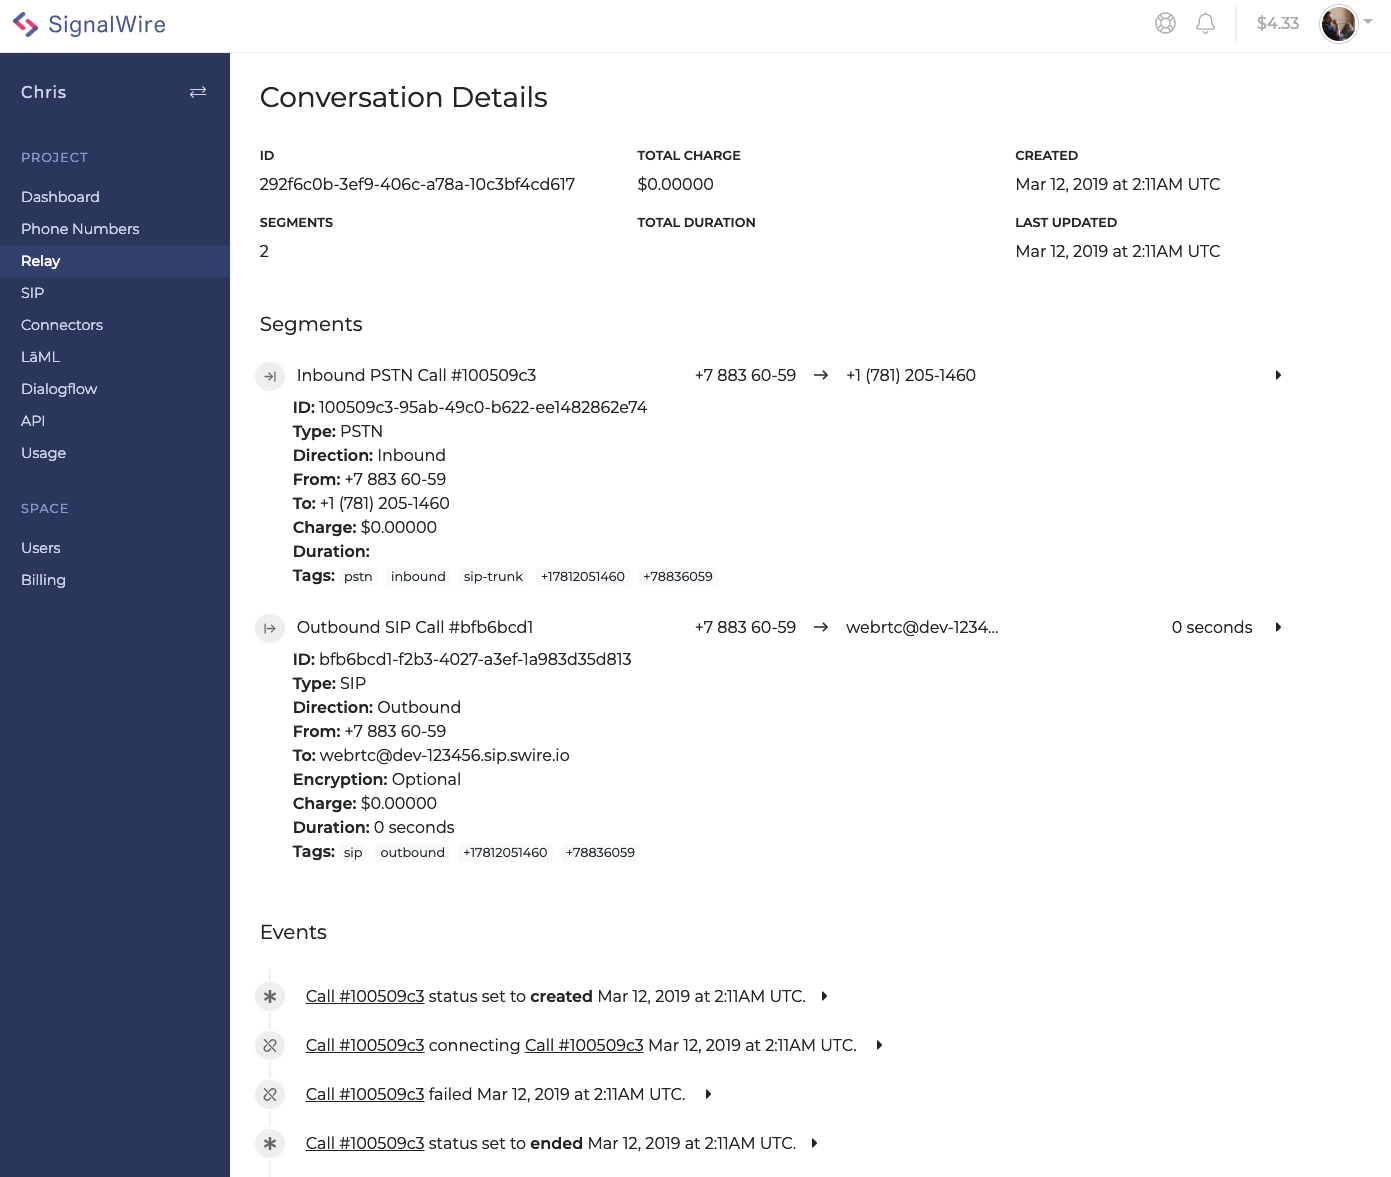
If we click on the call thread we can see more details on the conversation, including a summary, segments and events:
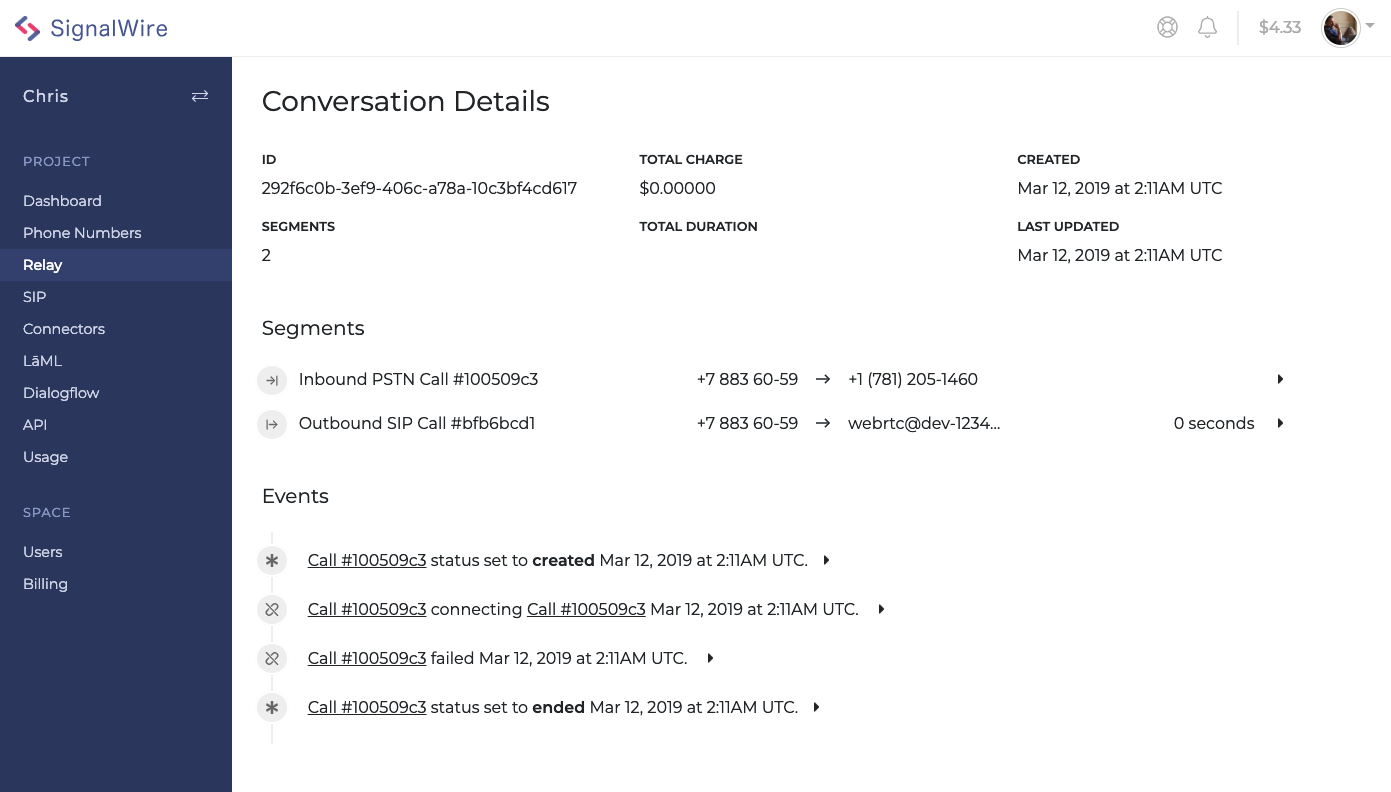
We can expand the segments and see the detail in each segment:
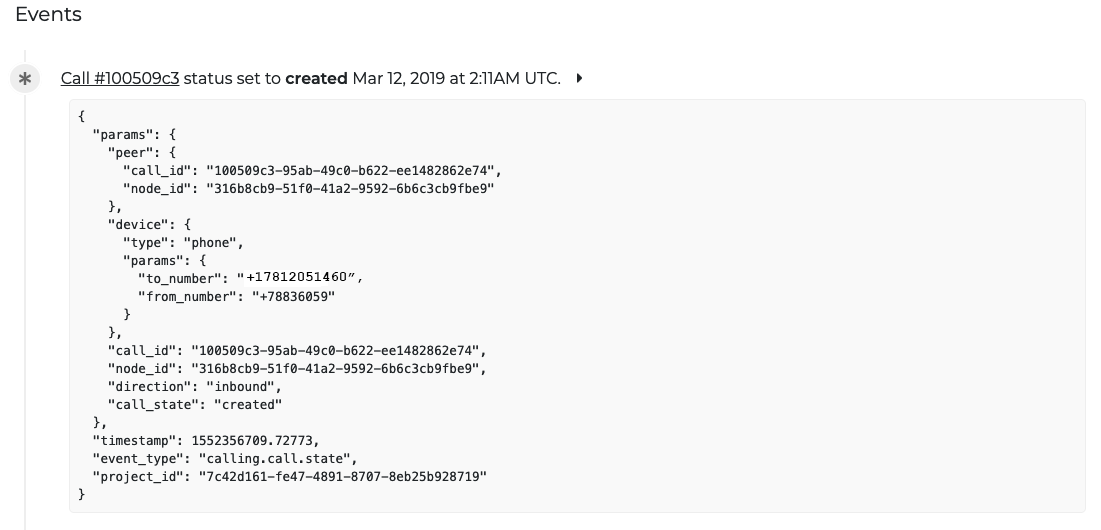
Let's have a look at the events. In this first example we see a Call Creation event:
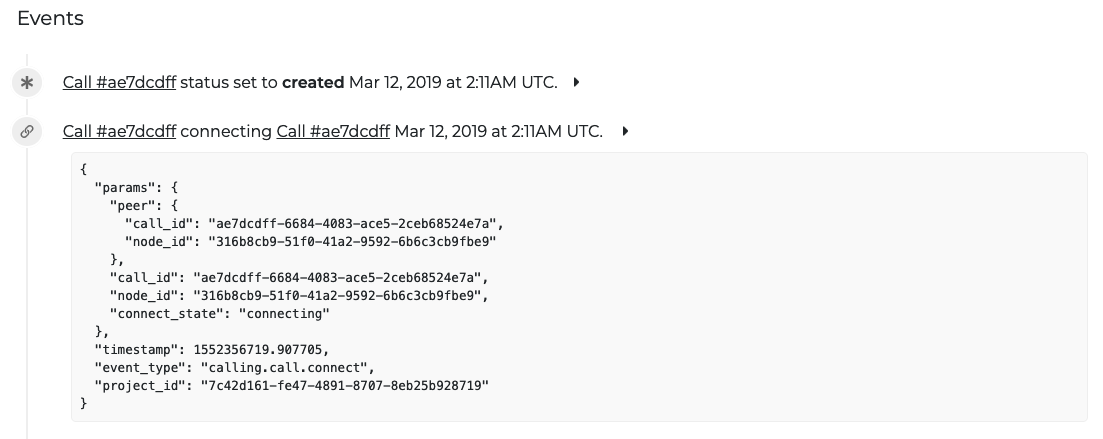
Next is the Call Connection event:
Disruptive Pricing
Our fee structure is simple. We meter per minute / per call leg, we don’t charge for setting up calls programmatically, nor do we charge for securing your calls, because security is a good thing.
For all pricing check here.
We want to see what you build with SignalWire! If you have any questions while getting started, stop by our Discord to connect with our team. You can also reach out to sales@signalwire.com with questions about pricing or specific products.
Frequently asked questions
What is SignalWire RELAY?
SignalWire RELAY is a real-time web service protocol that provides persistent, asynchronous connections to the SignalWire network, enabling real-time call control and event monitoring.
Why is REST a poor fit for real-time call control?
REST-based applications are stateless and rely on client-managed state, and Hypertext Transfer Protocol (HTTP) does not natively push server events to clients. Real-time behaviors often require polling, web sockets, or webhooks, which can add latency and complexity.
What is RELAY Call Control in Node.js?
RELAY Call Control is the set of RELAY functions exposed through the Relay JavaScript library that lets developers programmatically manage voice calls in real time using Node.js.