You can embed a WebRTC video conference into any website page by creating a Programmable Video Conference room in your SignalWire Space, choosing the prebuilt user interface option, then copying the Guest embed code into a code block. This guide walks through creating the room, generating moderator and guest links, copying the correct embed snippet, and optionally extending the embedded room with a background blur effect using Google MediaPipe and a guest token.
Add Video Conferencing to Your Website
Today, I’m going to walk through step-by-step how I embedded a video conference into a Wordpess site in just a few minutes, and then used Google Mediapipe to build in a background blur effect.
It seems worth noting here that I’m not a developer. And yet, in just a few minutes, I used SignalWire’s new Programmable Video Conferences to make my own WebRTC video conference run on a Wordpress site.
Here’s how I did it:
Step 1: Create and configure a programmable video conference in your SignalWire Space (2-5 minutes)
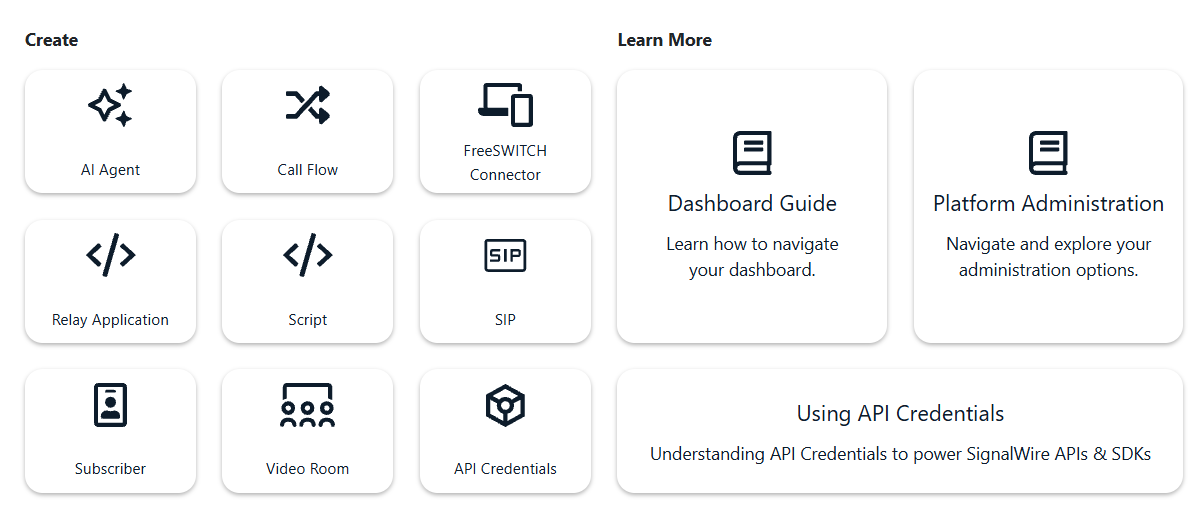
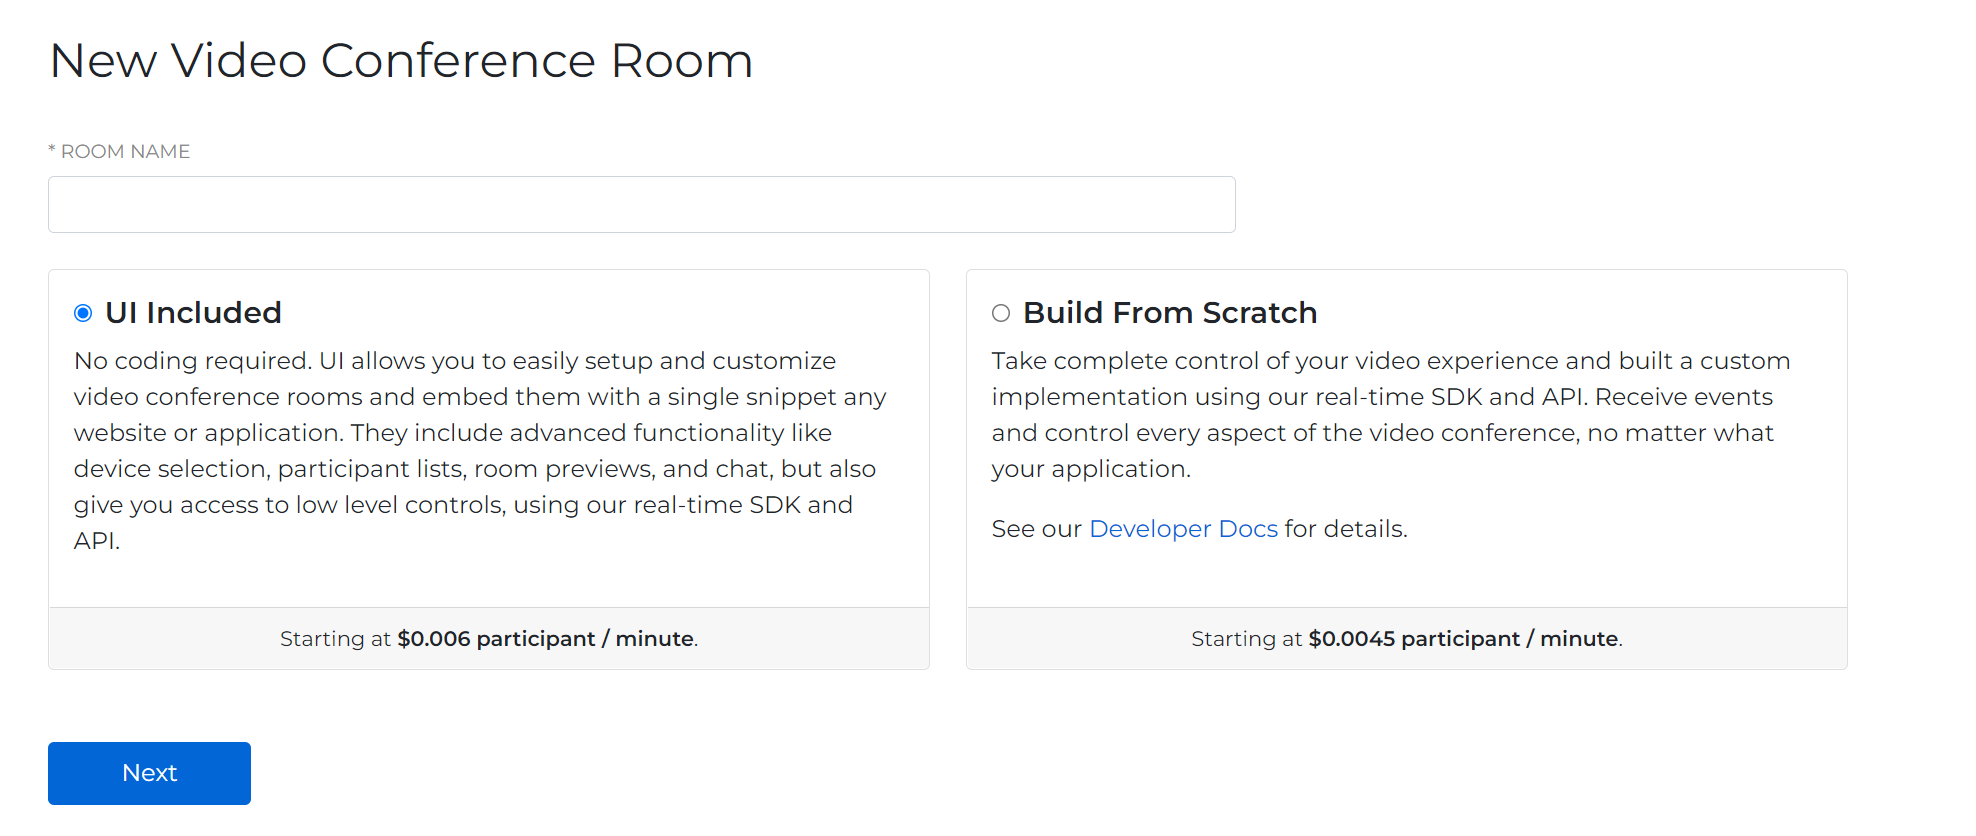
To start any project with SignalWire, I have to create a space by signing up. By clicking on 'Video Room' in the dashboard, I can find the options for building a programmable video conference. Because I have very little coding experience, I’m going to go with the first option: "UI Included."
From here, I’ll choose a room name, and when I create it, the settings for the room should load.
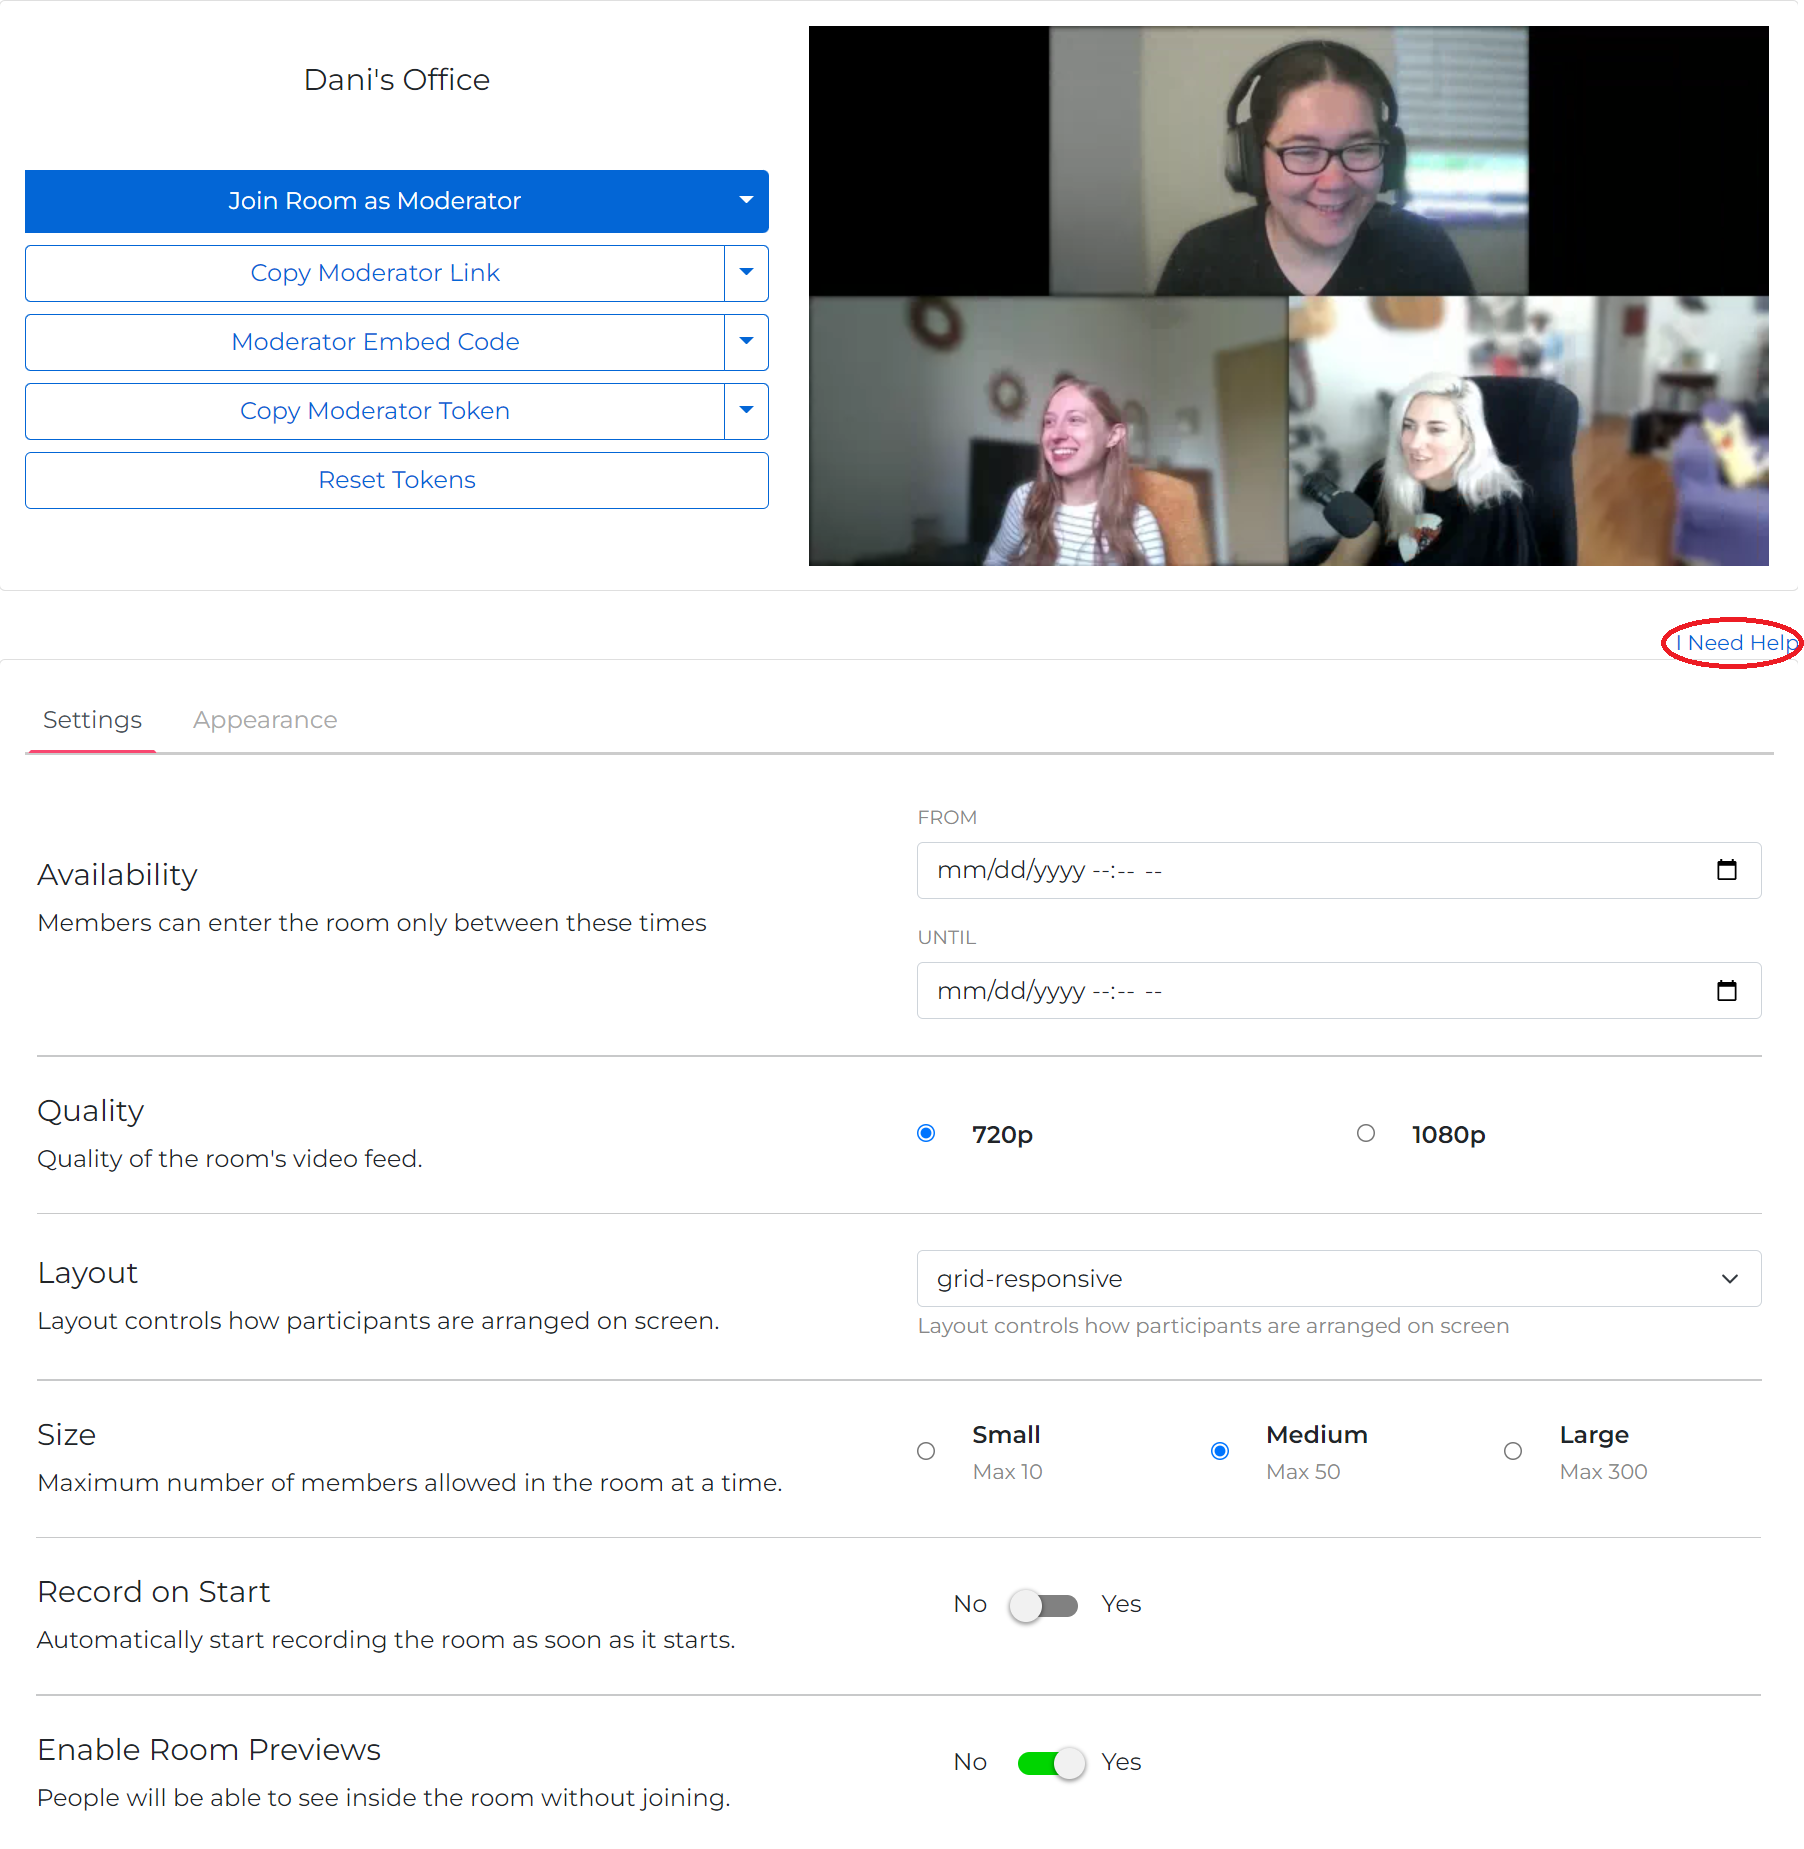
Here, there are a multitude of basic options for the room that can be toggled later on. All of them are extremely straightforward.
Join Room as Moderator vs. Join Room as Guest - If you want to have any power in the room whatsoever when you enter, you want to be sure you’re a moderator. This will allow you to screenshare, and toggle the powers that guests have. This is the button that you push to actually enter the room.
Copy Moderator Link and Copy Guest Link - These links allow you to invite others to the room. Choose whether you want them to have the all-powerful Moderator access, or just have them in as a guest.
Moderator Embed Code and Guest Embed Code - These are the codes you embed on your own website. Be sure to embed the guest code if you don’t want everyone running around with Moderator access.
Copy Moderator Token and Copy Guest Token - The token contains all the info for the video conferencing room you built, so each one is unique. You can plug this token into any pre-written code snippets to make them function for your room.
Reset Token - Pressing this resets the security tokens associated with the room. Only press this if you want to disable access to the room. If you reset this token, you’ll have to update all the code snippets and links shared, as they won’t work any more.
Beneath these options are the settings. Here you can select specific dates the room will be open, the quality of video feeds, the layout of the video feeds displayed, how many guests can be in the room at once, and whether or not you want the room to record automatically. This is where you would enable room previews, so anyone looking from the outside can see who is in your room. You can also delete the room here.
If anything is unclear, you can click “I need help” for an in-depth text guide to all the features shown above.
I’m going to leave everything as is, except I’m going to switch on Room Previews. This lets me see if anything fun is happening in my room while I’m working on it.
Under the Appearances tab, you have the option of customizing the room colors. You can make two different theme sets.
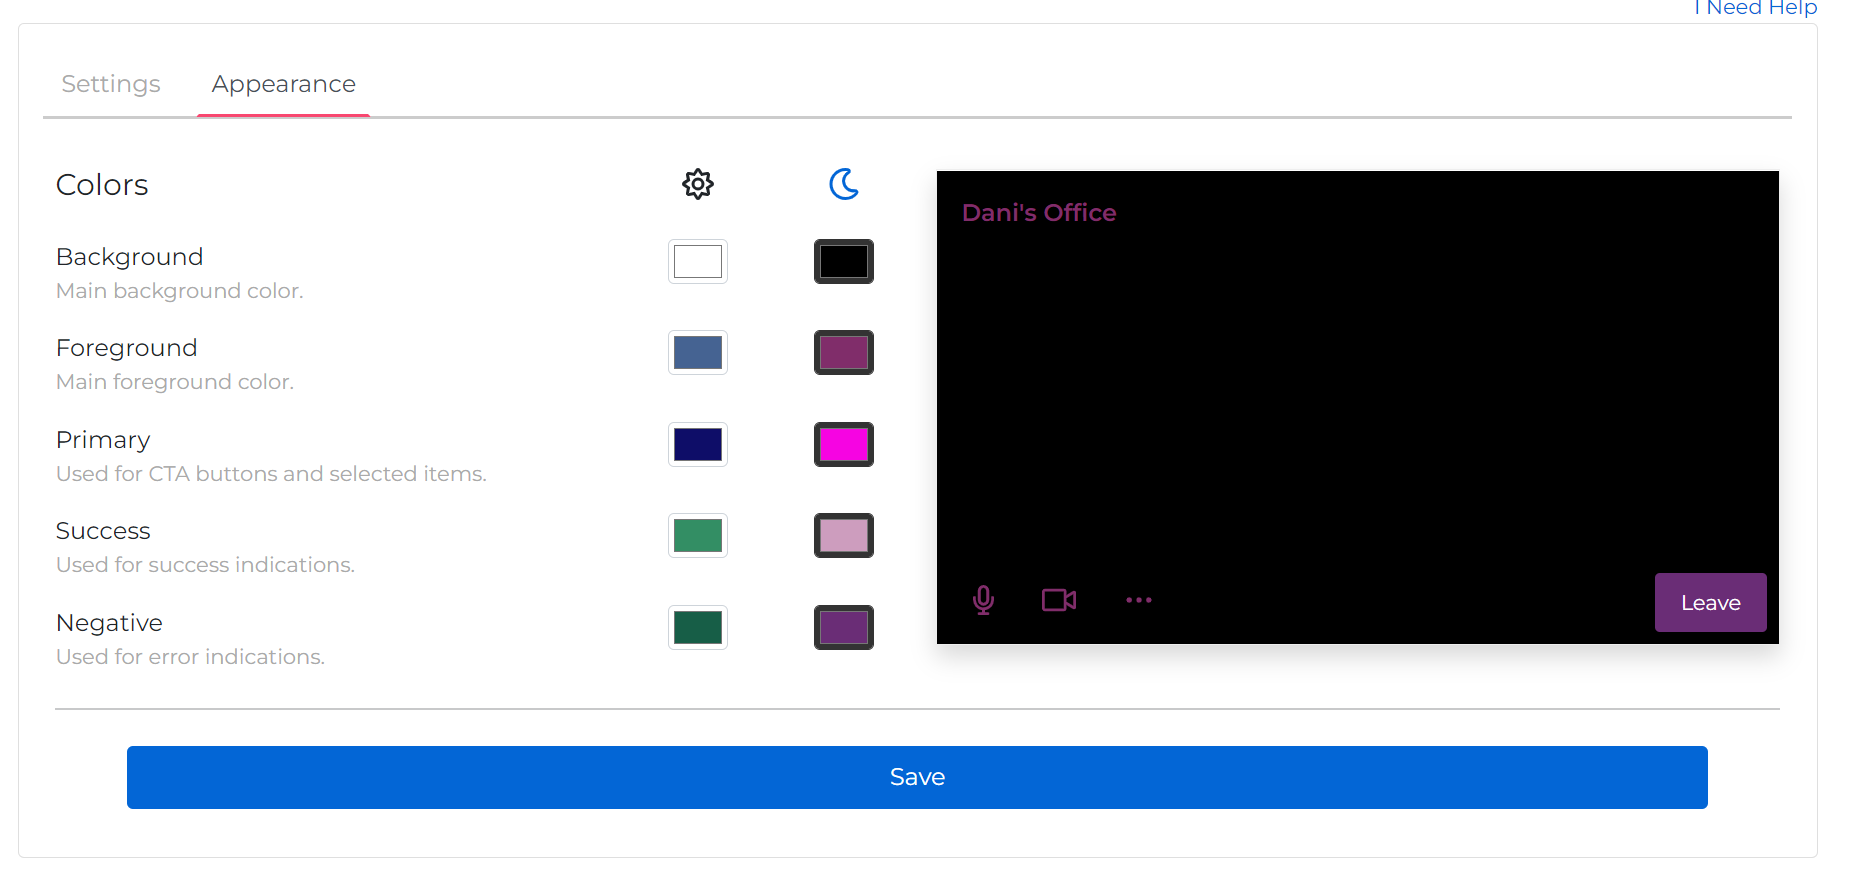
These are the default options for when you create a room based on the existing UI:
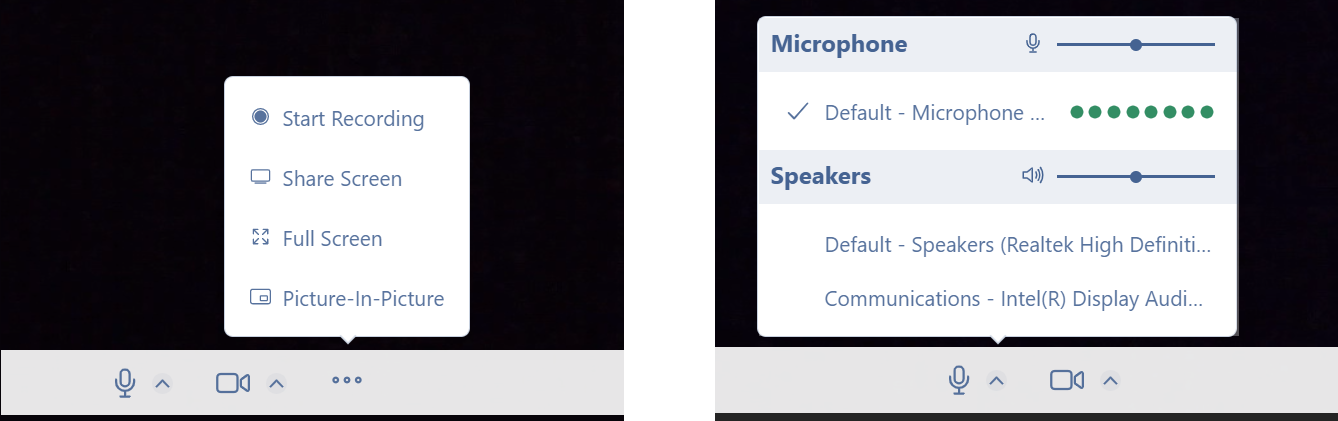
With Moderator permissions, this includes the widgets to mute your video and audio, a recording option, a screen share option, and display options. The only power guests have is to mute video and audio.
Step 2: Generate the embed code and embed it! (1-2 Minutes)
Now I’m going to grab the Embed code so that the video conference can be accessed on my website. For this example, I’m going to use the ClueCon wordpress site. Clicking the arrow beside the Moderator Embed Code, I can view the Guest Embed Code… and simply copy it. Still no need to know exactly what this code is doing.
Since I’m using wordpress, all I have to do is paste it as a code block. Literally. That’s it.
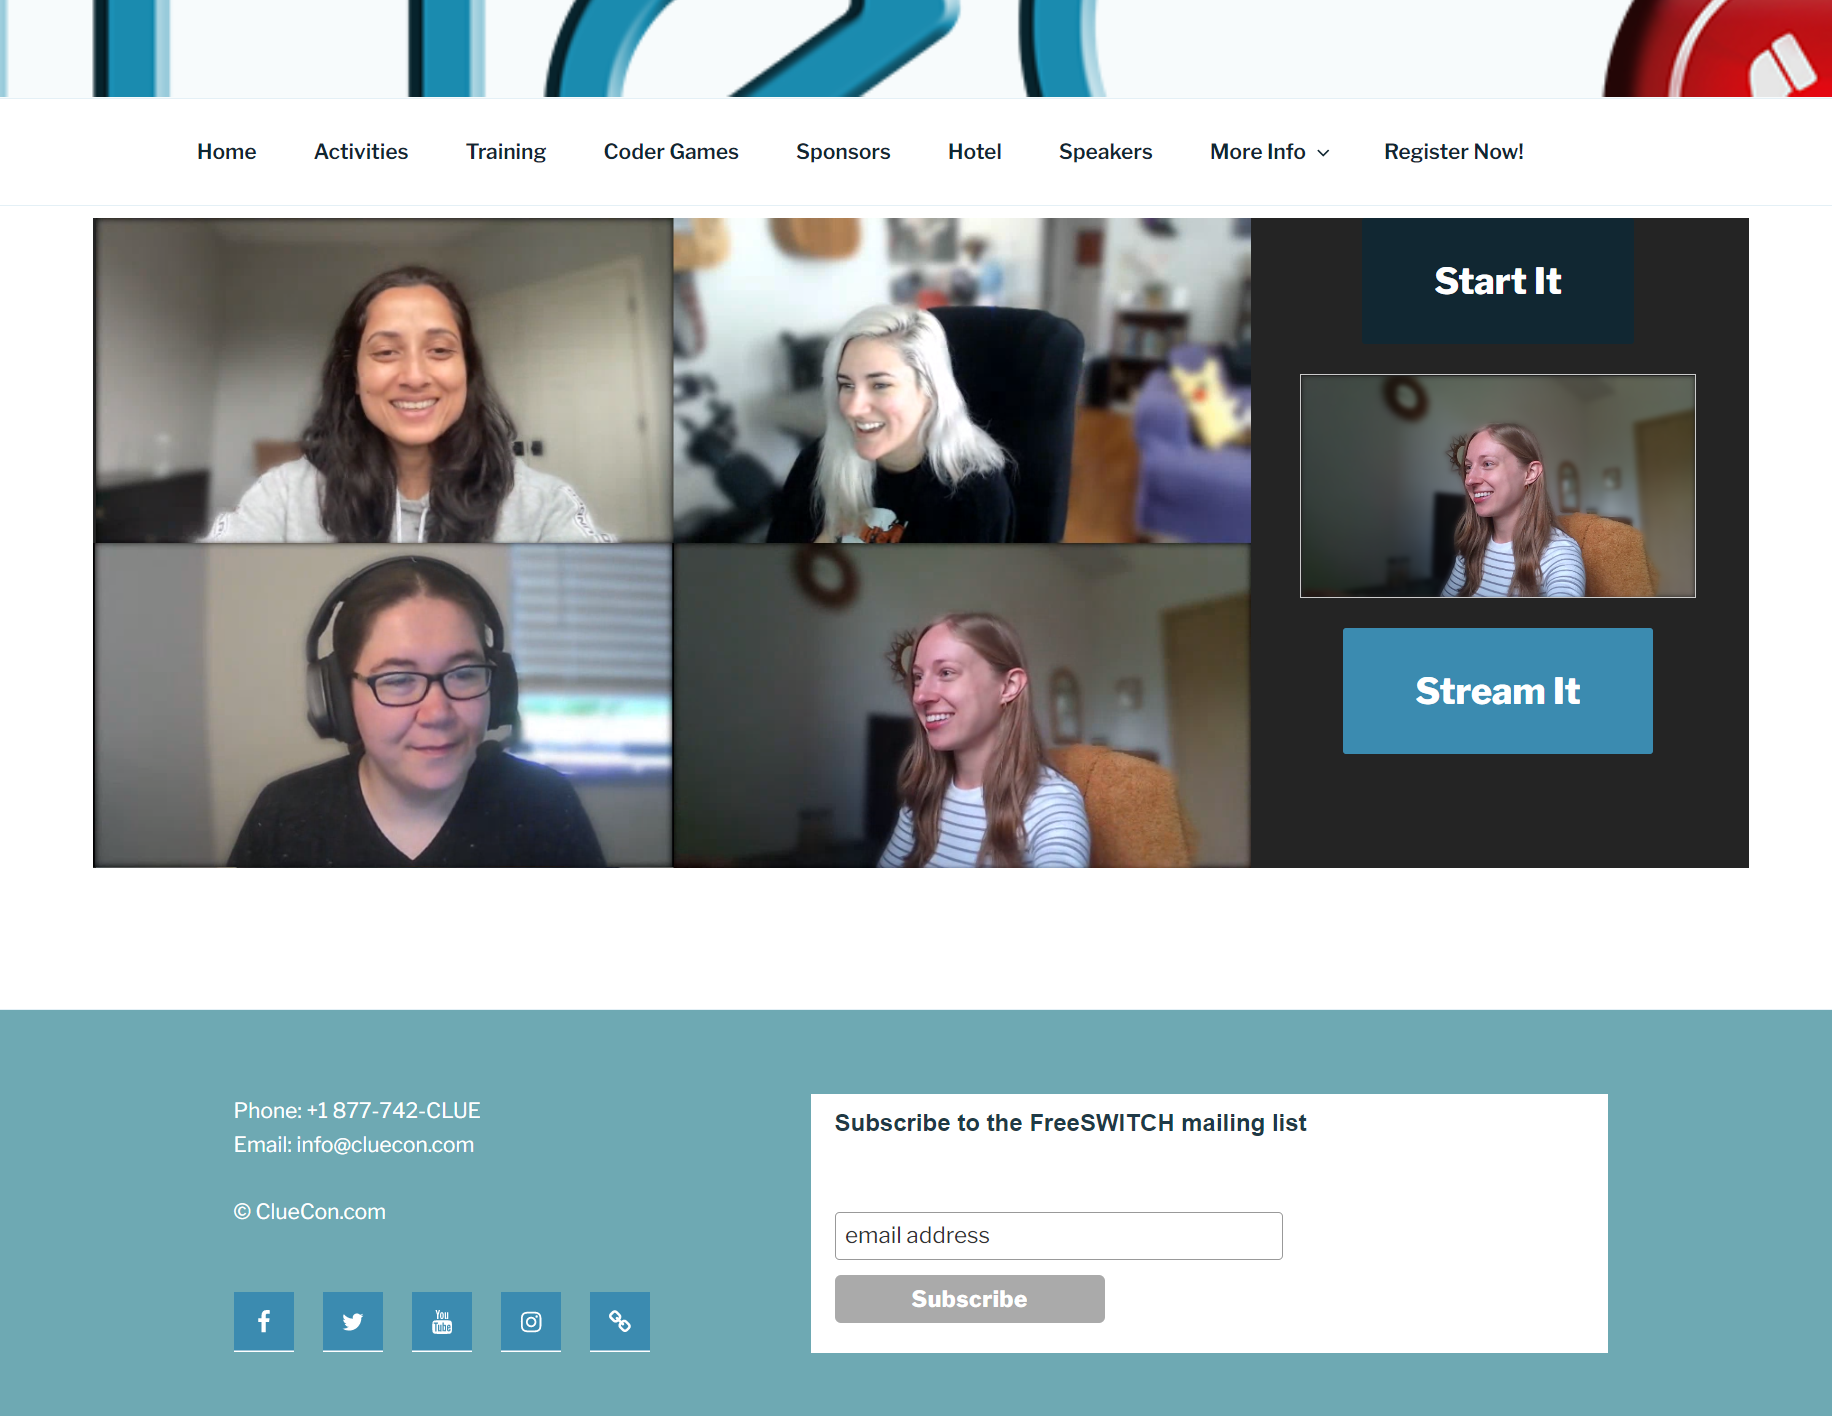
Now my video conference is embedded on the ClueCon website.
This whole project took me a total of maybe five minutes. And that’s because I was pausing to screenshot everything.
Bonus: Adding in background blur made with Google Mediapipe (1-2 minutes)
The unique thing about Programmable Video Conferences: they’re more than basic “low-code” embeds. You can, as the name suggests, write your own code to extend them, add new features to them, and integrate them into other apps.
While most coding is above my skill set, I can borrow sample code that one of my teammates wrote to add other features, like background blur effects made with Google Mediapipe.
Before I tested this out and wrote about it, I knew nothing about machine vision or products like Google Mediapipe. In this case, that was no obstacle.
I went to SignalWire’s repository on GitHub and took the code from the “background-blur” sample app.
All I have to do is copy the code for background-blur, delete the old embed code I was using, and paste the new code into a code block on the ClueCon wordpress website.
Next, I’ll copy the Guest Token from the SignalWire video portal, and paste it into where it says “YOUR_TOKEN” in the code.
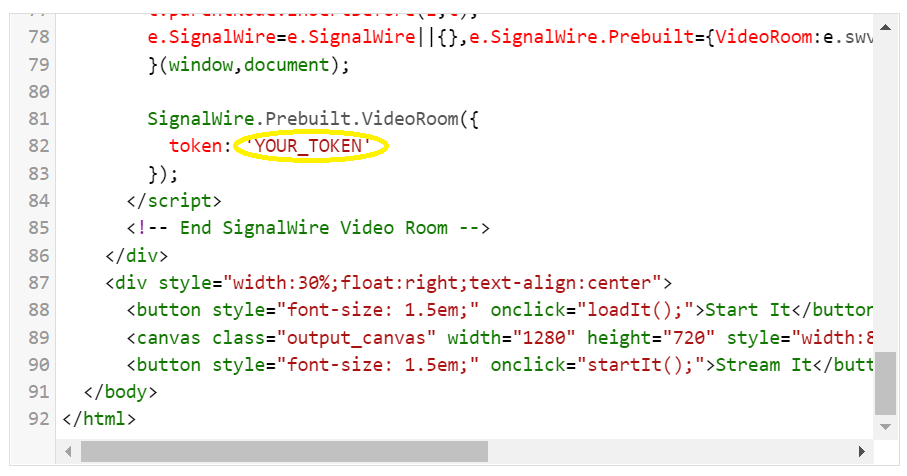
Then I’ll open the page where the new video conference is embedded. Click “Start It” to start the blur function in the preview, and “stream it” to apply it to the stream.
Done.
Now I have a WebRTC video conference that can host up to 50 participants with built-in background blurring from Google Mediapipe, embedded into a Wordpress website.
You can also create more complex, scalable video conferencing tools. If you have questions as you build, bring them to the SignalWire community on Discord.
Frequently Asked Questions
How do you embed a WebRTC video conference into WordPress?
Create a video room in your SignalWire Space, select the option that includes a prebuilt user interface, copy the Guest embed code, then paste it into a WordPress page using a code block.
Do you need to write code to embed a SignalWire video room in WordPress?
No. If you use the prebuilt user interface option, you can embed the room by copying and pasting the provided embed snippet into WordPress.
What is the difference between moderator and guest embed code?
Moderator embed code gives the embedded room moderator permissions. Guest embed code limits permissions for visitors, which helps prevent everyone from joining with full moderator access.
What is a guest token, and when do you use it?
A guest token is a room-specific token used to authorize access to a specific video room. It is commonly used when you plug a token into a sample application or customized embed so the code runs against your room.
How do you add background blur to an embedded video conference?
Use a background blur sample app that integrates Google MediaPipe, replace the basic embed code with the sample embed, then insert your room’s guest token where the code expects a token