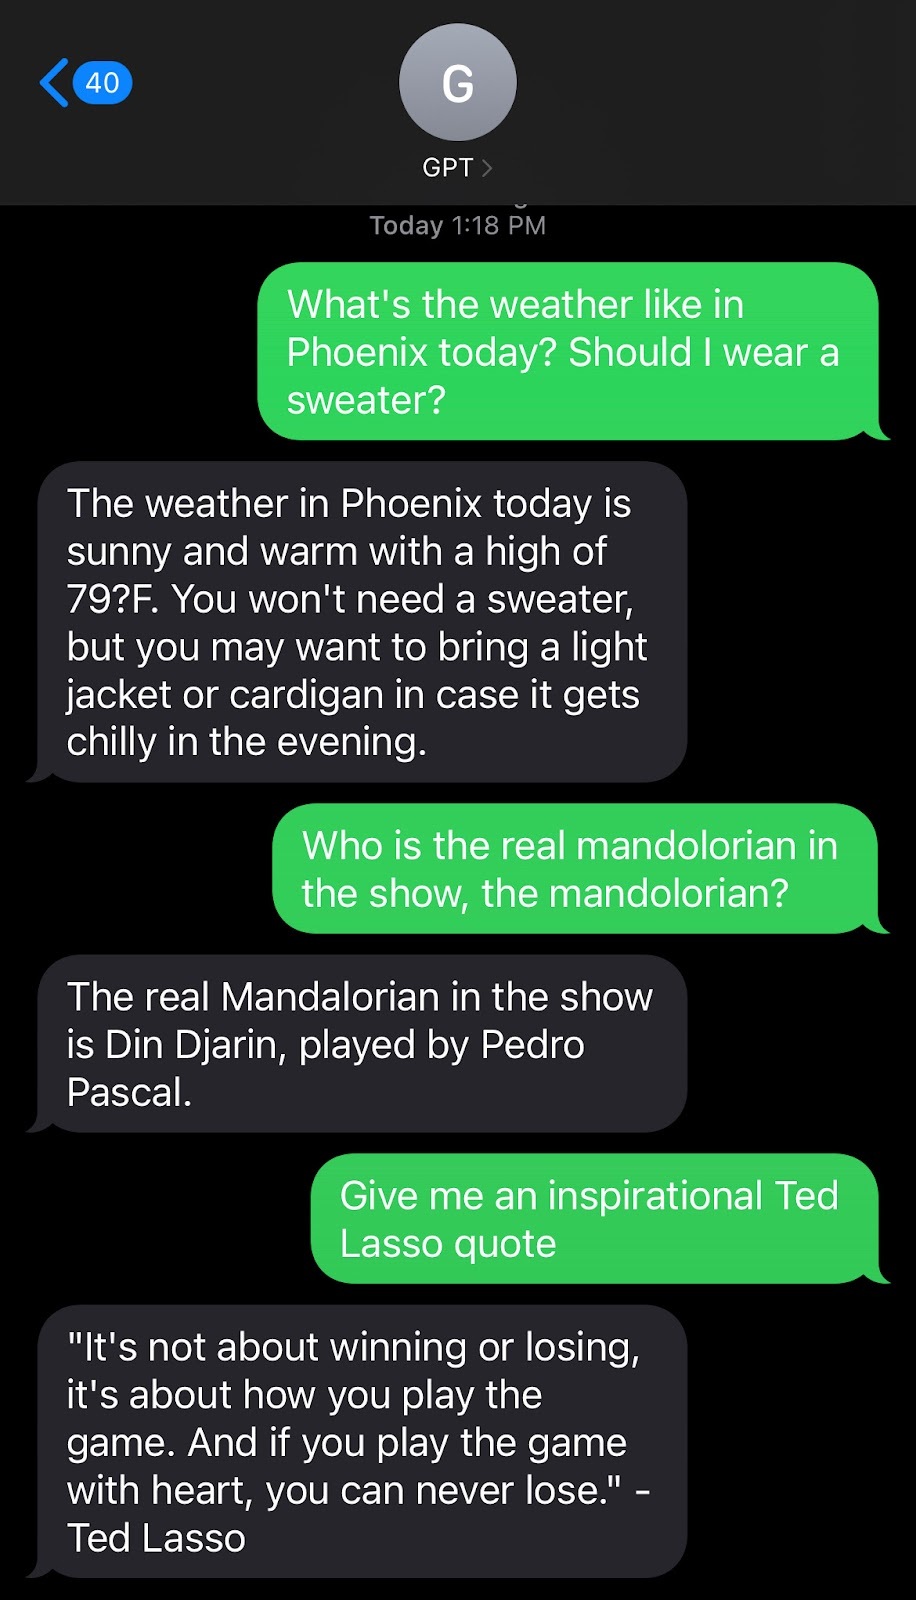
This guide shows how to build an AI-powered textbot that replies to incoming Short Message Service (SMS) messages using OpenAI’s ChatGPT, powered by SignalWire Messaging APIs. It covers the basic architecture, receiving inbound SMS, sending outbound replies, configuring environment variables for SignalWire and OpenAI, and running the bot locally with Node.js or in the browser with Replit. The implementation can also generate an image when a user asks for one, and the post includes a test number and a link to source code.
SignalWire meets ChatGPT
AI is transforming the telecommunications industry rapidly, enabling faster, more personalized, and more efficient communication. With AI-powered chatbots, virtual assistants, and other advanced technologies, telecom providers are able to give their customers a more seamless and intuitive experience.
In this post, we will walk through building an AI-powered Textbot using SignalWire and OpenAI’s ChatGPT. This code snippet creates a textbot that can receive text messages from users and respond with a message generated by ChatGPT, or it can generate an image based on the user's request.
You can find the source code on SignalWire’s Replit Live Code Repository or test it out by sending an SMS message to +1 205-796-6268.
Building the textbot
To run this on your own system, you will need the following:
SignalWire account with a Project ID, API Token, and SignalWire Space URL
OpenAI API Key
Node.js installed on your computer, or run in the browser with Replit
If you’re running the application locally, start by downloading the code as a .zip file from Replit, and then navigate to the directory in your environment. Rename the SAMPLE.env file in the root directory and add the environment variables.
To run the application on Replit, fork the repository and then enter in your environment variables by renaming the SAMPLE.env file, or by using the secrets feature.
You will need to replace the following variables:
OPENAI_API_KEY=Obtained from OpenAI
SIGNALWIRE_NUMBER=Phone number in the format +1XXXXXXXXX
PROJECT_ID=Obtained from SW Dashboard
API_TOKEN=Obtained from SW Dashboard
SIGNALWIRE_SPACE_URL=Obtained from SW Dashboard
Understanding the code
The index.js file contains the implementation of the chatbot. It starts by initializing the SignalWire RestClient from the @signalwire/compatibility-api library. This library provides a Node.js wrapper for the SignalWire API.
We’ll create a function called sendTextMessage that sends a text message to the user with the SignalWire client's messages.create() method. This function takes in the body of the message, the recipient's phone number, an array of media, and the SignalWire phone number to send the message from.
After setting up the SignalWire client and the sendTextMessage function, we’ll create an instance of the express framework and start listening on our port. We also create two routes, /sms and /image, for incoming messages and requests for images, respectively.
The /sms route listens for incoming text messages and sends the message body to the OpenAI API for a response. The response is then sent back to the user with the sendTextMessage function.
The /image route listens for incoming requests for images and sends the request body to the OpenAI API for an image response. The URL of the generated image is then sent back to the user using the sendTextMessage function.
Next, we’ll start the server by running npm run start or node index.js.
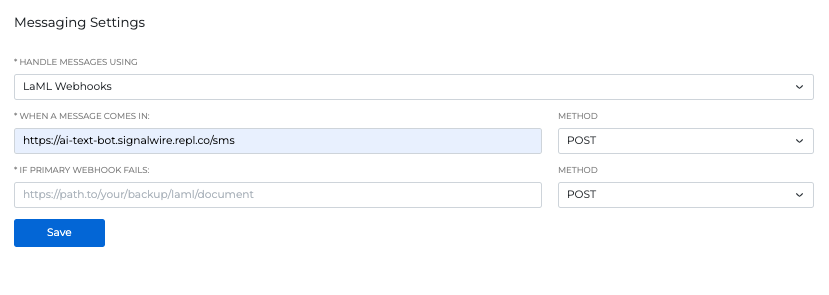
Lastly, we need to assign our webhook to a SignalWire phone number through the settings of your chosen number. Obtain the webhook created from Replit or from your environment tunnel and enter it in the WHEN A MESSAGE COMES IN field.
Now you can text the OpenAI bot from any cell phone or personal device. By using SignalWire and the OpenAI API, you can easily implement an AI-powered chatbot that can respond to customer queries, generate personalized content, and provide timely and efficient services.
We want to see what you build with SignalWire! If you have any questions while getting started, stop by our Community Discord to connect with our team. You can also reach out to sales@signalwire.com with questions about pricing or specific products.
Frequently asked questions
How do you text with ChatGPT from a phone number?
Connect an SMS-capable phone number to a webhook that receives inbound messages, send the message text to the OpenAI API, then return the model’s response as an outbound SMS reply.
What do you need to build an SMS chatbot with SignalWire and OpenAI?
You need a SignalWire account with a Project ID, API token, and SignalWire Space URL, plus an OpenAI API key, and a runtime such as Node.js or a browser environment like Replit.
How does a bot send SMS replies with SignalWire?
A common pattern is using the SignalWire Compatibility API RestClient and sending messages with the messages.create() method, including the destination number, source number, and message body.


