
API credentials
The API credentials found on this page are your key to accessing SignalWire’s APIs and SDKs.
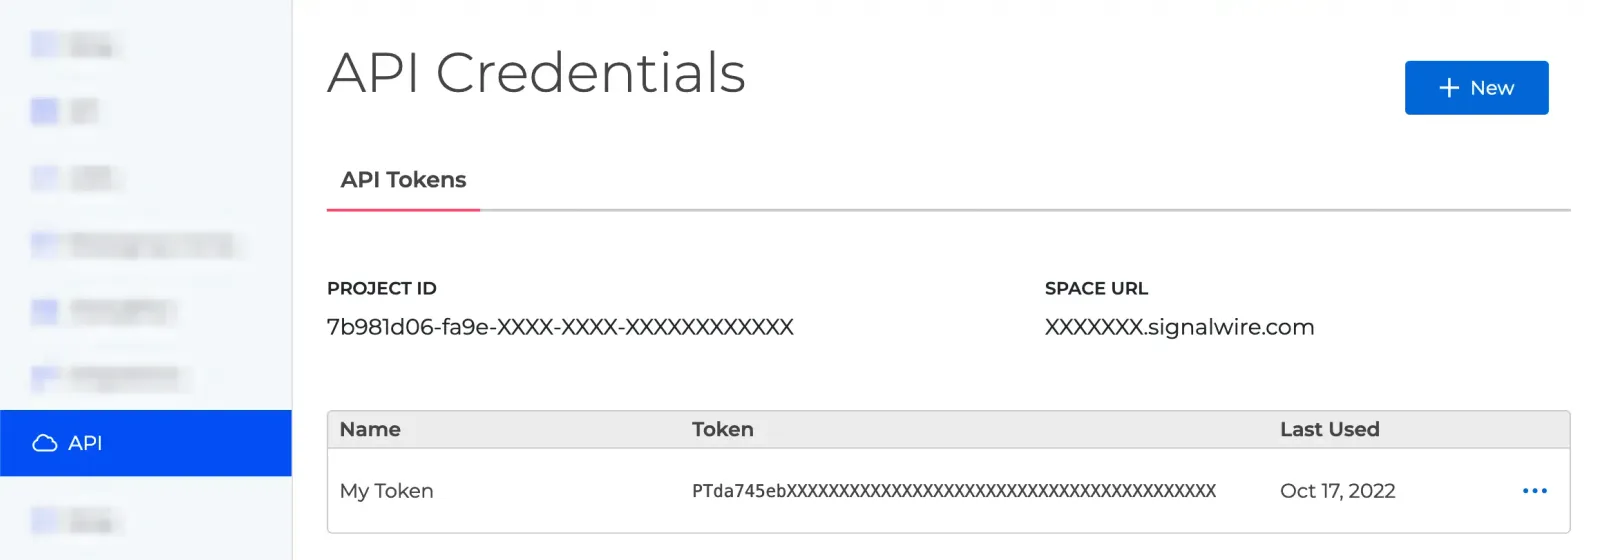
Most SignalWire API endpoints require authentication using HTTP Basic Auth. HTTP Basic Authentication requires you to send an Authorization header with your Project ID and API Token.
Each Project has its own Project ID and API Authentication Tokens you will need to use when making a request to the API. Some methods will also require you to pass your Space URL. Subprojects work the same way: each one has its own Project ID and tokens, and a root Project can issue a token for one of its Subprojects with Create API token.
- Project ID: Use this UUID to specify your Project to the API.
- Space URL: Use this URL to access SignalWire APIs.
For example:
https://{Your_Space_Name}.signalwire.com/api/calling/calls - API Tokens: Authentication tokens to access the API. You can have multiple tokens for each Project.
An API token acts for one Project. To administer the Space itself over the API, such as managing members, the balance, or billing, or to create a root Project, use a Personal access token instead. It is created from your user menu in the Dashboard rather than on this page, and it carries your owner or admin role instead of a Project’s scopes.
API tokens are protected and used server-side to access the API. The tokens we refer to when using Video, Chat, or Fabric products in the browser are not the same tokens we generate and store here. Instead, you use your API token to call an endpoint that generates a client-side token:
- Video Room Tokens: Generated via the Create Room Token endpoint.
- Chat Tokens: Generated for chat applications via the Create Chat Token endpoint.
- Subscriber Access Tokens (SAT): Generated via the Create Subscriber Token endpoint for Fabric applications.
For more details on authentication methods, see the REST API Authorization guide.
Generate a new API token
To generate a new API token, click the blue ”+ New” button. A “New API Token” form will open. Give your token a descriptive name to help differentiate it in logs and for debugging.
You can edit the token name and allowed scopes later by clicking the ⋯ button and selecting “Edit.” You may also delete a token from the same dropdown menu or the Edit page.
To replace a token’s value over the API without changing its name or scopes, use Regenerate API token. The previous value stops working immediately, so update everything that uses it with the new value from the response. List API tokens returns each token’s ID and when it last authenticated a request, but never its value.
Token format
New API tokens begin with swapi_ and are 42 characters long. Tokens created earlier begin
with PT and are 50 characters long. Both formats authenticate the same way, and a Project
can hold tokens in both formats at the same time.
Existing PT tokens are not deprecated and have no end date, so there is nothing to migrate.
Treat a token as an opaque string. Don’t parse it, match it against a pattern, or assume a fixed length, in either format.
Token scopes
API tokens can be configured with specific scopes that limit which APIs the token can access. When creating or editing an API token in the Dashboard, you can select which scopes to enable under the “Permissions” section.
For security best practices, only enable the scopes your application actually needs. This limits the potential impact if a token is compromised.
If your API request returns a 401 Unauthorized error,
verify that your API token has the required scope enabled for that endpoint
in the Dashboard.
Use an API token
All API requests must be made with proper authentication over HTTPS. Calls made over plain HTTP or without auth will fail.
Find the correct credentials structure for each specific call in the SDK Reference, REST API Reference, or in a specific Guide you may wish to follow.
For example, list video rooms with the REST client in the Server SDKs, or call the REST API directly:
Server SDKs
cURL
Node.js
Signing key
The Signing Key on this page is the secret SignalWire uses to sign the requests it sends to your webhooks. It appears once the Project has at least one API token. Select Show to reveal and copy it, then use it to verify webhook signatures.
New signing keys begin with swpsk_ and are 42 characters long. Keys created earlier begin with
PSK_ and are 28 characters long. Both formats sign and verify webhooks the same way, and existing
PSK_ keys keep working with nothing to reset or migrate.
After you select Show, Reset replaces the current key with the next key, which the confirmation dialog shows before you proceed. Rotate signing key promotes the same next key through the API. Either way, the new key takes a minute or two to become active, and until then requests can still arrive signed with the old key. Update your verification code to accept a signature that verifies with either key during that window, then remove the old key.
Because that next key already exists, a Project created before the swpsk_ format can receive a
PSK_ key from its first reset or API rotation.
Treat a signing key as an opaque string. Signature verification uses the whole key, so don’t parse it, match it against a pattern, or assume a fixed length.