
FreePBX
Using FreePBX and taking advantage of SignalWire’s disruptive pricing on DIDs and voice minutes is almost too easy.
Create a SIP Credential
FreePBX registers with SignalWire using a SIP Credential, the username and password SIP devices use to connect to your Space. If you don’t have one yet, create a SIP Credential and assign a phone number to it so inbound calls reach FreePBX.
Adjust the SIP Credential for FreePBX
Open the SIP Credential in the SignalWire Dashboard and update two settings on its Configuration tab so it works well with FreePBX, then deploy:
- Set Encryption to Required.
- Under Codecs and Ciphers, select Custom Ciphers and clear AEAD_AES_256_GCM_8. Asterisk supports this cipher only when it is built against a libsrtp with AES-GCM support and with its AES GCM and AES 256 SRTP build options turned on. Both build options are off by default.
- Select Deploy to save the changes.
Below the URI field, the same tab shows the SIP Credential’s full SIP address, in the form username@YOURSPACE-123456abc.sip.signalwire.com, with a copy button. You need both parts of it when you configure the trunk. The Dashboard doesn’t display the password; use the one you set when you created the SIP Credential, or set a new one with Change Password and select Deploy.
Configure Asterisk
Add a SIP (PJSIP) trunk, and on the General tab enter the following:
Trunk Name: SignalWire (Can be anything you want)
Outbound CallerID: 1-469-FREEPBX (the DID you purchased)
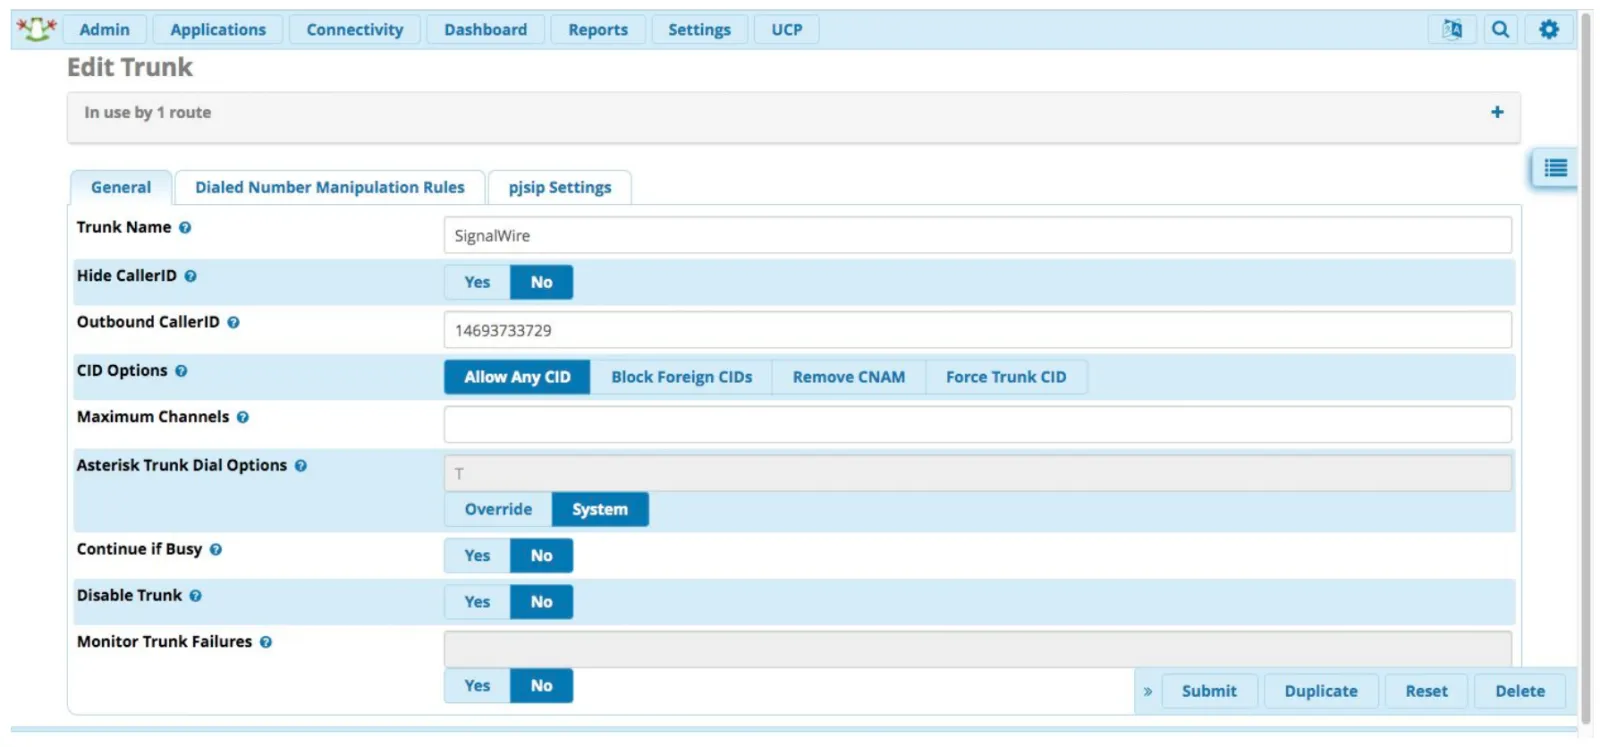
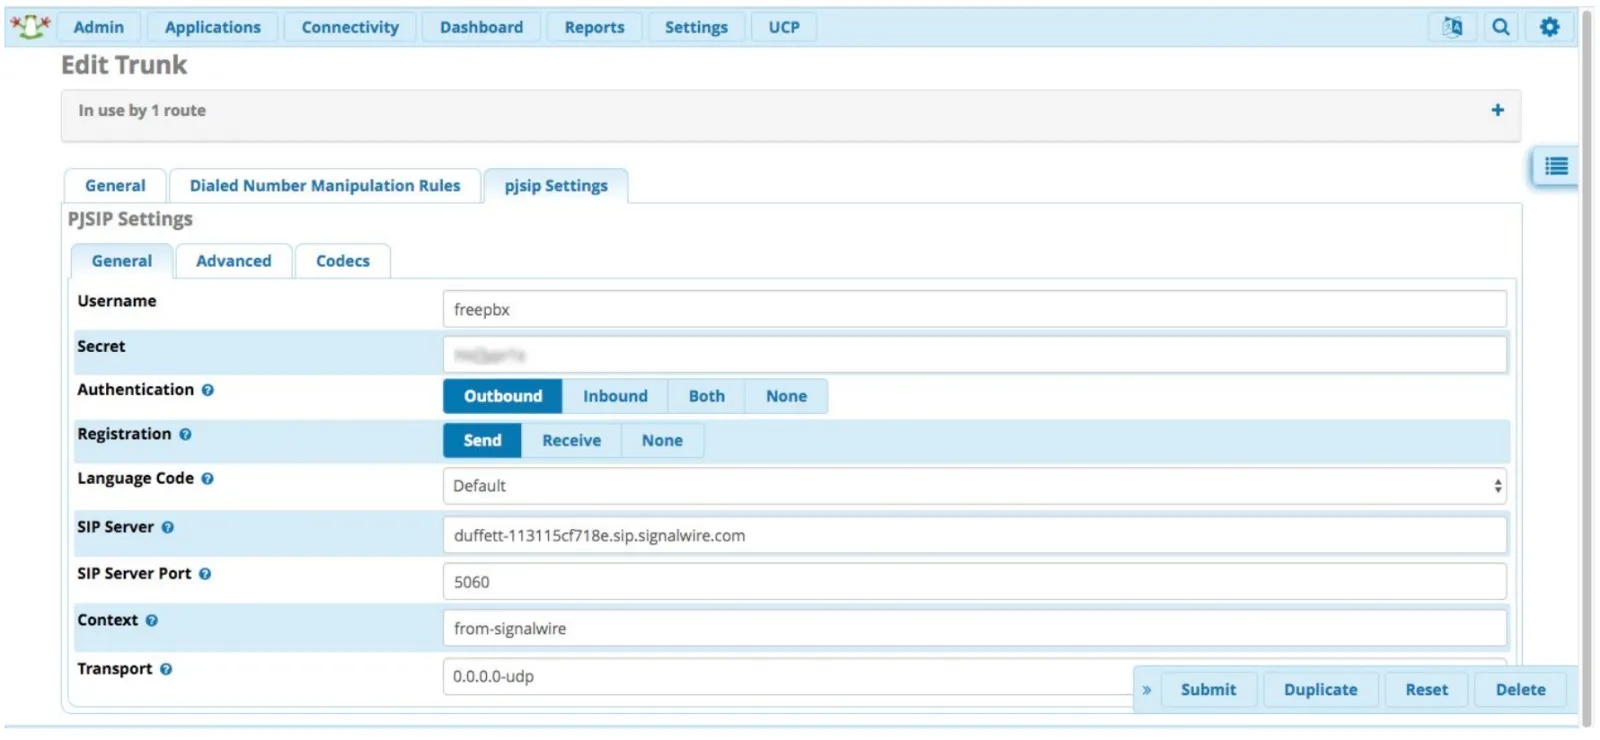
Then, on the PJSIP Settings tab and the General sub-tab, enter the following:
Username: freepbx (the URI of your SIP Credential, the part of its SIP address before the @)
Secret: (the password you set on your SIP Credential)
SIP Server: YOURSPACE-123456abc.sip.signalwire.com (the domain of your SIP Credential’s SIP address, the part after the @)
SIP Server Port: 5060 (standard SIP port)
Context: from-signalwire (default is ‘from-pstn’, but you must change it)
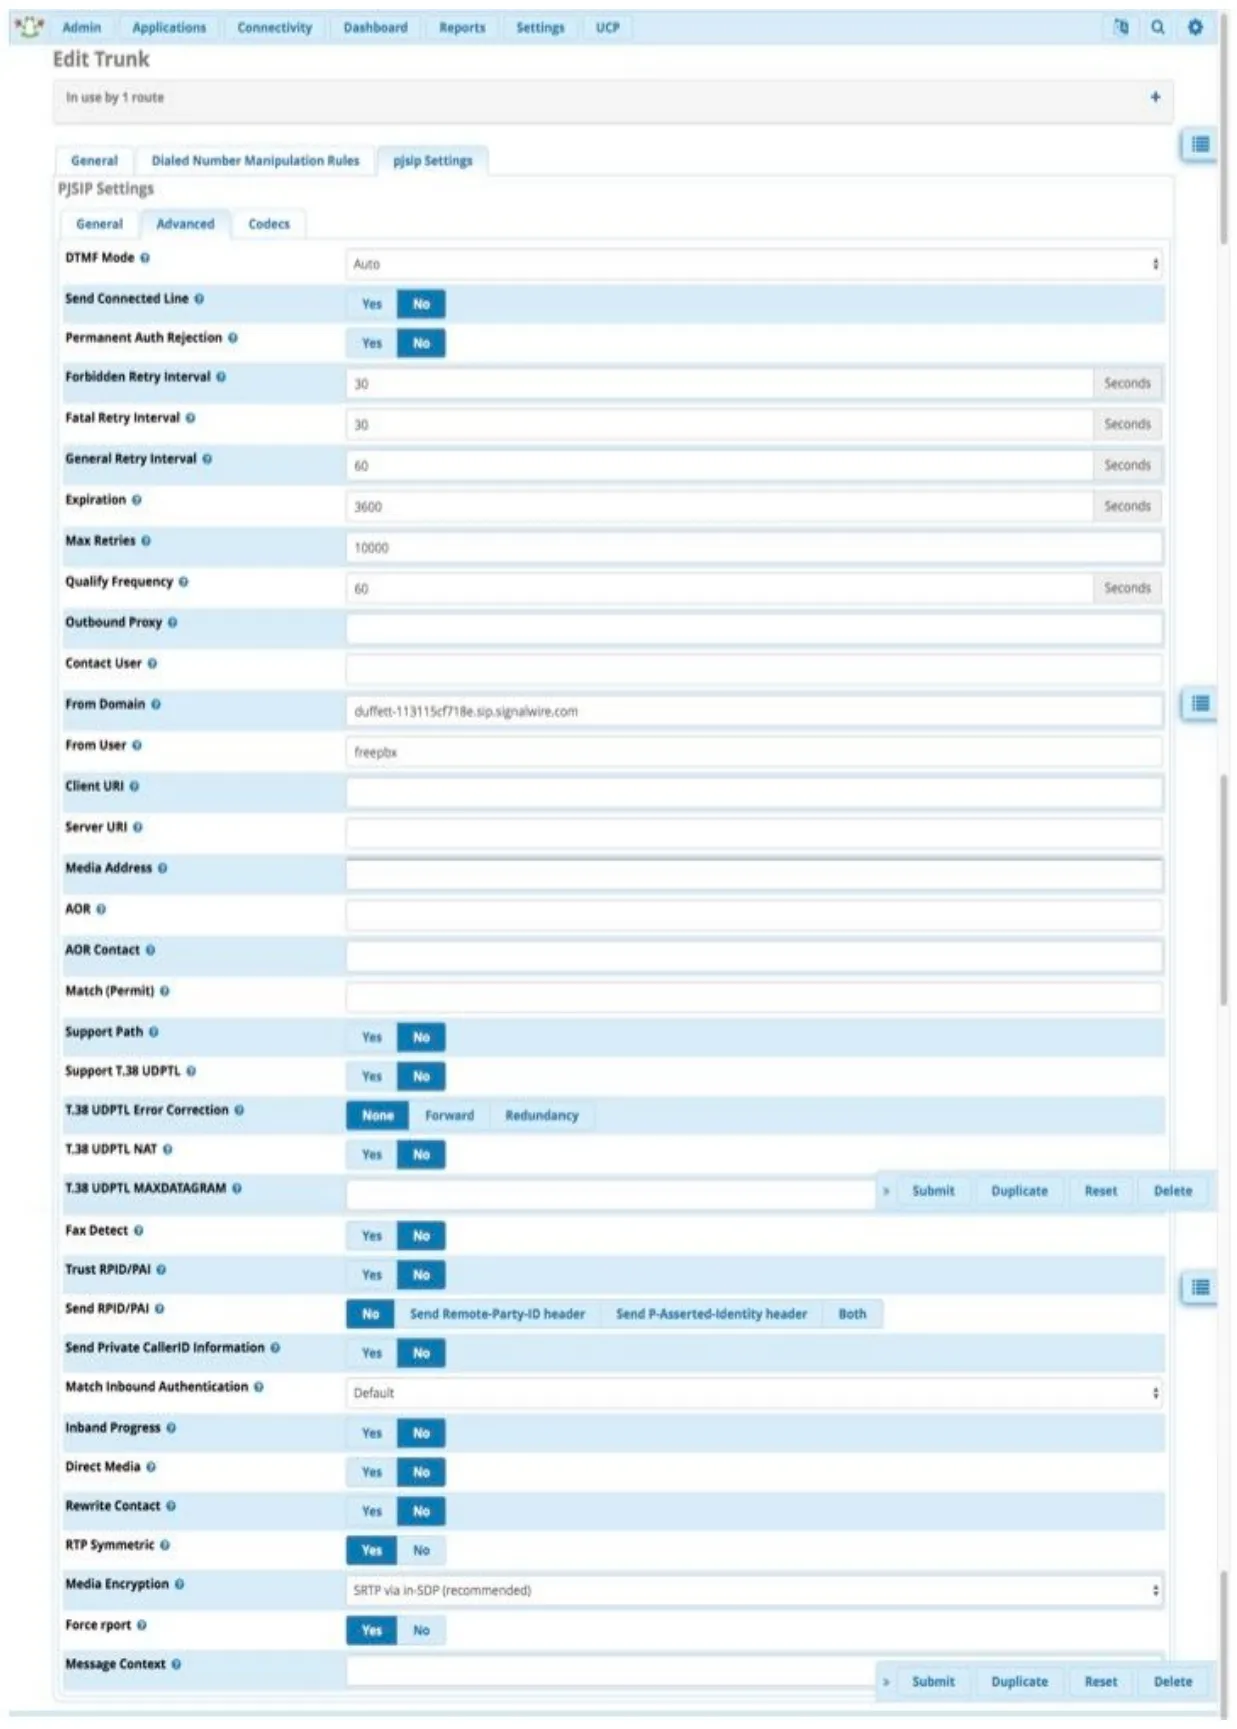
As the last step on this screen, on the PJSIP Settings tab and the Advanced sub-tab, the following three settings:
From Domain: YOURSPACE-123456abc.sip.signalwire.com (the domain of your SIP Credential’s SIP address)
From User: freepbx (the URI of your SIP Credential)
Media Encryption: SRTP via in-SDP (select from drop-down)
Now your trunk is all set up!
Setting up the Dial Plan
There is a small amount of dialplan script to add (which we will place in a context called “from-signalwire” - remember, we set this in the above steps), in order to extract the dialed number from the SIP Header, before passing the call to FreePBX for normal processing.
We do this by entering the following lines in a file called extensions_custom.conf (which may be empty) using the inbuilt config editor in the Admin menu:
The editor is at Admin > Config Edit > extensions_custom.conf:
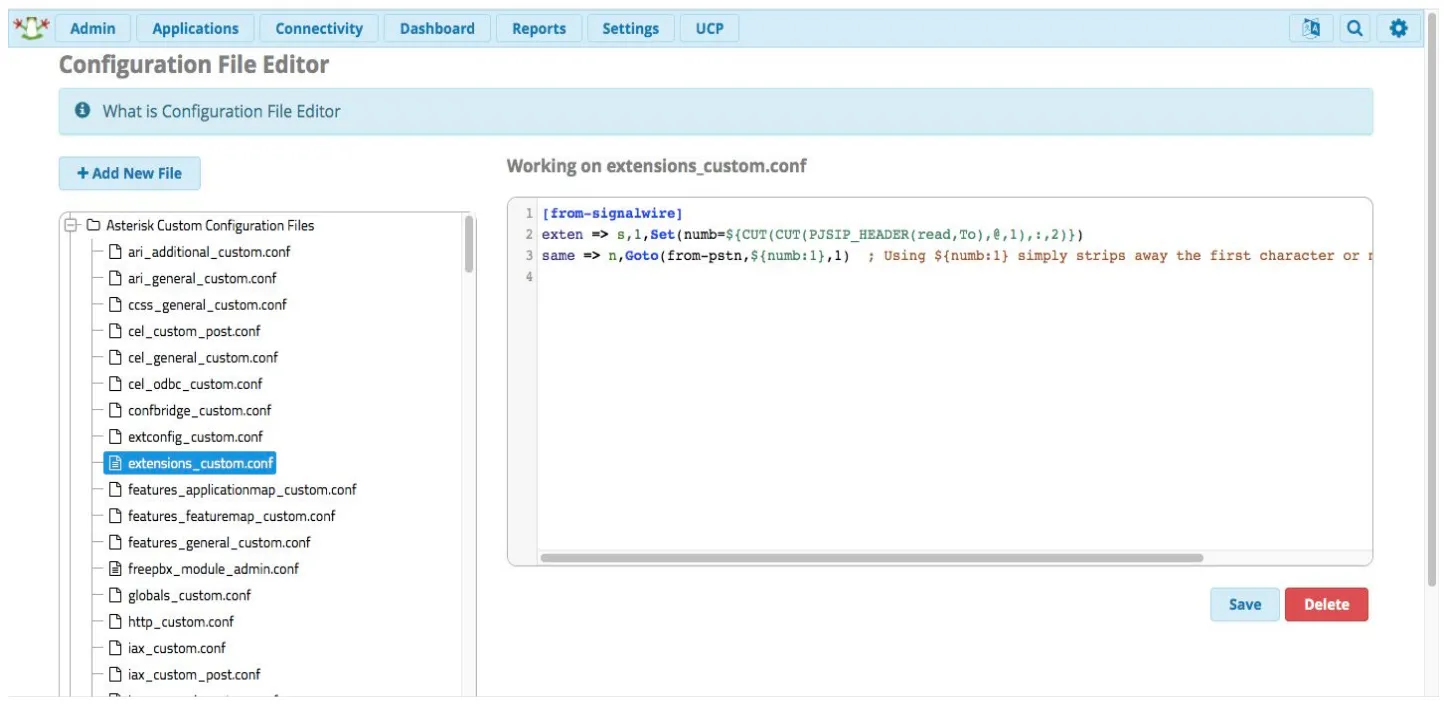
Now just set up your inbound routing (the DID will be in the format 12223334444) and your outbound routing as normal.
That’s all there is to it! You should now be able to make outbound calls over your SignalWire SIP trunk and accept incoming calls to the number you purchased.