***
id: 80fec1fc-b153-474f-801b-8cd4aecb1566
slug: /guides/ivr
title: Simple IVR
description: Learn how to create a simple IVR with SWML.
x-custom:
tags:
* favorite
* 'sdk:swml'
* 'product:voice'
max-toc-depth: 3
***
In this tutorial, we will demonstrate how to build a Simple IVR (Interactive Voice Response) using SWML (SignalWire Markup Language).
SWML enables you to create RELAY applications using a descriptive format without the need for additional infrastructure like your own server.
## Getting started
Before proceeding ahead with this tutorial, you should be familiar with the [Making and Receiving Phone Calls](/docs/swml/guides/make-and-receive-calls#swml) guide.
This resource will offer you step-by-step instructions on how to create a SWML script directly on your [SignalWire SWML Dashboard](https://my.signalwire.com?page=relay-bins).
The first crucial step is to have a SignalWire Space. Begin by [signing up now to get started](https://signalwire.com/signups/new).
In this guide we will create an IVR with SWML that takes a prompt from the user and directs callers to the appropriate resource.
```yaml
version: 1.0.0
sections:
main:
- answer: {}
- play:
urls:
- >-
say:Welcome to the Vance Refrigerator Corporation. For Quality
assurance this call maybe recorded
- record_call:
stereo: true
format: wav
- prompt:
play: >-
say:Press 1 to talk to sales, Press 2 to talk to Support, Press 3 to
talk to a Customer Representative
say_language: en-US
max_digits: 1
speech_hints:
- one
- two
- three
- switch:
variable: prompt_value
case:
'1':
- execute:
dest: sales
'2':
- execute:
dest: support
'3':
- execute:
dest: customer
one:
- execute:
dest: sales
two:
- execute:
dest: support
three:
- execute:
dest: customer
default:
- execute:
dest: sales
sales:
- play:
url: 'say:You have reached sales'
- connect:
to: +1XXXXXXXXXX
support:
- play:
url: 'say:You have reached support'
- connect:
to: +1YYYYYYYYYY
customer:
- play:
url: 'say:You have reached a Customer representative'
- connect:
to: +1ZZZZZZZZZZ
```
```json
{
"version": "1.0.0",
"sections": {
"main": [
{
"answer": {}
},
{
"play": {
"urls": [
"say:Welcome to the Vance Refrigerator Corporation. For Quality assurance this call maybe recorded"
]
}
},
{
"record_call": {
"stereo": true,
"format": "wav"
}
},
{
"prompt": {
"play": "say:Press 1 to talk to sales, Press 2 to talk to Support, Press 3 to talk to a Customer Representative",
"say_language": "en-US",
"max_digits": 1,
"speech_hints": [
"one",
"two",
"three"
]
}
},
{
"switch": {
"variable": "prompt_value",
"case": {
"1": [
{
"execute": {
"dest": "sales"
}
}
],
"2": [
{
"execute": {
"dest": "support"
}
}
],
"3": [
{
"execute": {
"dest": "customer"
}
}
],
"one": [
{
"execute": {
"dest": "sales"
}
}
],
"two": [
{
"execute": {
"dest": "support"
}
}
],
"three": [
{
"execute": {
"dest": "customer"
}
}
]
},
"default": [
{
"execute": {
"dest": "sales"
}
}
]
}
}
],
"sales": [
{
"play": {
"url": "say:You have reached sales"
}
},
{
"connect": {
"to": "+1XXXXXXXXXX"
}
}
],
"support": [
{
"play": {
"url": "say:You have reached support"
}
},
{
"connect": {
"to": "+1YYYYYYYYYY"
}
}
],
"customer": [
{
"play": {
"url": "say:You have reached a Customer representative"
}
},
{
"connect": {
"to": "+1ZZZZZZZZZZ"
}
}
]
}
}
```
To put this script into action right away, simply copy it into a [new SWML script](https://my.signalwire.com?page=relay-bins/new),
replace placeholders with your information, and save it with a descriptive name so you can assign a phone number to run it.
Below, we will dissect each section and method of this script to gain a clear understanding of its purpose and functionality.
### Sections
Each SWML script comprises a "sections" field, which serves as a mapping of named sections for execution.
The initial execution always begins with the "main" section.
It is essential to include a "main" section in the document at all times.
Firstly, we "answer" the call.
Then, we proceed by using the [`play`](/docs/swml/reference/play) method to welcome our customer and provide them with a simple menu to choose from.
Afterward, we initiate the call recording using [`record_call`](/docs/swml/reference/record-call).
```yaml
version: 1.0.0
sections:
main:
- answer: {}
- play:
urls:
- >-
say:Welcome to the Vance Refrigerator Corporation. For Quality
assurance this call maybe recorded
- record_call:
stereo: true
format: wav
```
```json
{
"version": "1.0.0",
"sections": {
"main": [
{
"answer": {}
},
{
"play": {
"urls": [
"say:Welcome to the Vance Refrigerator Corporation. For Quality assurance this call maybe recorded"
]
}
},
{
"record_call": {
"stereo": true,
"format": "wav"
}
}
]
}
}
```
### Gather Input
Still in the "main" section, we use the [`prompt`](/docs/swml/reference/prompt) method to collect digits from the end user:
`1` for Sales, `2` for Support and `3` for a Customer representative.
```yaml
- prompt:
play: >-
say:Press 1 to talk to sales, Press 2 to talk to Support, Press 3 to talk
to a Customer Representative
say_language: en-US
max_digits: 1
speech_hints:
- one
- two
- three
```
```json
[
{
"prompt": {
"play": "say:Press 1 to talk to sales, Press 2 to talk to Support, Press 3 to talk to a Customer Representative",
"say_language": "en-US",
"max_digits": 1,
"speech_hints": [
"one",
"two",
"three"
]
}
}
]
```
### Conditional Handling
SWML provides you with ability to use conditional statements with the result from `prompt`.
In this final part of the "main" section, we use [`switch`](/docs/swml/reference/switch) to direct a caller to Sales in the case of a response of 1, Support for a response of 2, and a connects to a representative in the case of a response of 3.
Within each switch case, we use the [`execute`](/docs/swml/reference/execute) method to execute another section of our script.
```yaml
- switch:
variable: prompt_value
case:
'1':
- execute:
dest: sales
'2':
- execute:
dest: support
'3':
- execute:
dest: customer
one:
- execute:
dest: sales
two:
- execute:
dest: support
three:
- execute:
dest: customer
default:
- execute:
dest: sales
```
```json
[
{
"switch": {
"variable": "prompt_value",
"case": {
"1": [
{
"execute": {
"dest": "sales"
}
}
],
"2": [
{
"execute": {
"dest": "support"
}
}
],
"3": [
{
"execute": {
"dest": "customer"
}
}
],
"one": [
{
"execute": {
"dest": "sales"
}
}
],
"two": [
{
"execute": {
"dest": "support"
}
}
],
"three": [
{
"execute": {
"dest": "customer"
}
}
]
},
"default": [
{
"execute": {
"dest": "sales"
}
}
]
}
}
]
```
### Connecting Call
After the user makes a selection, they are directed to dedicated sections **sales**, **support**, or **customer**, triggering an outbound call to the corresponding department or agent.
This seamless integration is achieved through the [`connect`](/docs/swml/reference/connect) method, where the "to" parameter is the department or agent's phone number.
You will want to either replace these values in your script or add environmental variables.
```yaml
sales:
- play:
url: say:You have reached sales
- connect:
to: "+1XXXXXXXXXX"
support:
- play:
url: say:You have reached support
- connect:
to: "+1YYYYYYYYYY"
customer:
- play:
url: say:You have reached a Customer representative
- connect:
to: "+1ZZZZZZZZZZ"
```
```json
{
"sales": [
{
"play": {
"url": "say:You have reached sales"
}
},
{
"connect": {
"to": "+1XXXXXXXXXX"
}
}
],
"support": [
{
"play": {
"url": "say:You have reached support"
}
},
{
"connect": {
"to": "+1YYYYYYYYYY"
}
}
],
"customer": [
{
"play": {
"url": "say:You have reached a Customer representative"
}
},
{
"connect": {
"to": "+1ZZZZZZZZZZ"
}
}
]
}
```
### Testing
To put our creation to the test, make sure your script is saved to your Resource, or your SWML scripts with a recognizable name.
Then we'll purchase a phone number from our [SignalWire Space](https://my.signalwire.com?page=phone_numbers/new) to run it.
Follow the [Buying a Phone Number](/docs/platform/phone-numbers) if you need help.
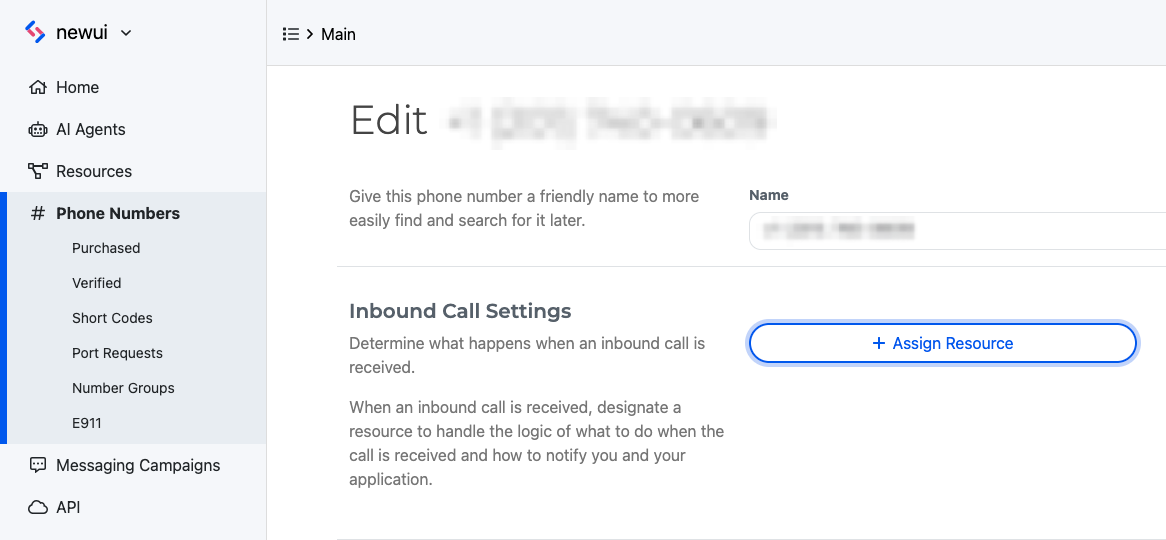
Once you have your phone number, we can assign our newly crafted SWML Script resource to handle incoming calls for that number.
Upon calling the assigned phone number, our script will execute, and you should hear the instructions running as intended.
This exciting step will allow us to experience firsthand the interactive capabilities of our SWML-based IVR system.
In just a matter of minutes, we have successfully crafted a basic IVR system using SWML script.
This powerful yet straightforward solution opens up a world of possibilities for enhancing customer interactions and streamlining communication processes.
With SWML's versatility, you can now explore more advanced features and build even more sophisticated applications to suit your specific business needs.
The journey to creating efficient and interactive voice responses has just begun, so explore our options and craft your perfect solution today.
# Reference
* [SWML Technical Reference](/docs/swml)