***
id: bee197e9-d7e9-4cc4-a747-095bb0f35eb9
title: First steps with fax
sidebar-title: Overview
slug: /fax
position: 0
description: Learn how to send and receive your first fax using SignalWire's APIs
x-custom:
tags:
* 'language:javascript'
* 'language:python'
* 'language:csharp'
* 'language:php'
* 'language:ruby'
* 'sdk:compatibility'
* 'product:fax'
***
Prototype, build, and deploy fax applications quickly and at competitive rates
using our APIs and SDKs as well as the lightweight SignalWire Markup Language ("SWML").
SignalWire Fax is certified
[**SOC 2 Type II**](https://signalwire.com/blogs/industry/soc-2-type-ii-attestation)
compliant, and is built from the ground up for seamless
**HIPAA**
compliance.
***
Learn how to send and receive your first fax using SignalWire.
You'll configure a phone number, create SWML scripts to handle faxes, and use SWML or our APIs to send faxes programmatically.
## Prerequisites
Before you begin, you'll need:
* A [SignalWire account](https://signalwire.com/signup)
* At least one phone number capable of receiving faxes
* Your [API credentials](https://my.signalwire.com/credentials) (Space URL, Project ID, and API token)
## Receiving your first fax
To receive faxes, you'll configure a phone number to handle incoming faxes using a SWML script that defines what happens when a fax arrives.
### Obtain a phone number
First, you need a SignalWire phone number capable of receiving faxes.
[Log in](https://signalwire.com/signin) to your SignalWire Space.
If you don't have a number yet, navigate to the Phone Numbers section and [buy a new phone number](/docs/platform/phone-numbers).
### Create a script
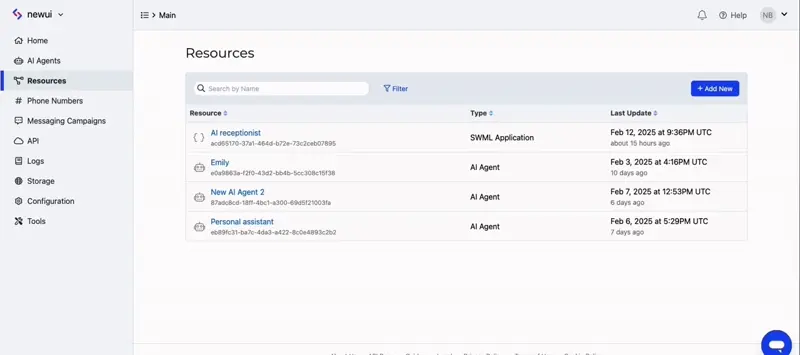
From your [SignalWire Dashboard](https://my.signalwire.com/dashboard), create a new Resource by navigating to the resources tab, then select the "New Script" option and choose "New SWML application".
Paste the following code into your script:
```yaml
version: 1.0.0
sections:
main:
- receive_fax: {}
```
Save the script. It should now be located in your **Resources** tab on the left sidebar, under **Scripts**.
Follow the above guide with these changes:
**Create a SWML Script**
Navigate to the "RELAY/SWML" section of your Dashboard and create a new SWML Script.
**Assign a phone number**
Open the settings for your phone number. Under "Voice and Fax Settings":
* Set "Accept Incoming Calls As" to "Fax"
* Set "Handle Faxes Using" to "SWML Script"
* Select your SWML Script from the dropdown for "When a Fax Comes In"
{/* Shared component: UI Accordion for new vs legacy dashboard */}
**New Dashboard**: You have a **Resources** tab in the left sidebar.
**Legacy Dashboard**: You have separate tabs for SIP, LaML, RELAY, etc.
### Configure phone number
Navigate to the "Phone Numbers" tab on the left sidebar.
From this tab, click on your newly purchased phone number, then on the "edit settings" option.
In the settings page that appears, select "Assign Resource" for "Inbound Call Settings".
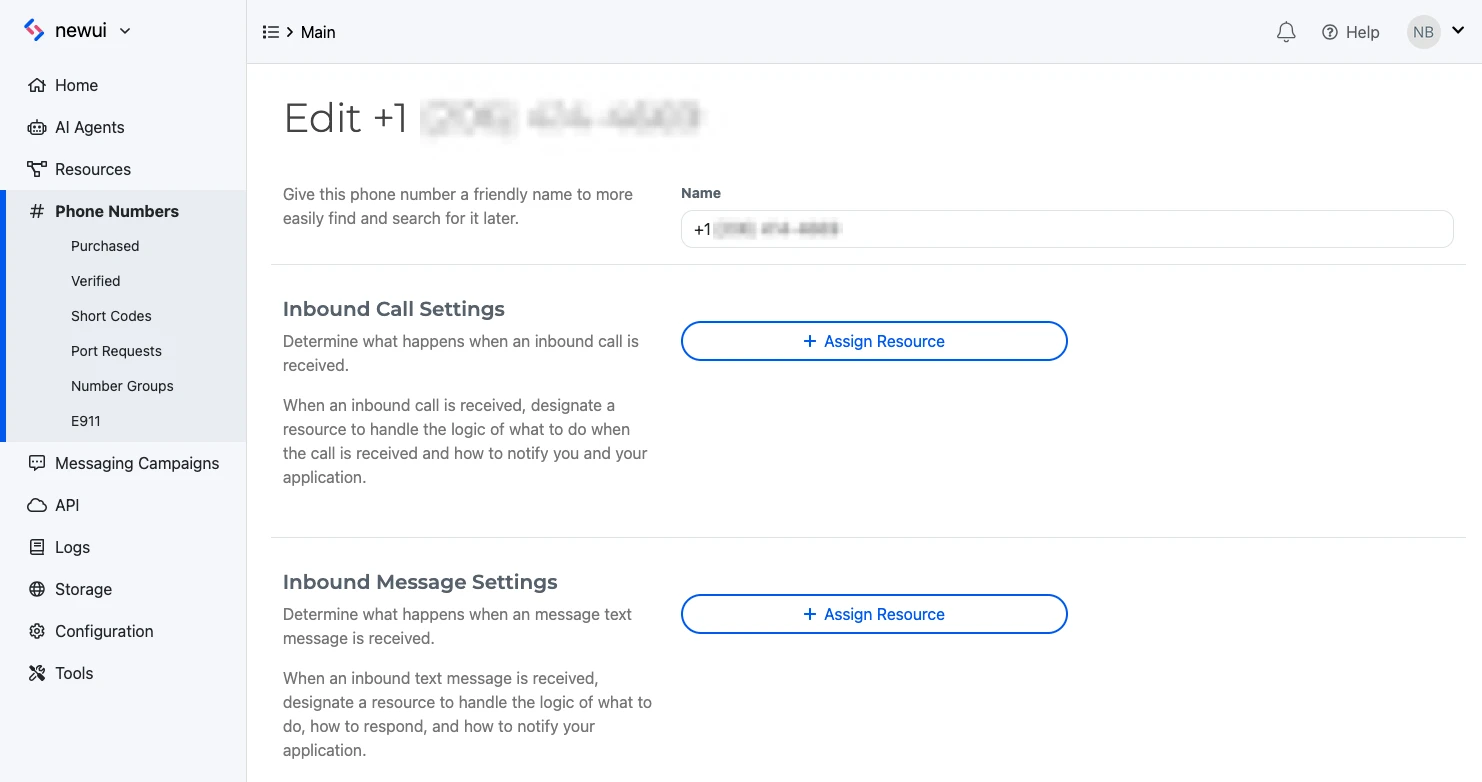
Select the newly created script, then click "Save" to apply the configuration.
### Test your setup
Send a test fax to your configured phone number and then open the respective call log found in the **Logs** section on your left sidebar.
Copy the link found in the **Document** parameter and paste it into your browser to view your fax.

If you prefer to host the fax handling logic yourself, configure a webhook endpoint that returns SWML. See our [SWML receive\_fax documentation](/docs/swml/reference/receive-fax) for more details.
You'll need to make your code accessible to SignalWire through a webhook. In development environments, use a tunneling service like ngrok to expose your local server.
## Sending your first fax
SWML can be used to send a fax through the `send_fax` method.
The below example script sends a fax, then posts the result to a predetermined webhook.
```yaml
version: 1.0.0
sections:
main:
- send_fax:
document: https://example.com/fax_to_send.pdf
- execute:
dest: 'https://example.com/handle_outgoing_fax_result'
```
You can also utilize SWML to send faxes via a POST request to the SignalWire REST API [Create a Call endpoint](/docs/apis/calling/calls/call-commands).
This can be done either by referencing a SWML script via webhook URL or by including the SWML inline in the request body.
```bash
curl -L -g 'https://{Your_Space_Name}.signalwire.com/api/calling/calls' \
-u '{YourProjectID}:{YourAPIToken}' \
-H 'Content-Type: application/json' \
-H 'Accept: application/json' \
--data-raw '{
"command": "dial",
"params": {
"from": "sip:from-sip@example-112233445566.sip.signalwire.com",
"to": "sip:from-sip@example-112233445567.sip.signalwire.com",
"url": "https://example.com/swml-for-faxing"
}
}'
```
```bash
curl -L -g 'https://{Your_Space_Name}.signalwire.com/api/calling/calls' \
-u '{YourProjectID}:{YourAPIToken}' \
-H 'Content-Type: application/json' \
-H 'Accept: application/json' \
--data-raw '{
"command": "dial",
"params": {
"from": "sip:from-sip@example-112233445566.sip.signalwire.com",
"to": "sip:from-sip@example-112233445567.sip.signalwire.com",
"swml": "{\"version\":\"1.0.0\",\"sections\":{\"main\":[{\"send_fax\":{\"document\":\"https://example.com/fax_to_send.pdf\"}},{\"execute\":{\"dest\":\"https://example.com/handle_outgoing_fax_result\"}}]}}"
}
}'
```
## Next steps
Troubleshoot and understand common fax transmission errors