***
id: 723188d4-fab9-4890-b6ff-f1719cb89c61
title: Build a chat application with the Browser SDK
slug: /js/guides/chat/build-a-react-application
x-custom:
ported\_from\_readme: true
tags:
* 'product:chat'
* 'sdk:relaybrowser'
* 'language:javascript'
* 'language:nodejs'
max-toc-depth: 3
***
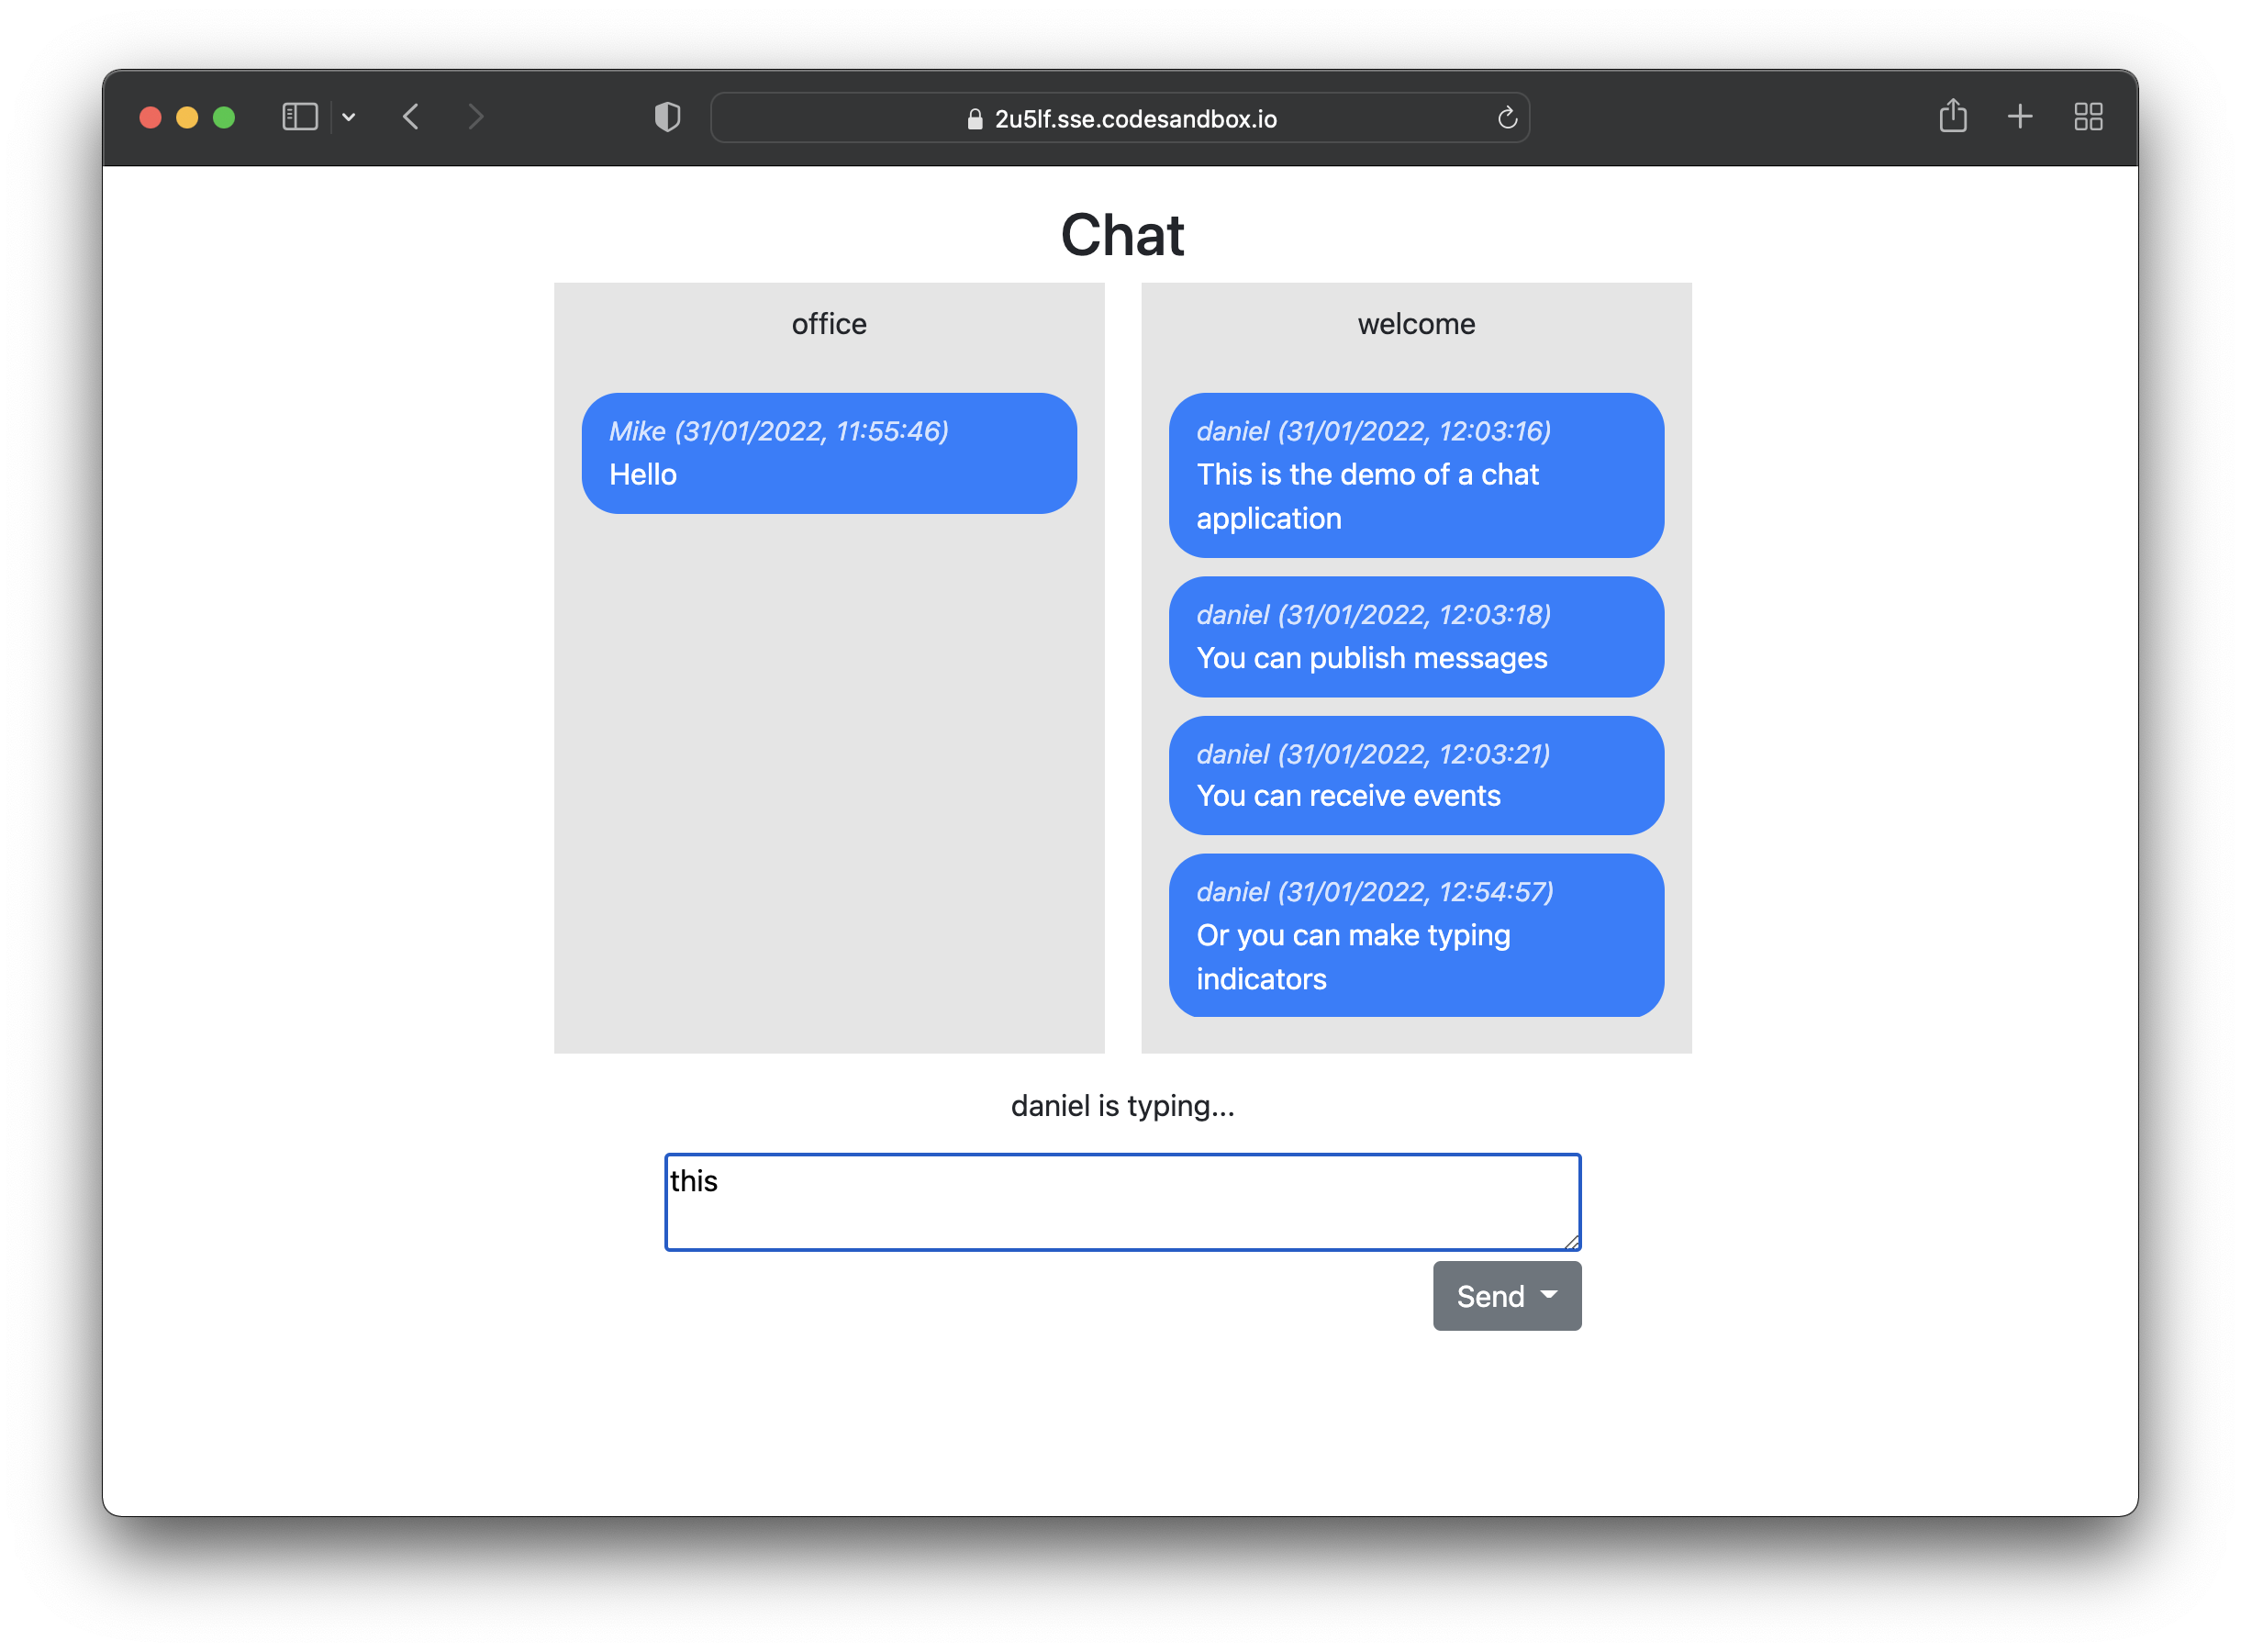
In this guide we will explore a simple chat application built using the SignalWire SDK.
## The Frontend
Using the Browser SDK you can easily integrate chat features into any web application. It only takes a few minutes to set up a basic example.
### Connection
To build your own chat application, you first need to include the SDK in your HTML.
```html
```
Then you can interact with the SDK using the global variable `SignalWire`. We'll mainly be interested in the `SignalWire.Chat.Client` class for this guide, but if you'd like to explore this API, feel free to browse the [SDK documentation](/docs/browser-sdk/v3/js/guides).
To get started, we need to instantiate a `Client` object and then subscribe to the channels that we want to be part of.
```javascript
const chatClient = new SignalWire.Chat.Client({
token: token
})
try {
await chatClient.subscribe(channels) // channels is an array such as ['office', 'test']
} catch (error) {
console.error('Error', error)
}
```
The `Client` constructor takes a `token` parameter. This is an authentication token that defines (among other things) the channels which the client is allowed to read and write. When you call `chatClient.subscribe`, you must make sure that the channels you're subscribing to are allowed by the token.
### How to obtain a token?
Tokens are provided to the client by your own custom server. Your server determines whether the user is actually authorized to access the chat and, if they are, asks SignalWire to emit a token.
The token is supplied to us by the [Backend](#the-backend) section of this guide, which we will explore shortly. For now, replace `` with the localhost address and port of your server. If you're using the code sample below,
replace `` with `http://localhost:8080`.
```javascript
const reply = await axios.post("http:///get_chat_token", {
member_id: memberId,
channels: channels
});
const token = reply.data.token;
```
Notice how we specify a member\_id (which can be any unique string of your choice) and a list of channels that should be allowed in the token. This interface is not specific to the SignalWire SDK: when you will write your own server, you will be free to specify any parameters you need for the `/get_chat_token` endpoint.
## The Backend
The backend is the proxy which should handle all your authentication logic. The backend is responsible to ensure the user requesting the token is authorized to access the chat and, if they are, ask SignalWire to emit a token.
The token from SignalWire is then sent to the frontend to be used to initialize the chat client.
Consider the Express.js example below:
```javascript
require("dotenv").config();
const auth = {
username: process.env.PROJECT_ID, // Project-ID
password: process.env.API_TOKEN, // API token
};
const apiurl = `https://${process.env.SPACE_URL}`;
const axios = require("axios")
const express = require("express");
const bodyParser = require("body-parser");
const cors = require("cors");
const app = express()
const port = 8080
app.use(bodyParser.json());
app.use(cors());
app.use(express.static('frontend'))
app.post("/get_chat_token", async (req, res) => {
const { member_id, channels } = req.body;
const channelsPerms = {}
for (const c of channels) {
channelsPerms[c] = { read: true, write: true }
}
const reply = await axios.post(
apiurl + "/api/chat/tokens",
{
ttl: 50,
channels: channelsPerms,
member_id,
state: {},
},
{ auth }
)
res.json({
token: reply.data.token
})
});
app.listen(port, () => {
console.log(`Example app listening on port ${port}`)
})
```
The backend technology and stack is not relevant. The important part is that the SignalWire Chat REST API is called to [Generate a new Chat Token](/docs/apis/chat/tokens/create-chat-token) with the appropriate parameters.
This is all you need to get the chat up and running.
## Downloading the existing messages
After you join a channel, you will likely want to download a list of messages that were sent into that channel. SignalWire stores the messages for you so that you can use the `getMessages` method of the SDK to get the JSON list.
```js
/**
* Download a list of existing messages from the server.
* @param {string} channel
*/
async function downloadExistingMessages(channel) {
const messages = await chatClient.getMessages({
channel: channel
});
if (!messages?.messages) return;
for (const msg of messages.messages.reverse()) {
displayMessage(msg, channel);
}
}
// Download the already existing messages
for (const channel of channels) {
downloadExistingMessages(channel);
}
```
For each of the channels we're subscribing to, we call `chatClient.getMessages`. For each message, we then call `displayMessage` to display it in the UI.
## Receiving incoming messages
If you want to receive incoming messages for the channels you've subscribed to, you just have to listen to the `message` event. For example:
```js
/**
* Subscribe to the "message" event.
* This is triggered each time a new message is sent in one of
* the channels we're subscribed to.
*/
chatClient.on("message", (message) => {
displayMessage(message, message.channel);
});
```
This will call `displayMessage` each time a new message is received.
## Sending a message
Sending a message is just a method call. This will send your message into the specified channel:
```js
await chatClient.publish({
channel: channel,
content: message
});
```
Note that your message doesn't necessarily have to be a string! It can be any JSON-serializable object.
## Displaying "is typing" indicator
To display a "member is typing" indicator we can exploit the member state management of the SDK. Each member has an associated state, which can be controlled from the SDK. We can use this state to store a boolean which indicates whether a member is currently typing. The state is shared across all members, so they can update their UI to show the indicator.
To set the typing state, you will need to subscribe to the `keyup` event for the textarea in which users type their messages. At the end, here is how the state is updated:
```js
chatClient.setMemberState({
channels: channels, // list of channels
state: {
typing: true
}
});
```
You can specify any JSON-serializable object as your state. The other members can subscribe to the `member.updated` event to get the state updates. For example:
```js
// Set of ids of the members who are typing
const typingMemberIds = new Set();
chatClient.on("member.updated", (member) => {
if (member.state?.typing) {
typingMemberIds.add(member.id);
} else {
typingMemberIds.delete(member.id);
}
});
```
Here, we check the value of `member.state.typing`. If it's true, we add the member to the set of members who are currently typing. Otherwise, we remove it.
## Wrap up
We have built a basic chat application. With just a few lines of code, our application can send and receive messages, subscribe to multiple channels at the same time, access the message history, and display typing indicators.
Here are a few resources to learn more about the chat:
* [Technical Reference](/docs/platform/chat)
## Sign Up Here
If you would like to test this example using your private credentials, you can create a SignalWire account and Space [here](https://signalwire.com/signups/new?s=1).
Please feel free to reach out to us on our [Community Discord](https://discord.com/invite/F2WNYTNjuF) or create a Support ticket if you need guidance!